

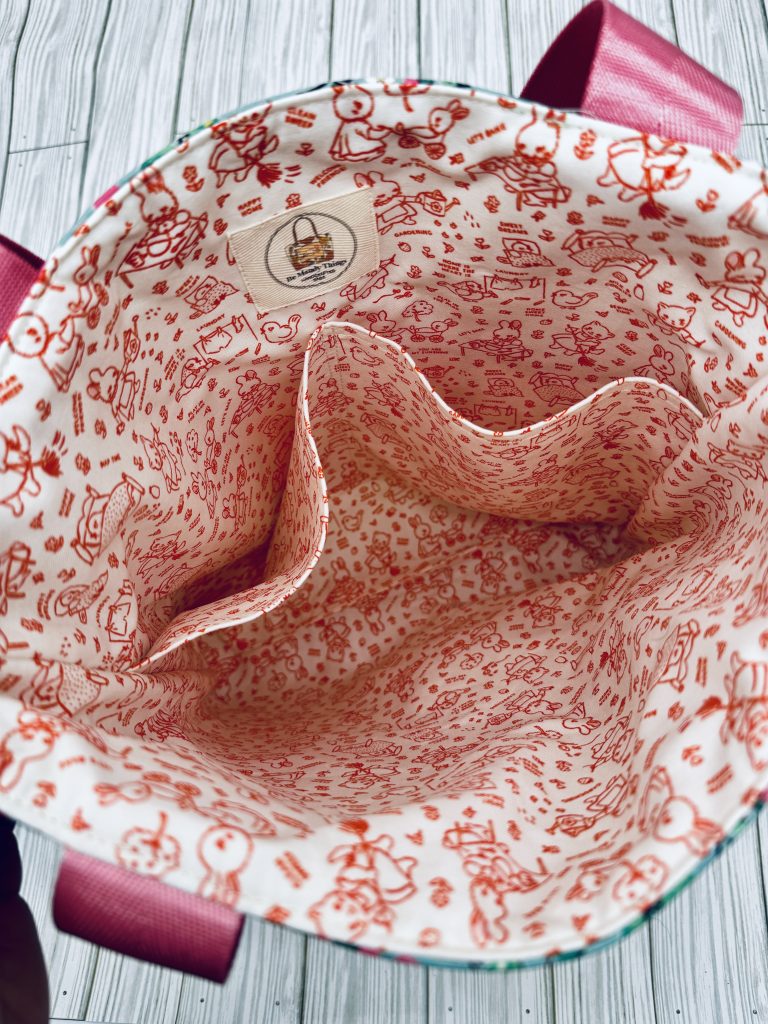
If you’ve ever wished your bag had just a bit more organization, you’re in the right place. Today, I’m sharing a quick and easy way to add a slip pocket to any bag lining, taking your handmade tote to the next level. Whether you're sewing for yourself or creating a gift, this little addition is sure to make your bag more functional and fabulous!
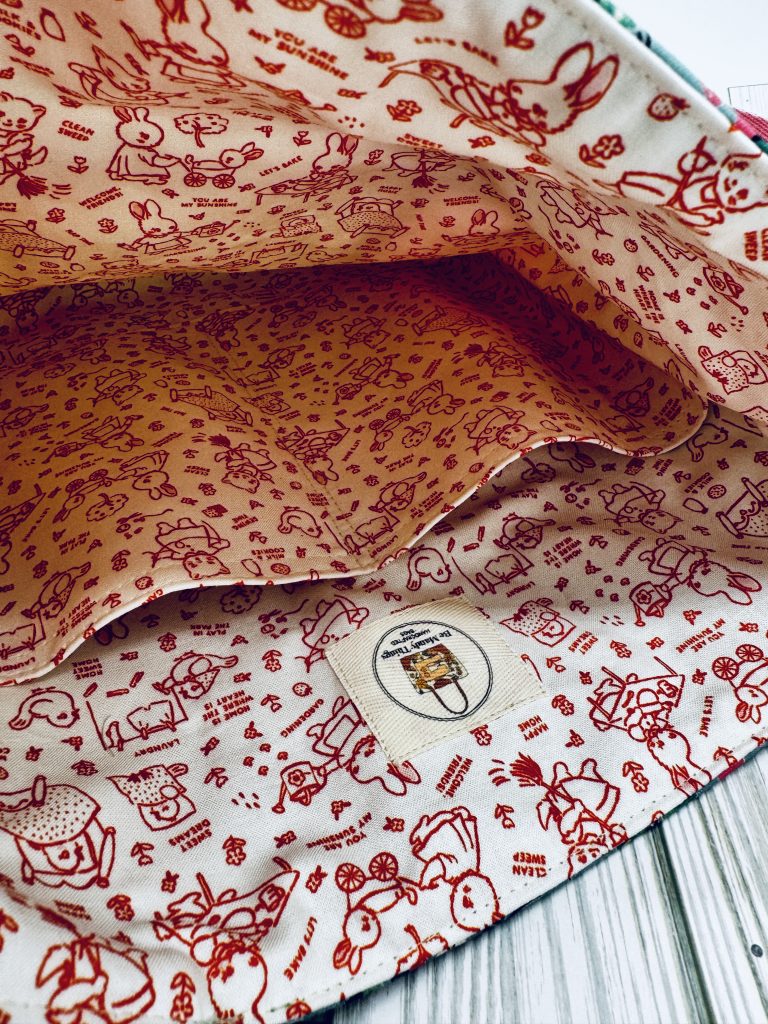
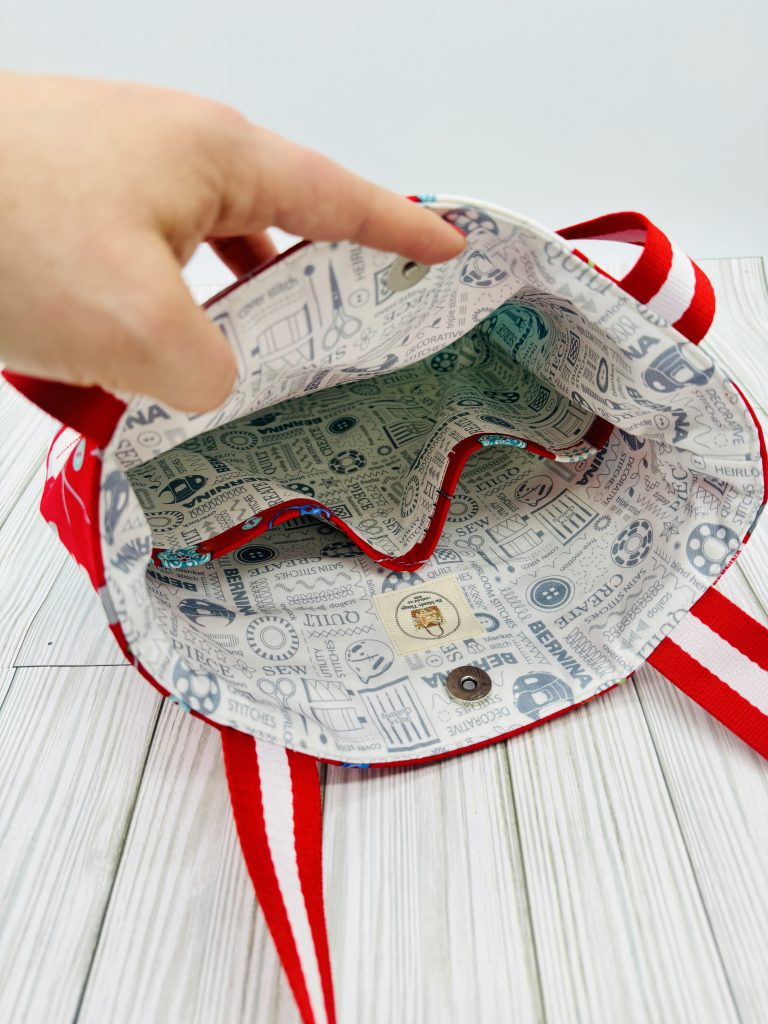
A slip pocket not only makes your bag more organized but also adds a professional touch. It’s perfect for stashing your phone, keys, or even a notebook. Best of all, you can make the pocket any size you need, allowing for endless customization.
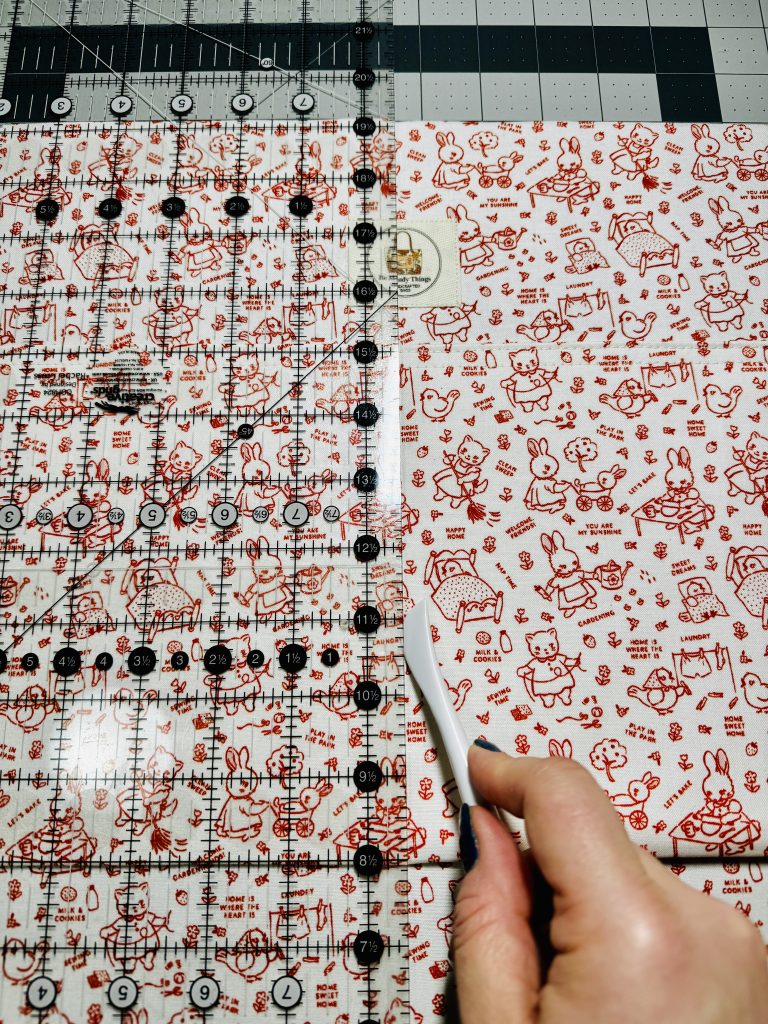
Decide how large you want your pocket to be. A good rule of thumb is to make the pocket slightly smaller than the width of the bag’s lining panel.
For example:
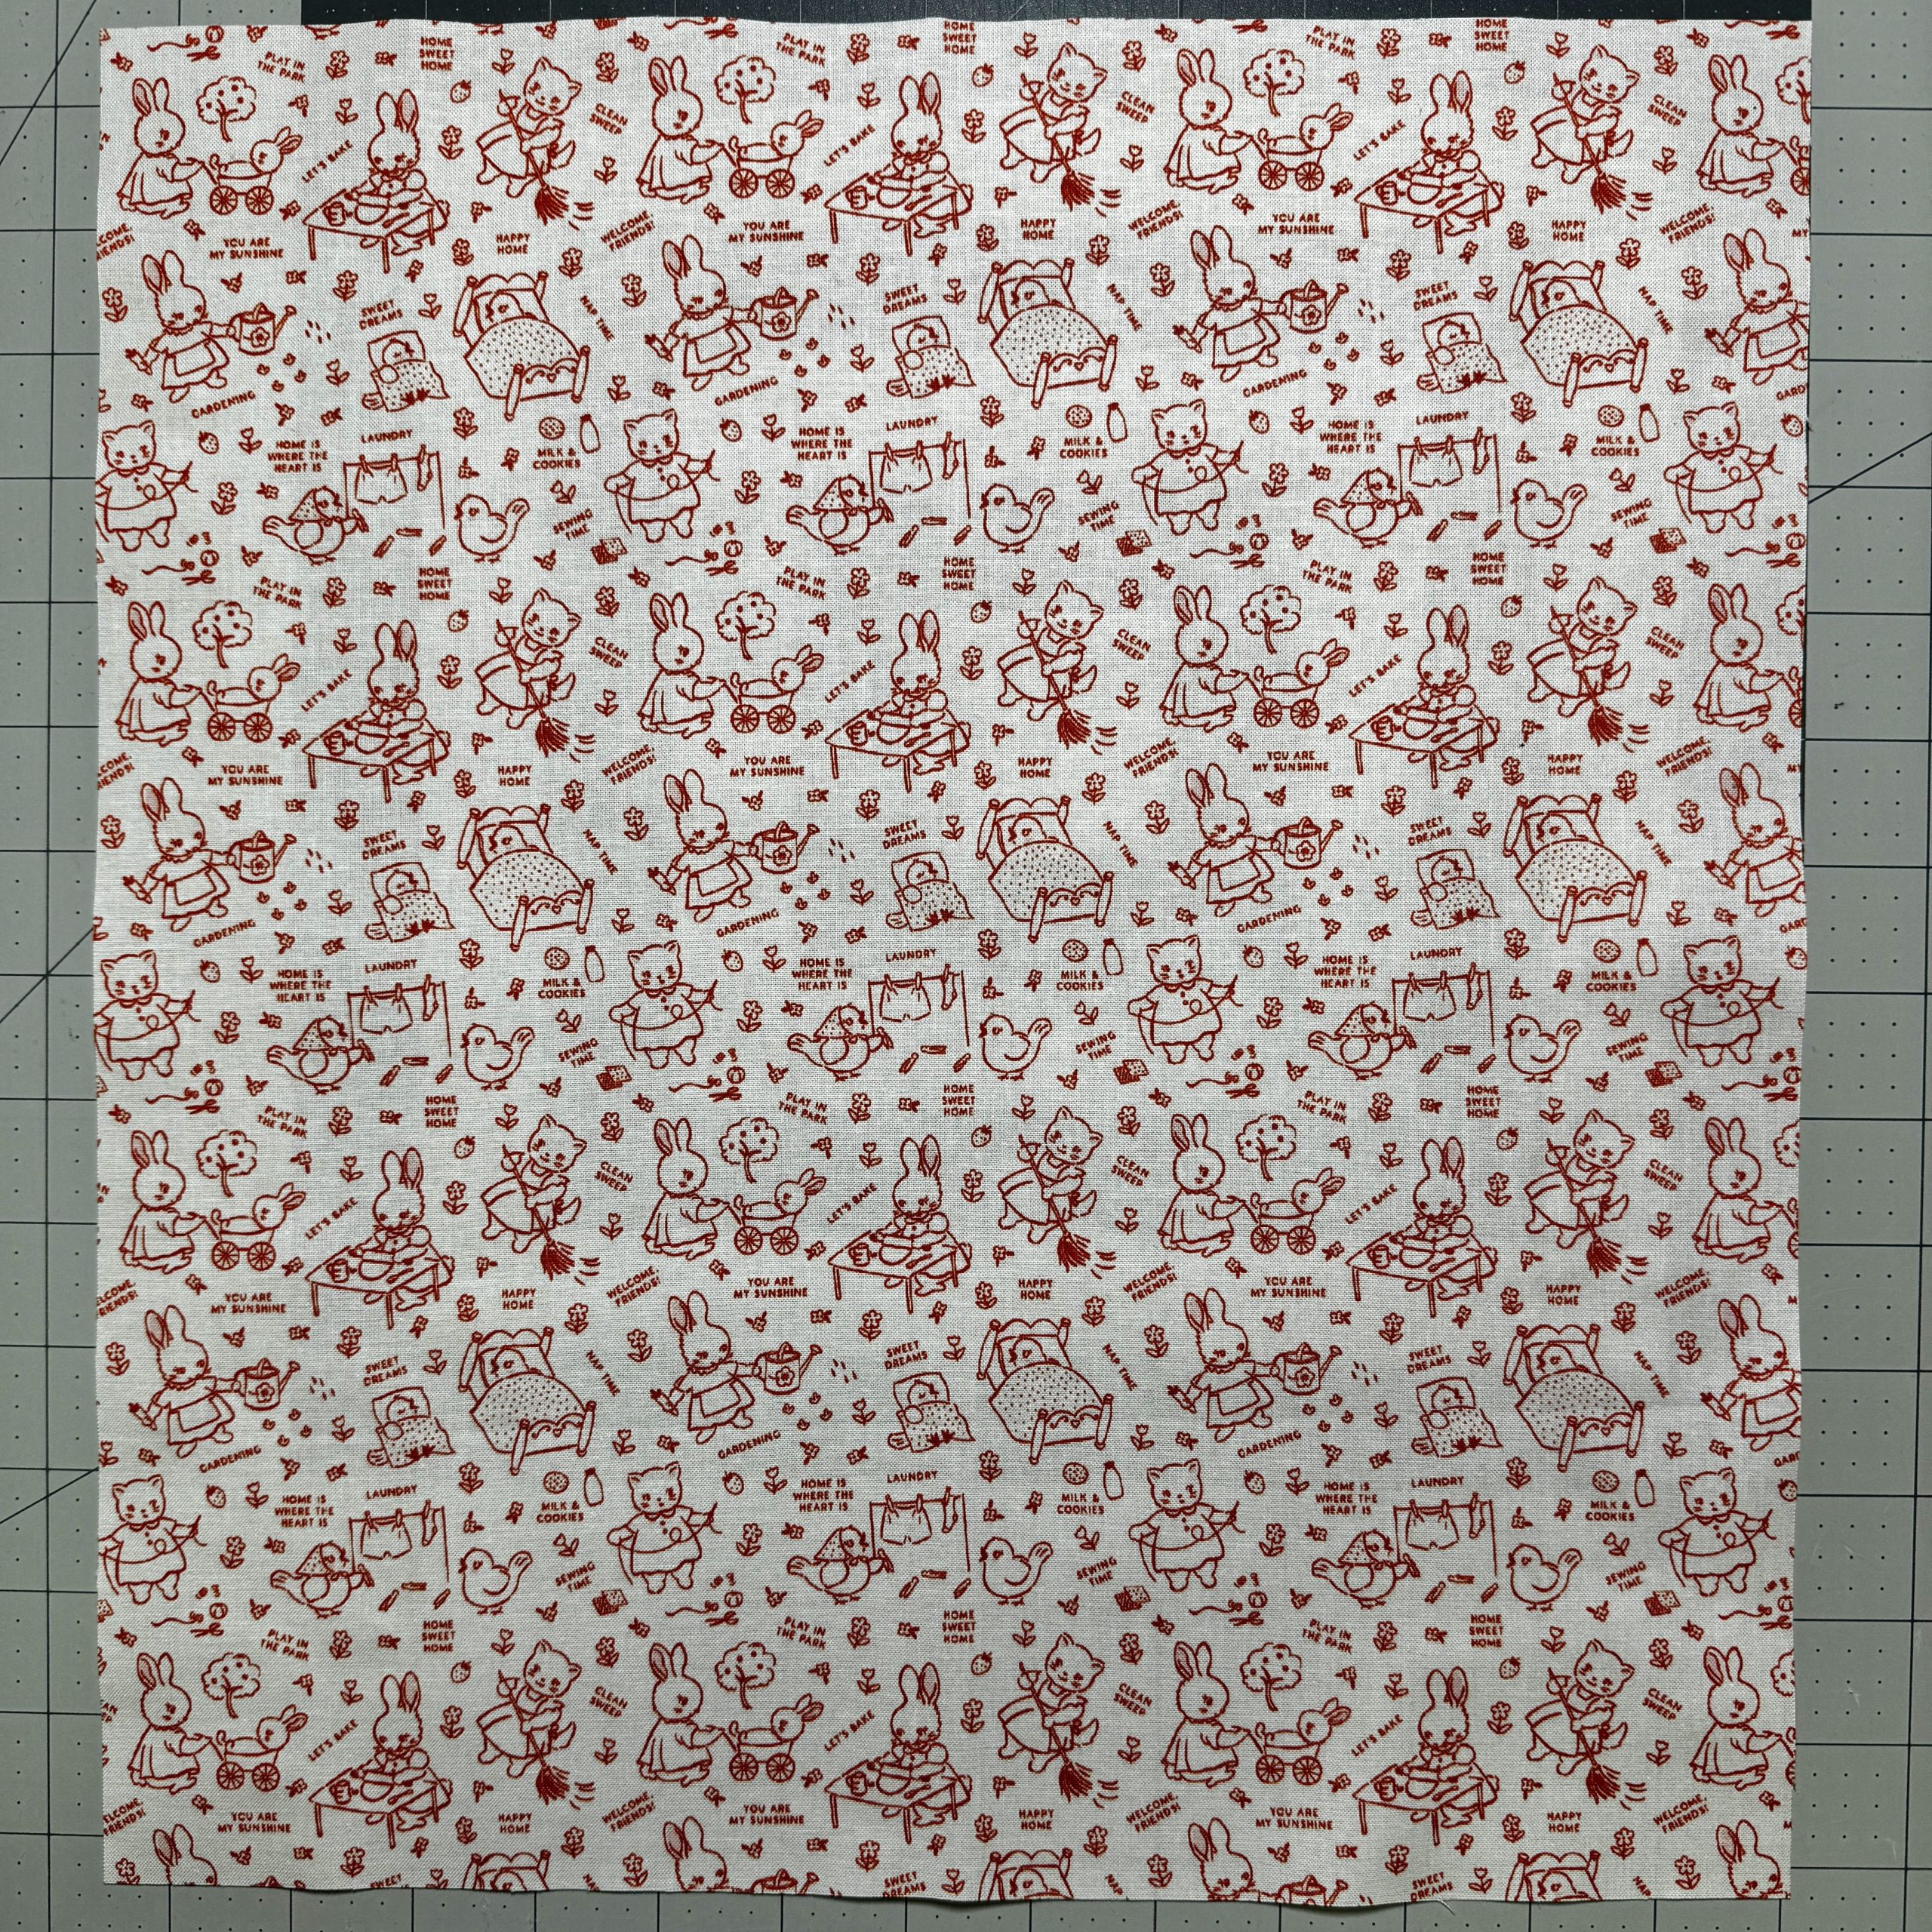
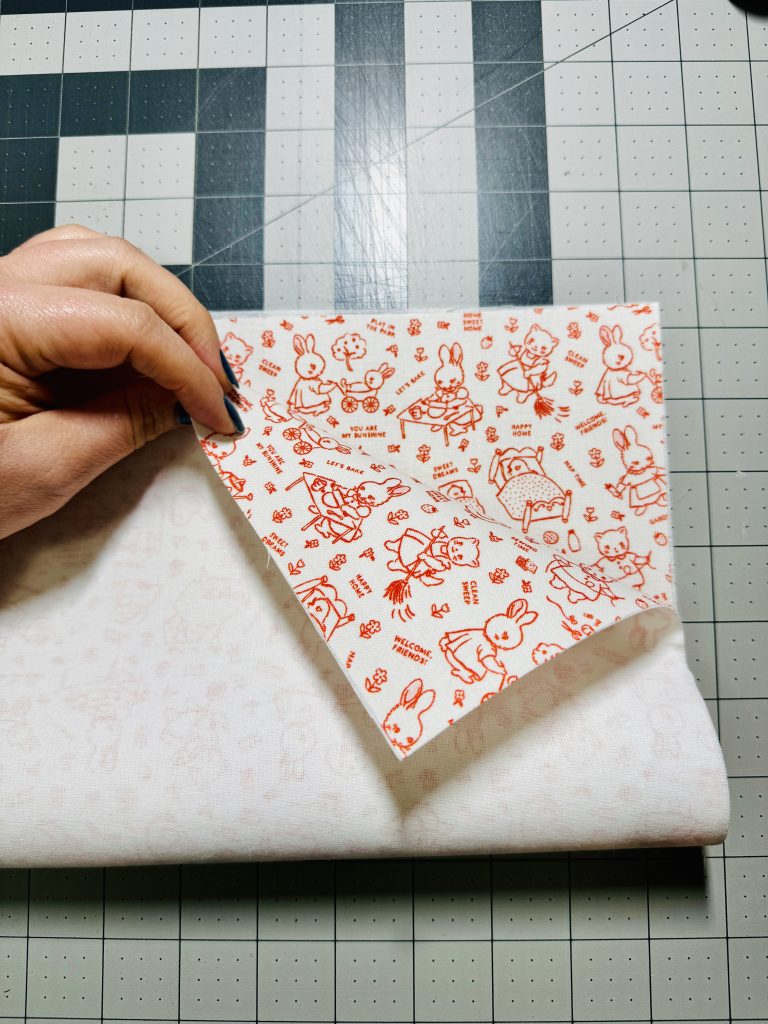
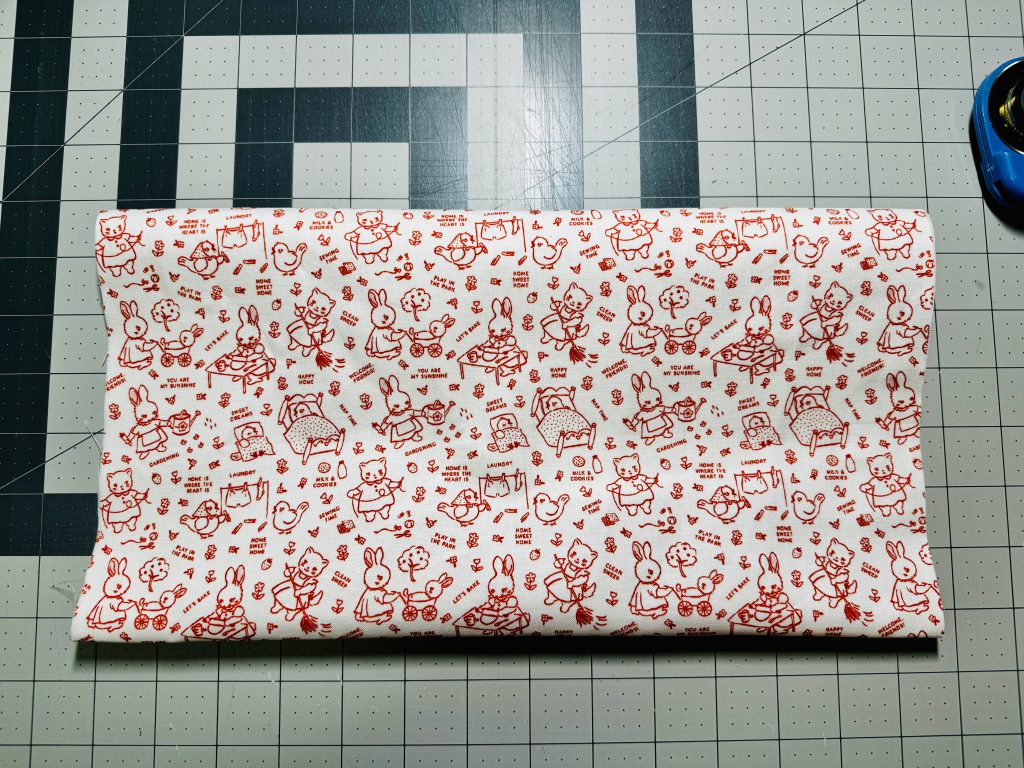
Cut your fabric piece twice the desired height of the pocket plus ½” for seam allowances. For example, for a 6” x 8” pocket, cut a piece 12½” x 9”. For this post, I'm adding slip pockets to my EASY CHARM TOTE, and I want my pocket to measure around 7h" X 14 1/2"w. So I cut my cotton fabric and SF 101 to measure 14½”w X 15"h.
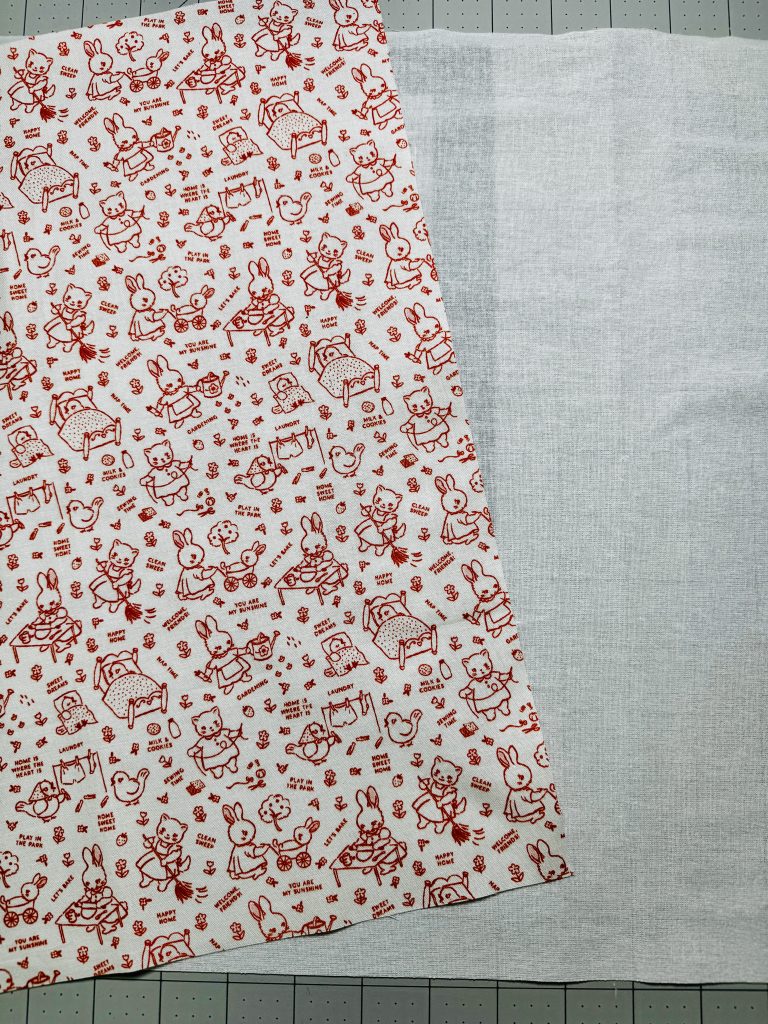
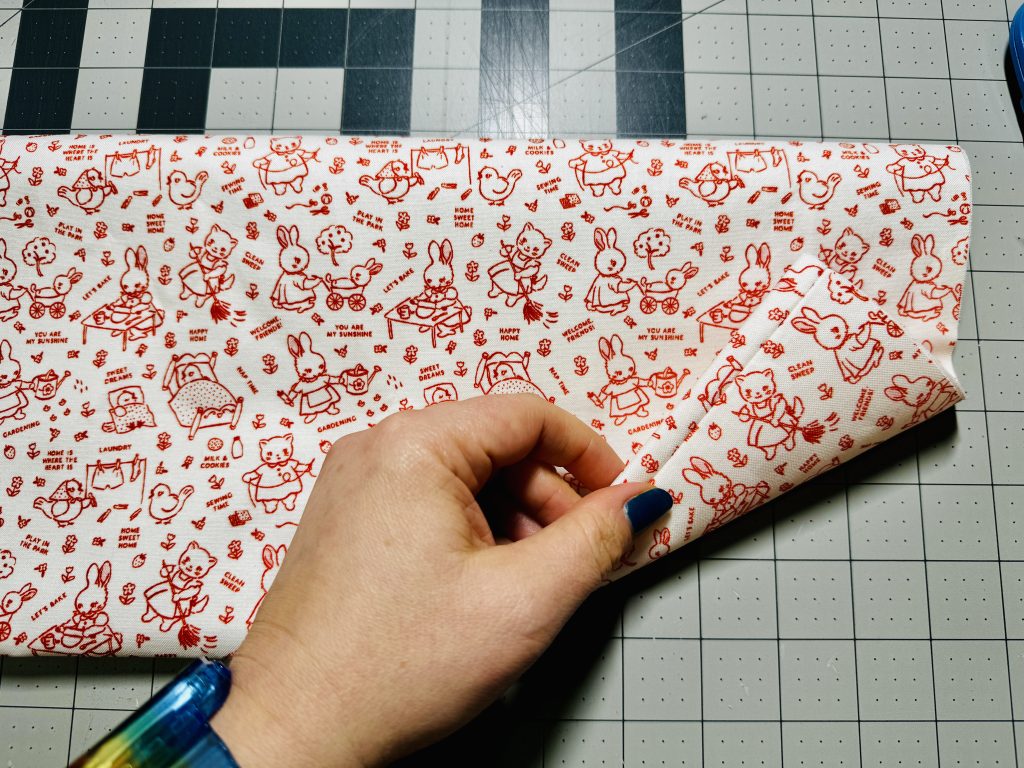
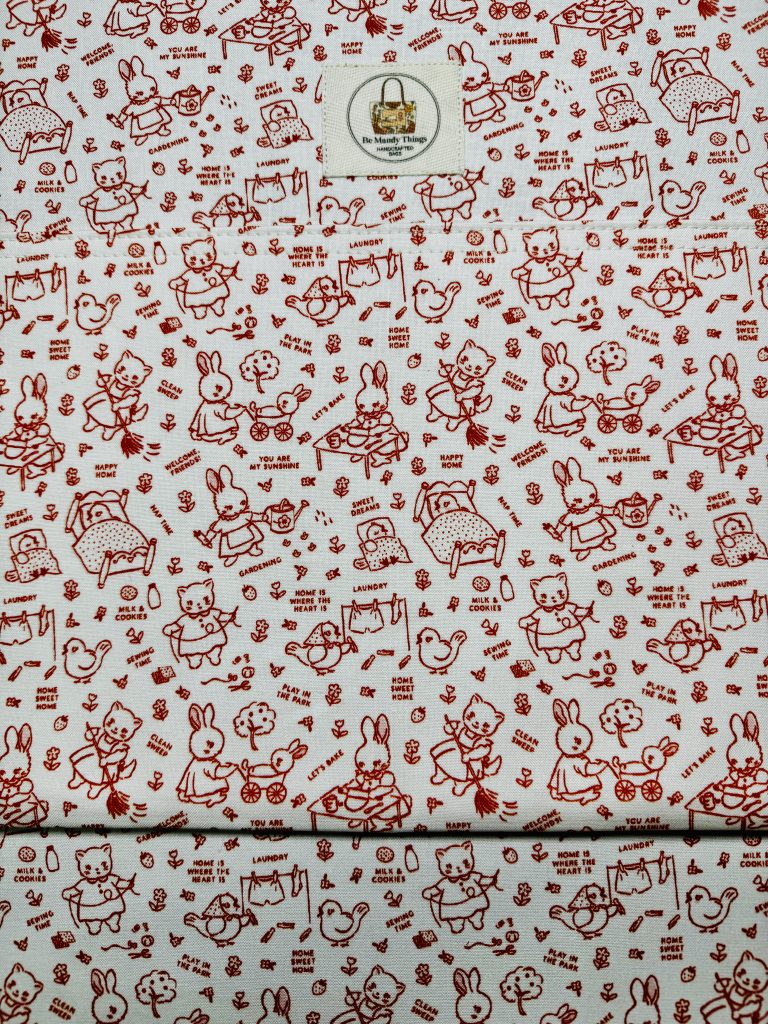
If you want your pocket to have structure, fuse the SF 101 or other lightweight interfacing to the wrong side of your fabric before sewing.
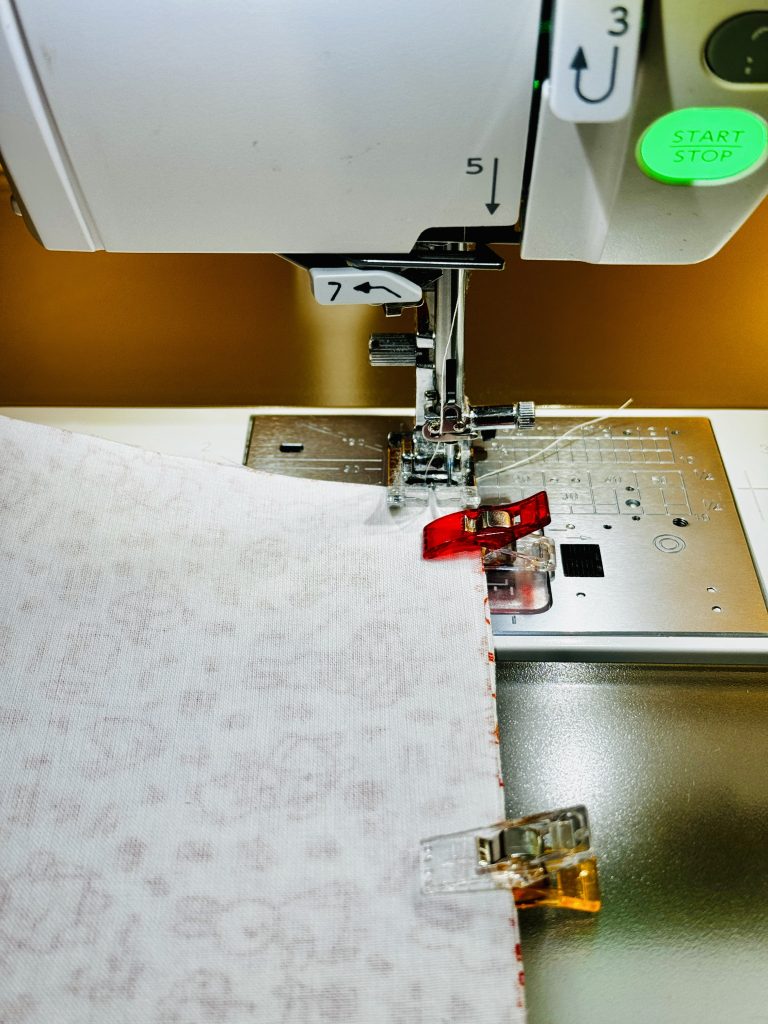
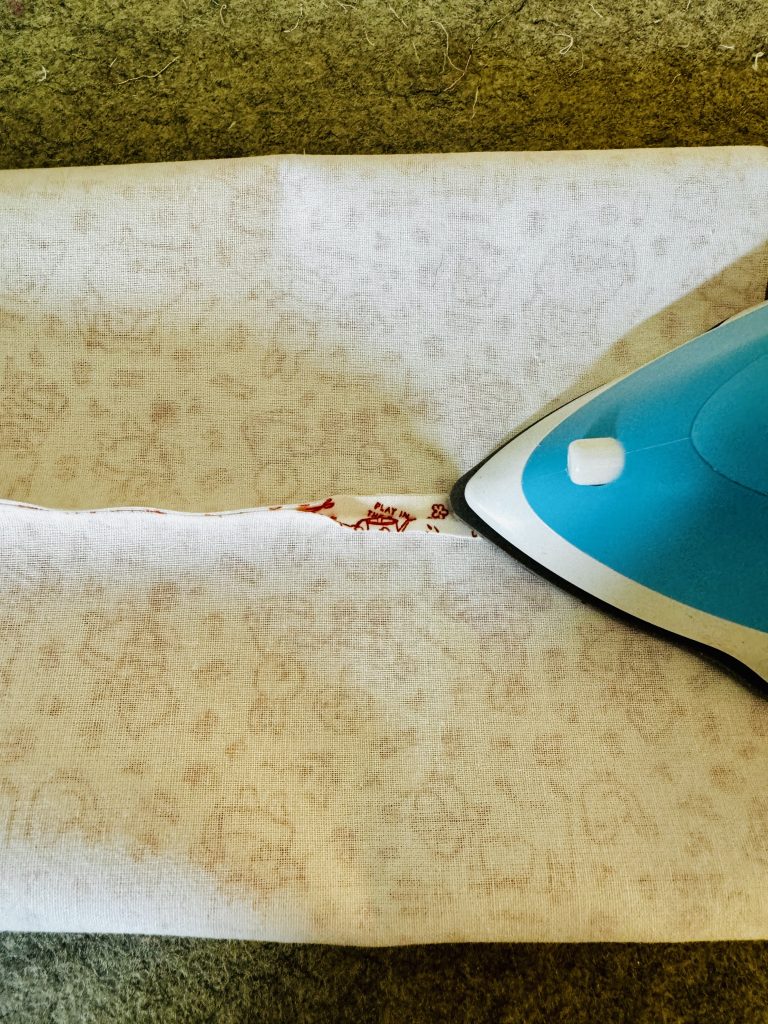
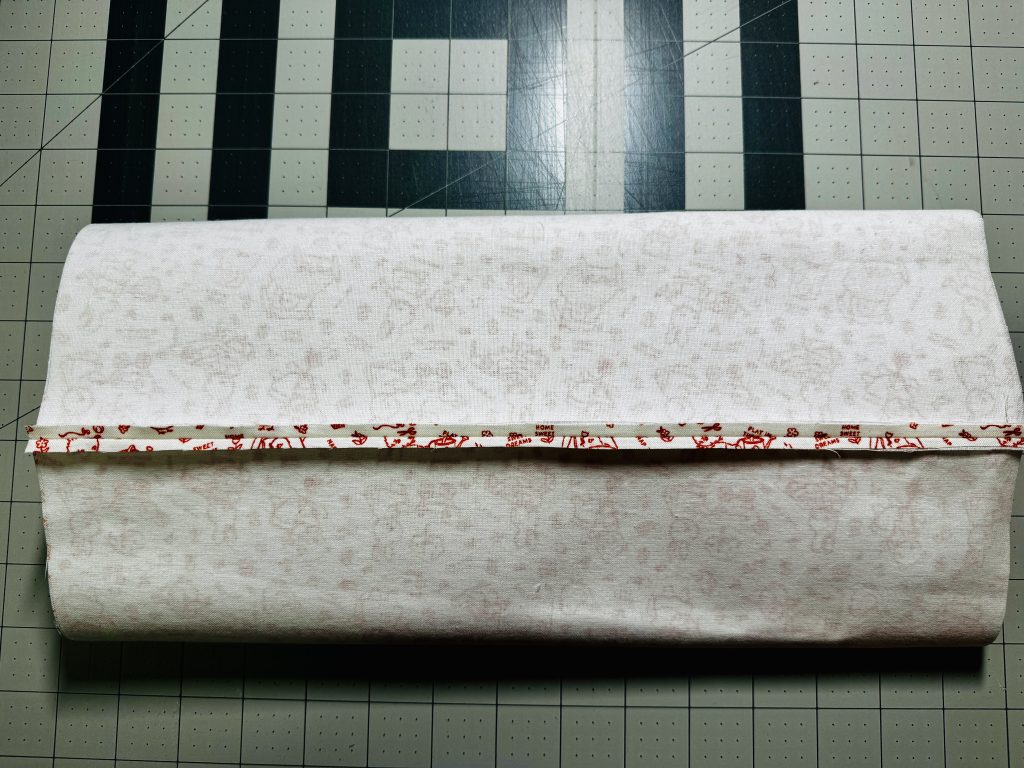
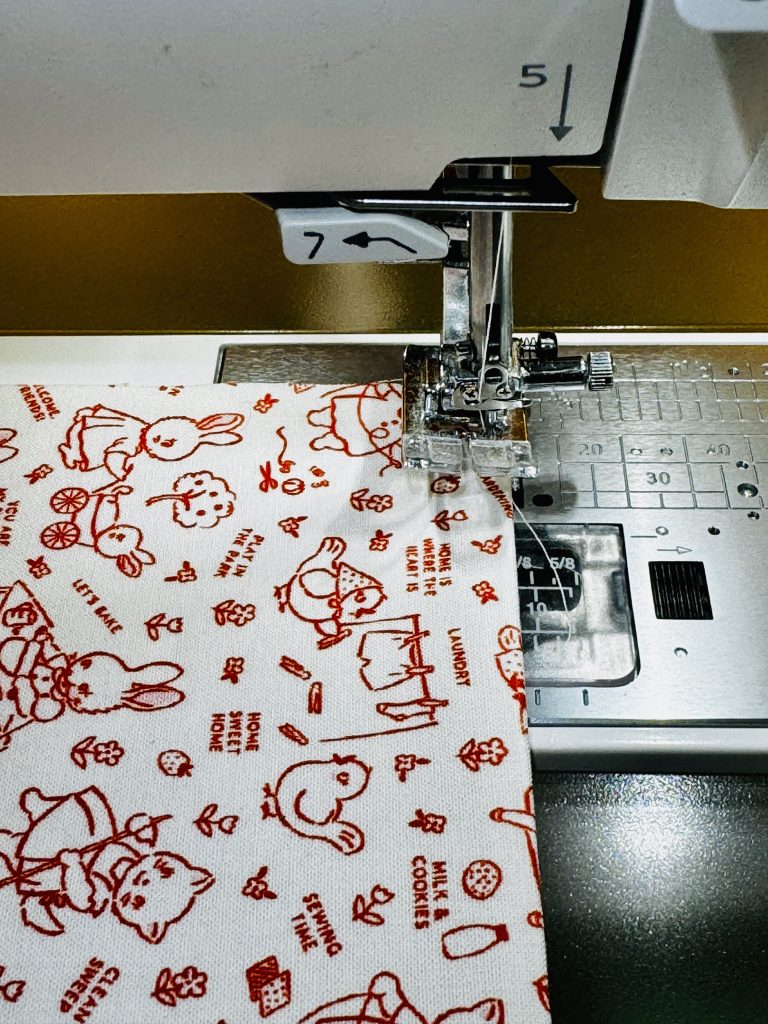
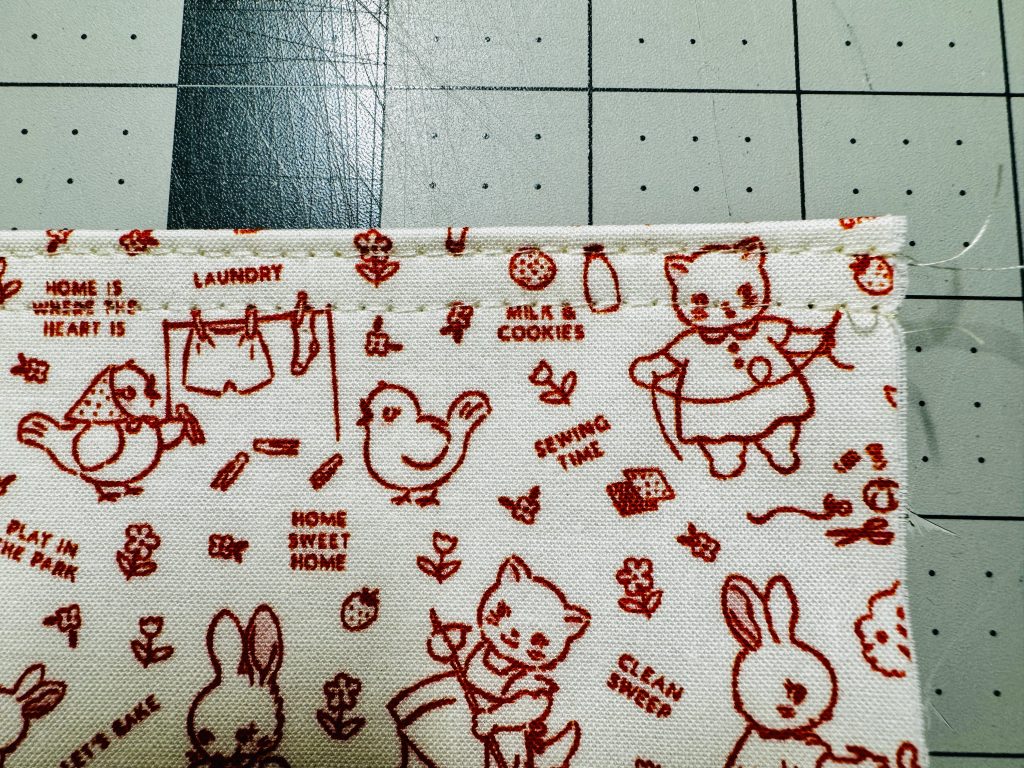
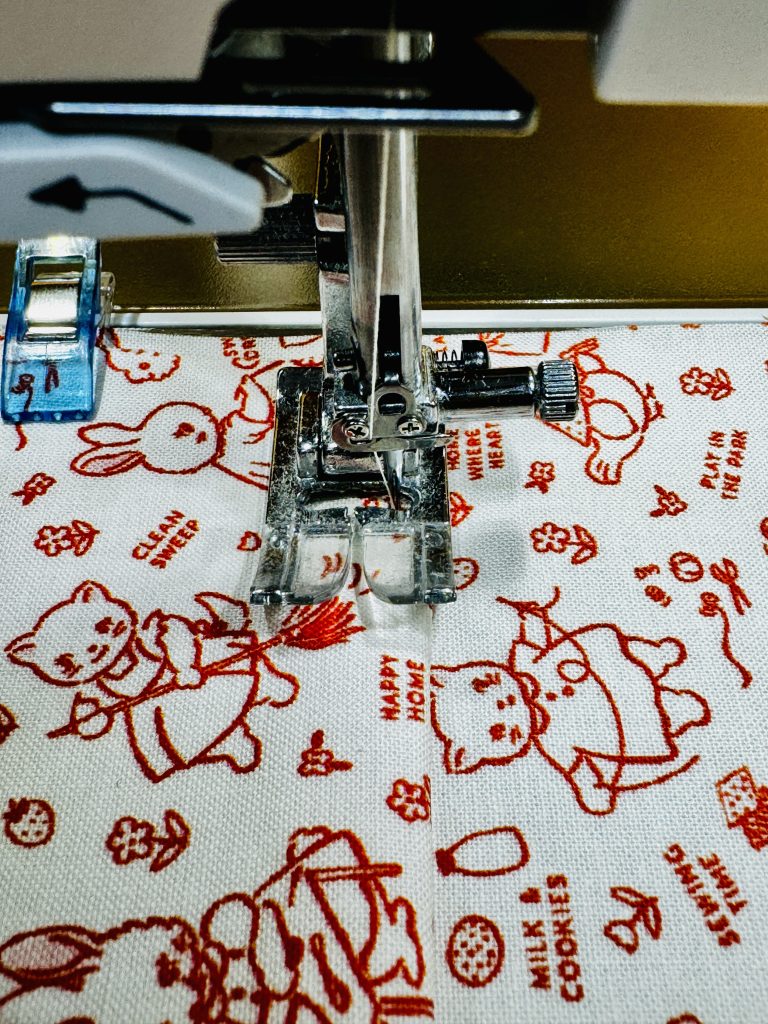
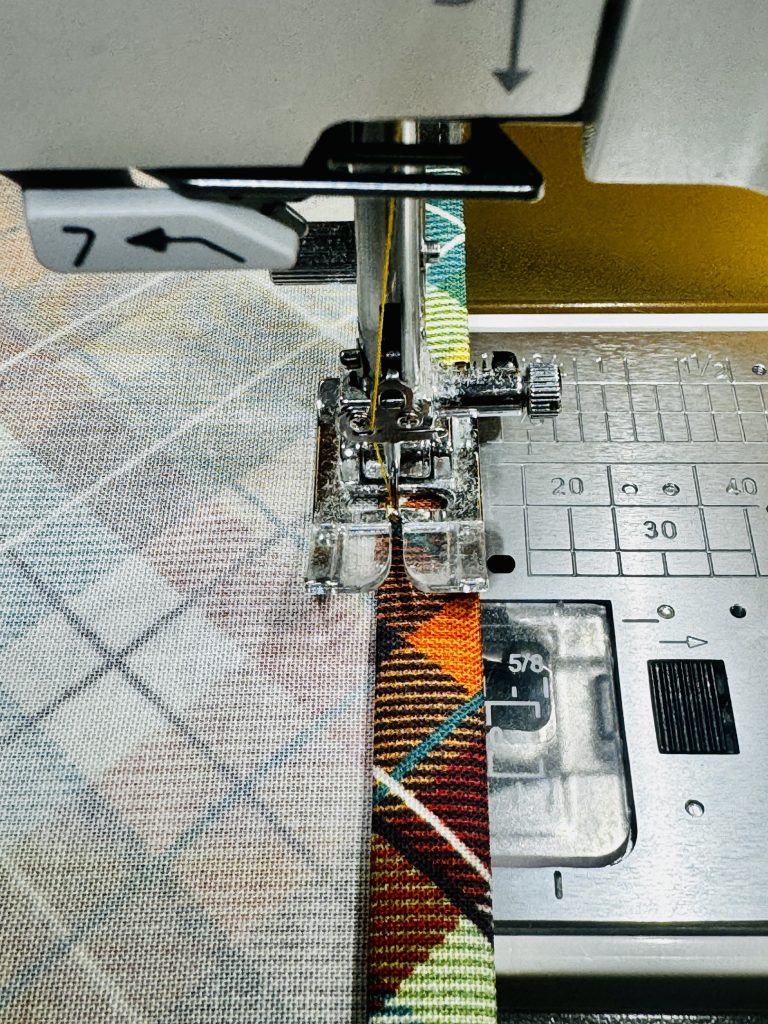
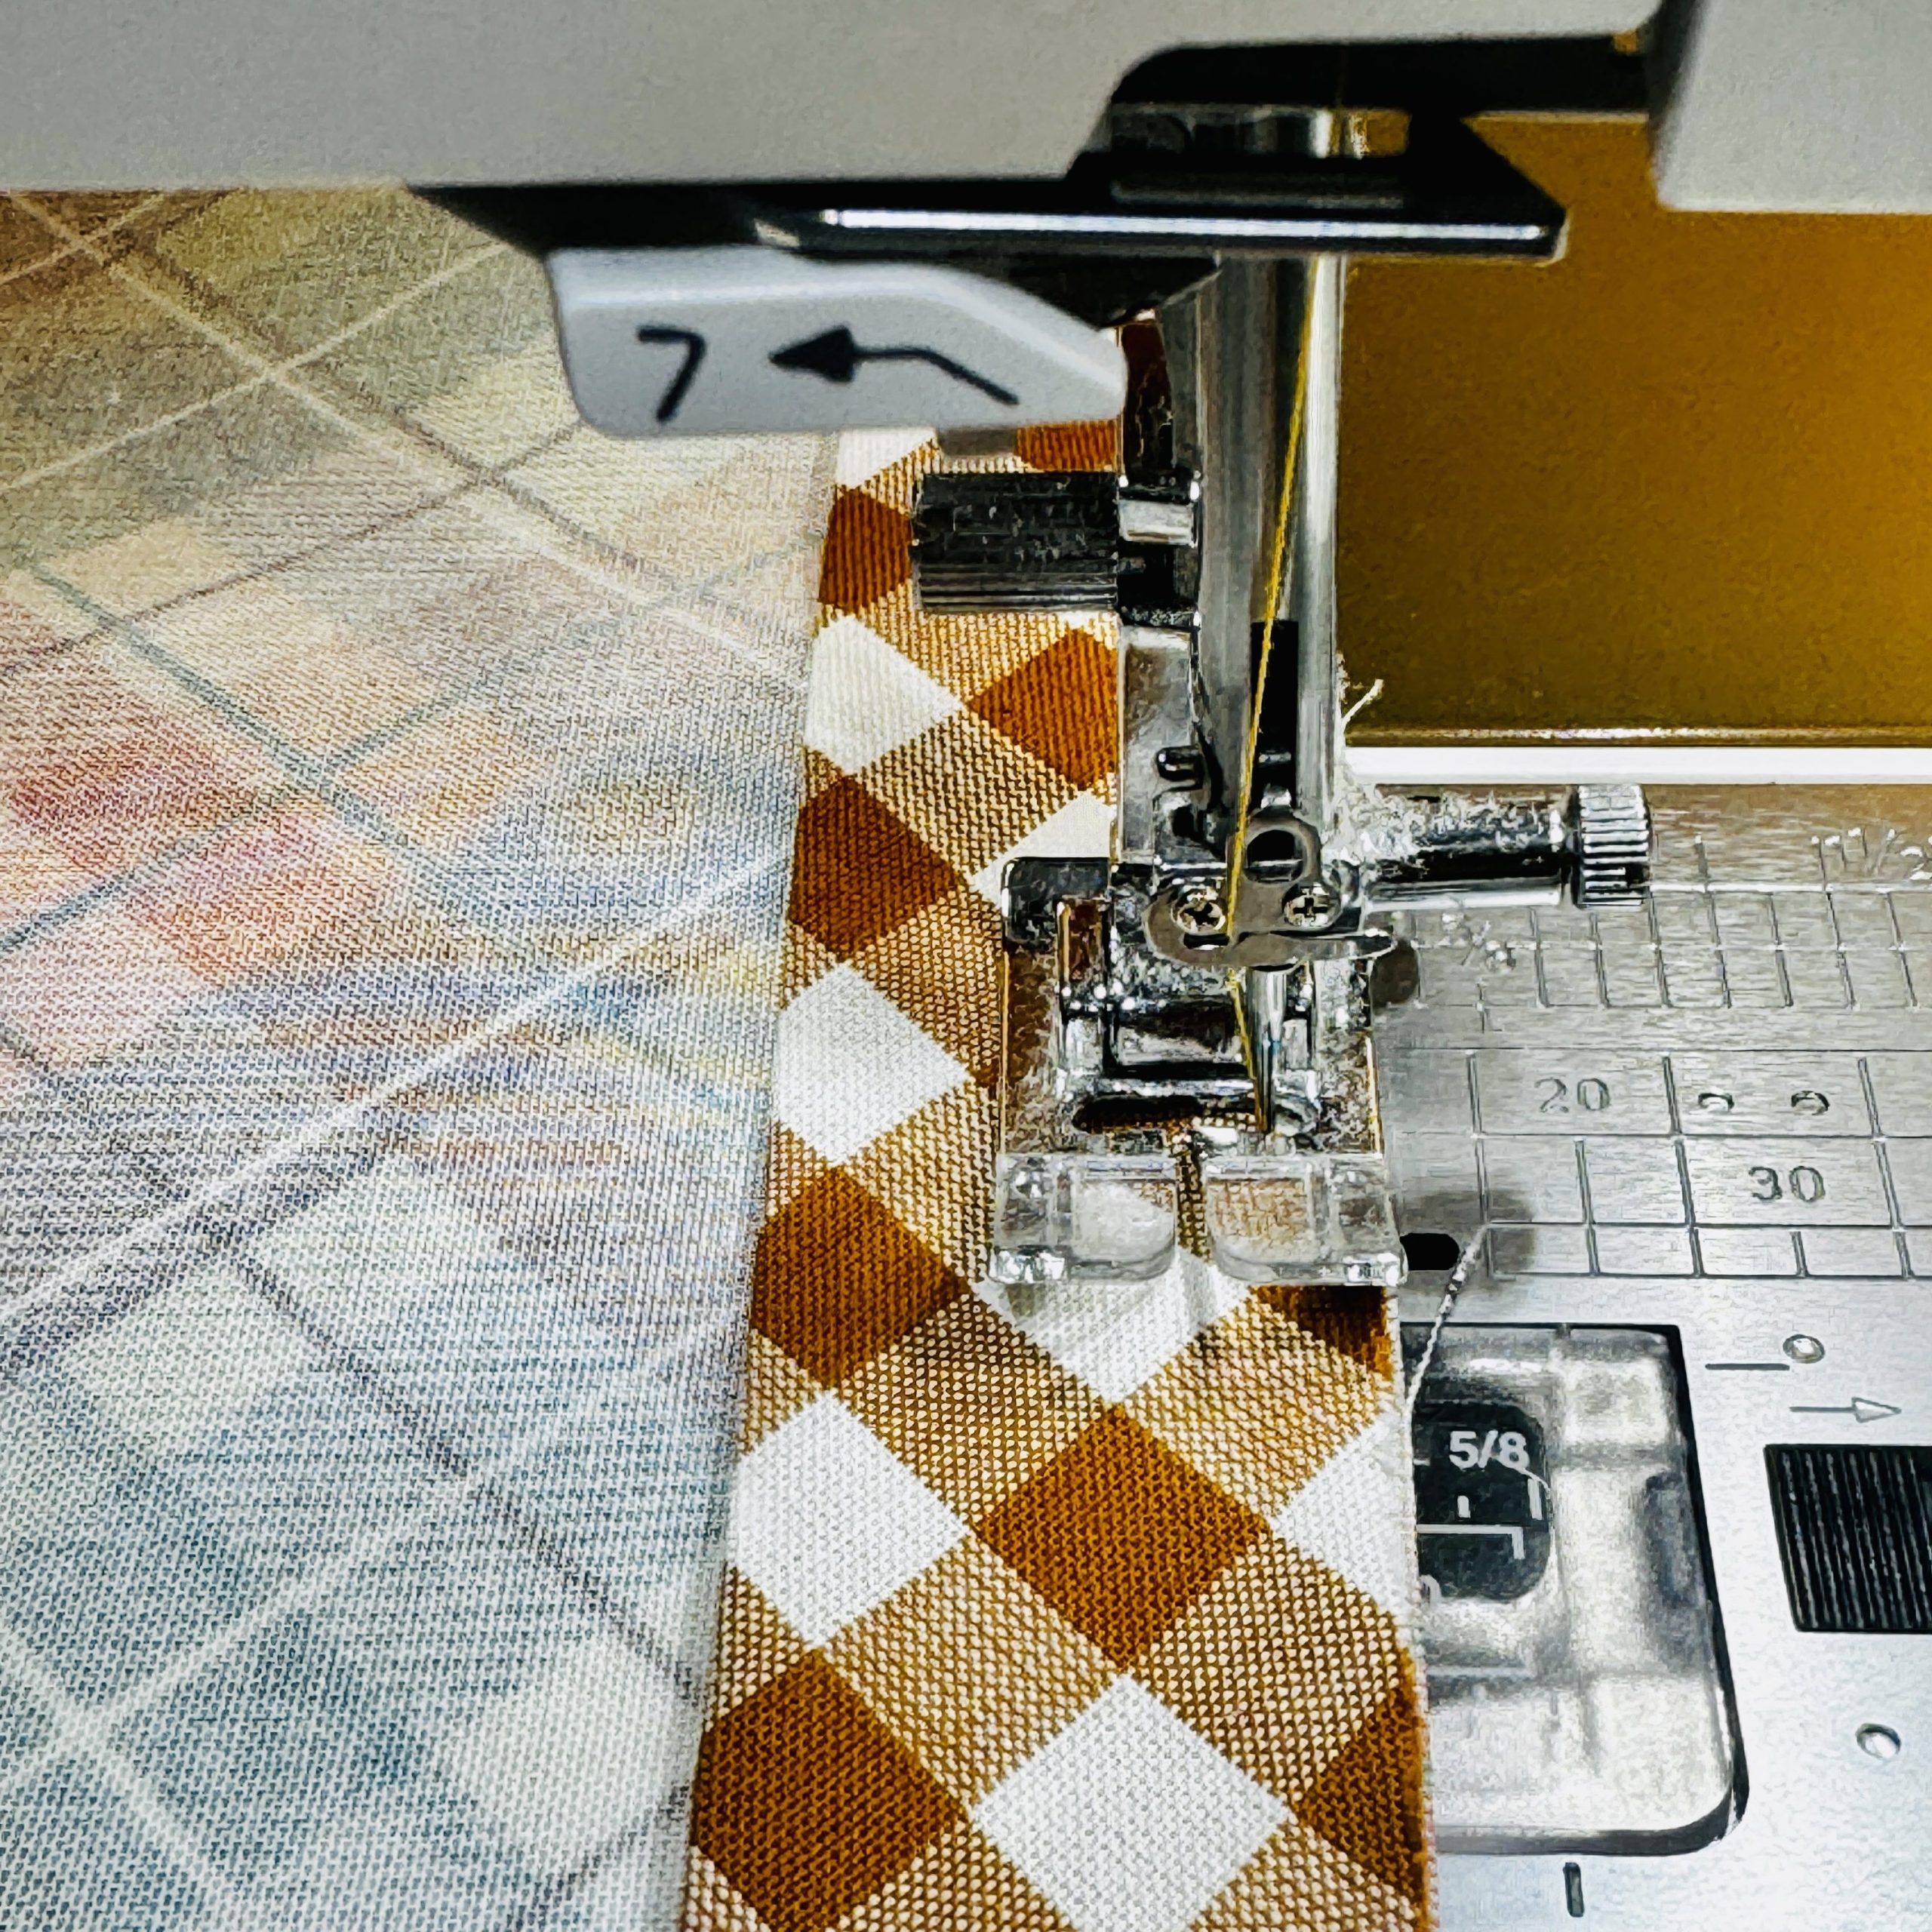
Topstitch along the folded edge of the pocket for a clean finish. One row of topstitching an 1/8" away from the finished edge keeps it from rolling - use a longer stitch length. I added one row 1/8" away from finished edge, then added another row 1/4" away from my original topstitch.

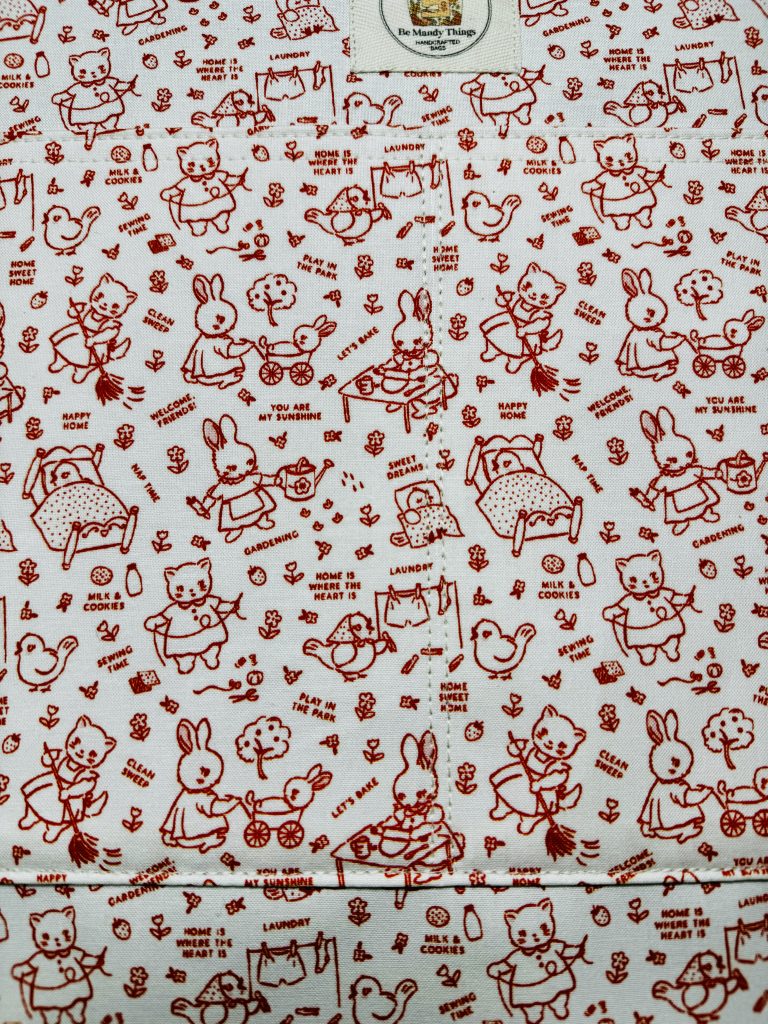

Adding a slip pocket is a small detail that makes a big difference. It’s quick, easy, and elevates the overall look and functionality of your handmade bag. Plus, the personalization possibilities are endless!
Try adding a slip pocket to your next project, and let me know how it turns out. I’d love to see your creations—tag me on social media @BeMandyThings!
Happy sewing! Amanda🧵🧡

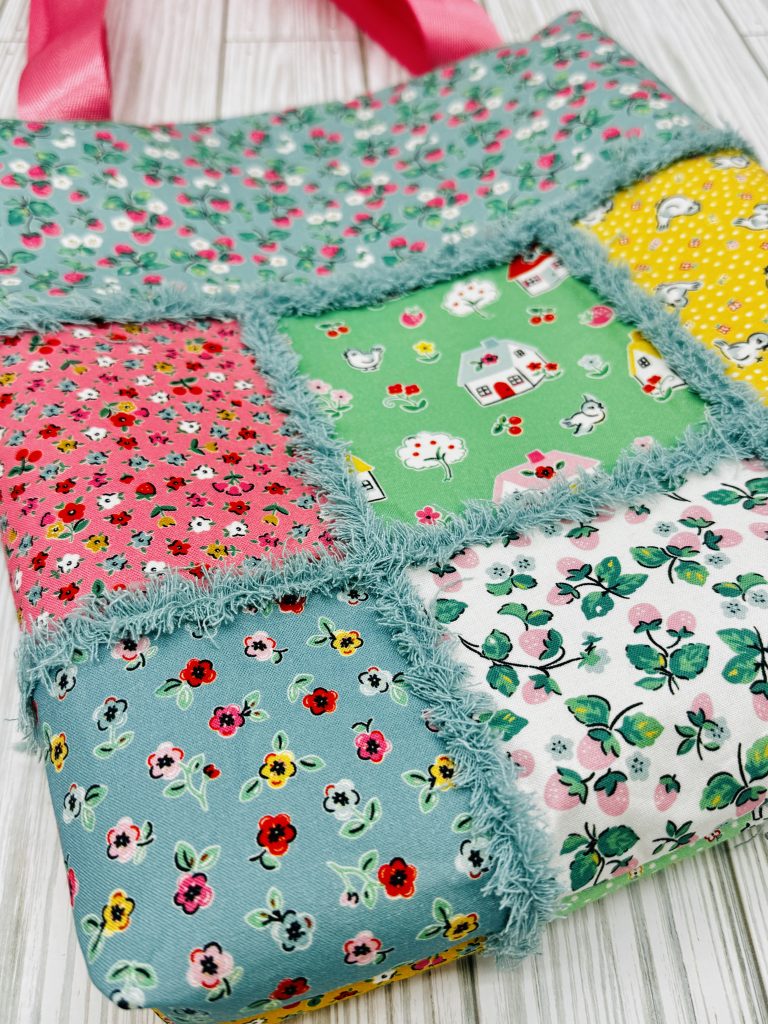
Are you a beginner bag maker looking for a way to make your bags stand out? Let me introduce you to Chenille It, a magical product that can add texture, dimension, and a touch of whimsy to your handmade bags. I’ve recently tried it with my Easy Charm Tote Pattern and Sunset Zipper Pouch Pattern, and the results are nothing short of fabulous! In this post, I’ll guide you through how to use Chenille It and share some tips for incorporating it into your projects.
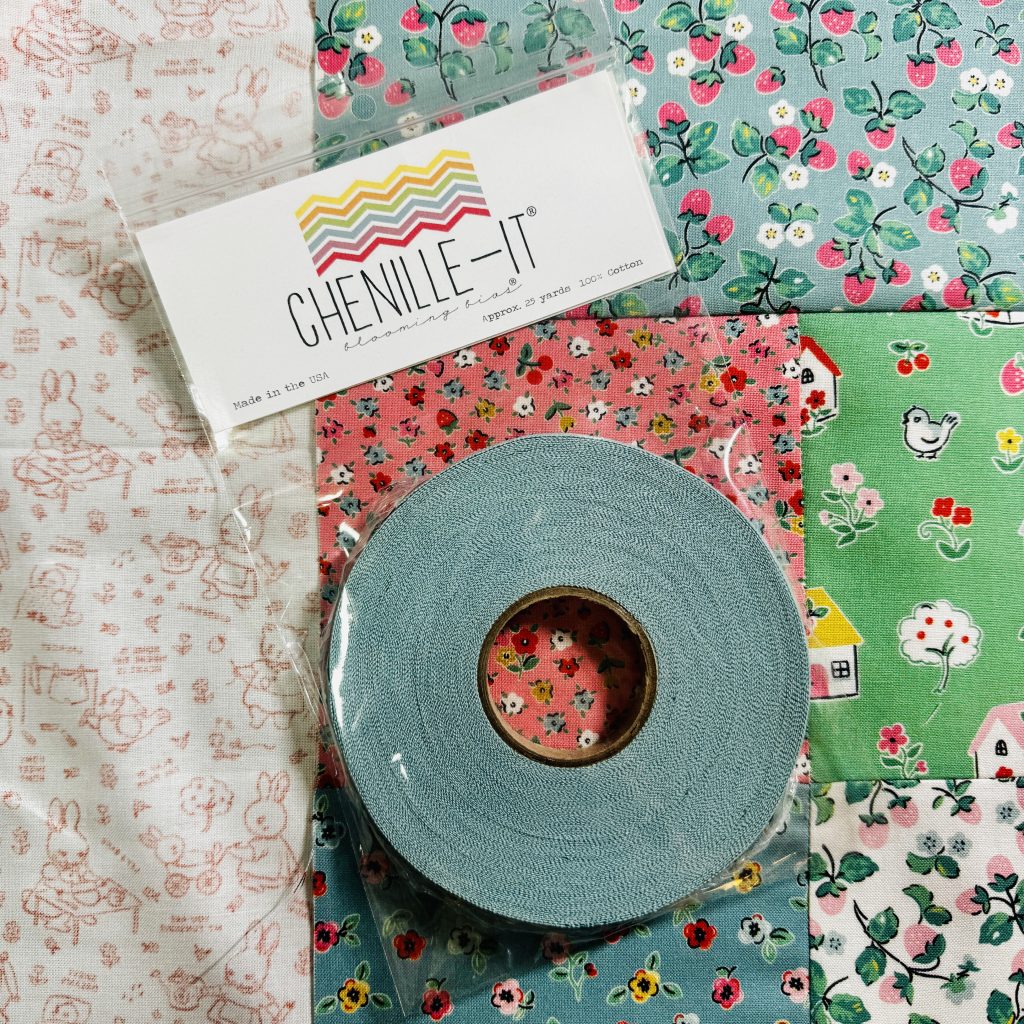
Chenille It is a soft, precut fabric strip that fluffs up when washed, creating a textured, chenille-like effect. It’s perfect for adding a cozy, quilted vibe to your bags while keeping things simple and beginner-friendly. Plus, it comes in a variety of colors, and a 3/8" or 5/8" width option, so you can customize it to suit any fabric or design.
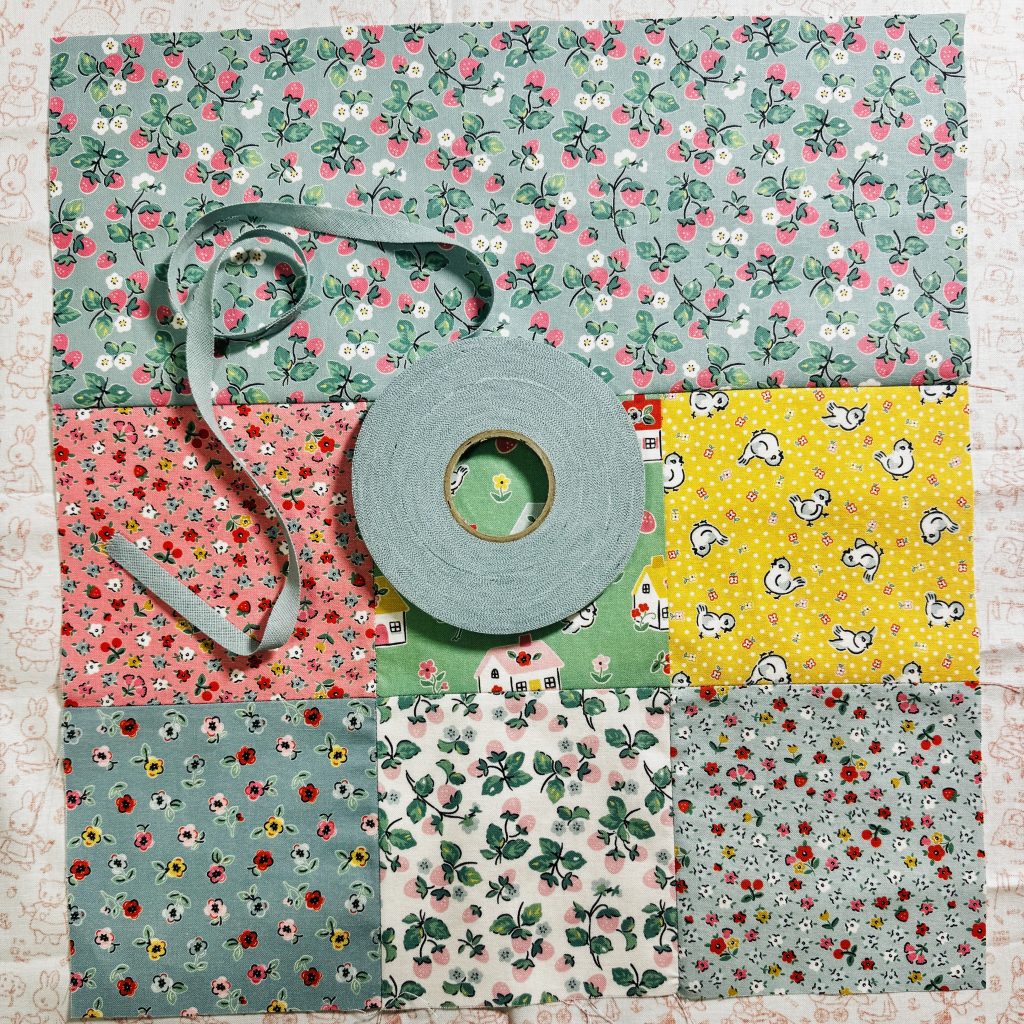

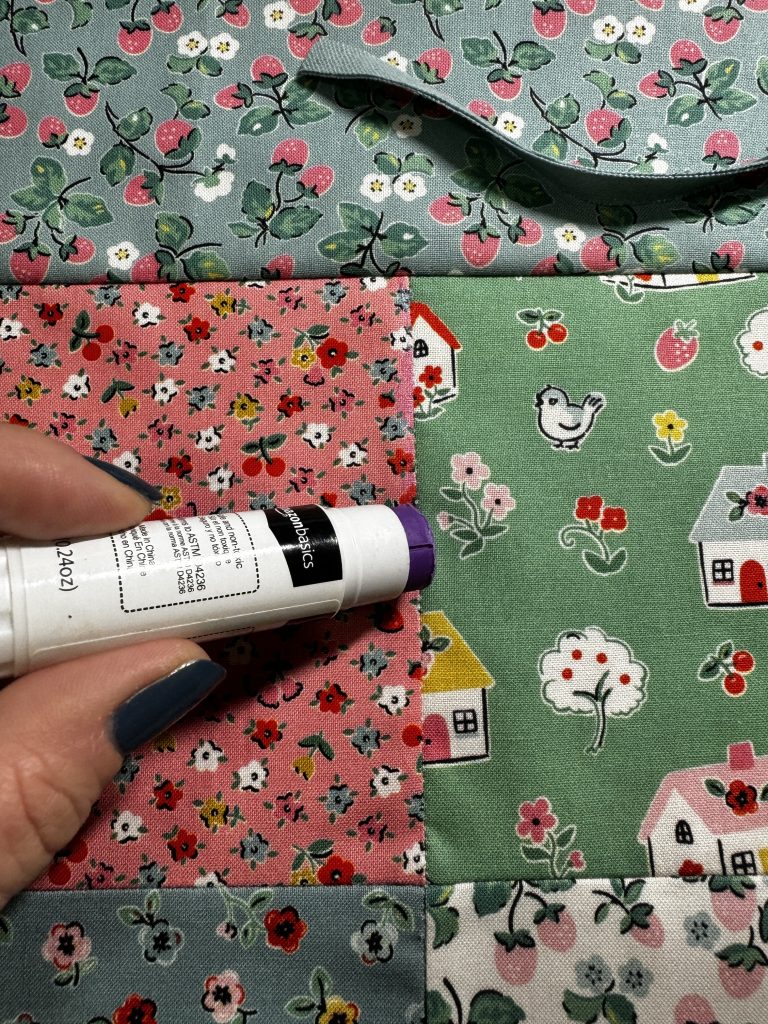
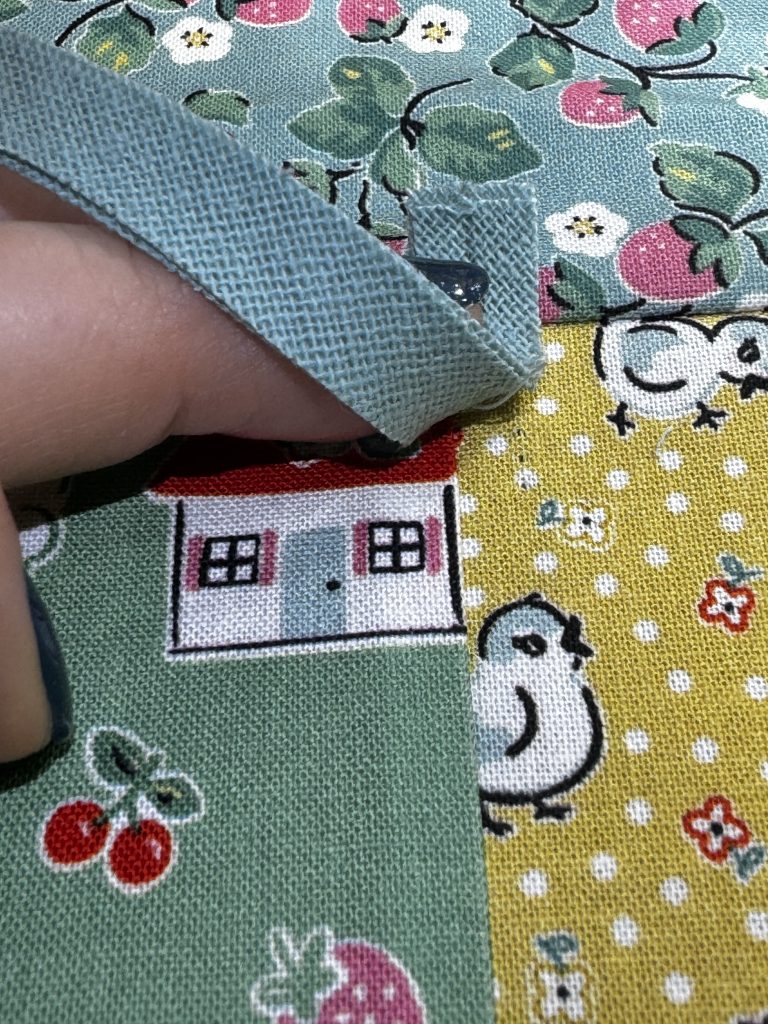
Choose Placement: You will want at least 2 strips of Chenille It for each area you choose to add texture. The more strips you use, the fluffier the project. For the Easy Charm Tote, I recommend applying it to the charm square and top border seams.
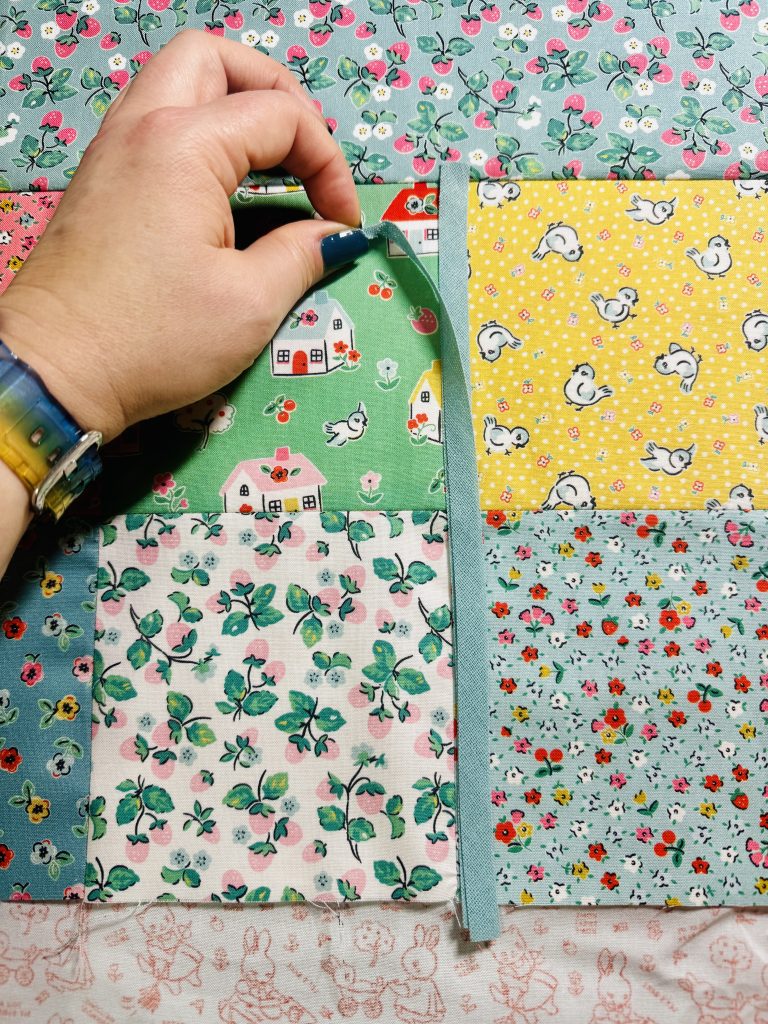
Stitch it Down: I used a glue stick to apply glue to the center of the seams, then placed 2 strips of Chenille It on top. Sew the Chenille It strips in place using a straight stitch down the center of the strip. Make sure it’s securely attached but not over-stitched.

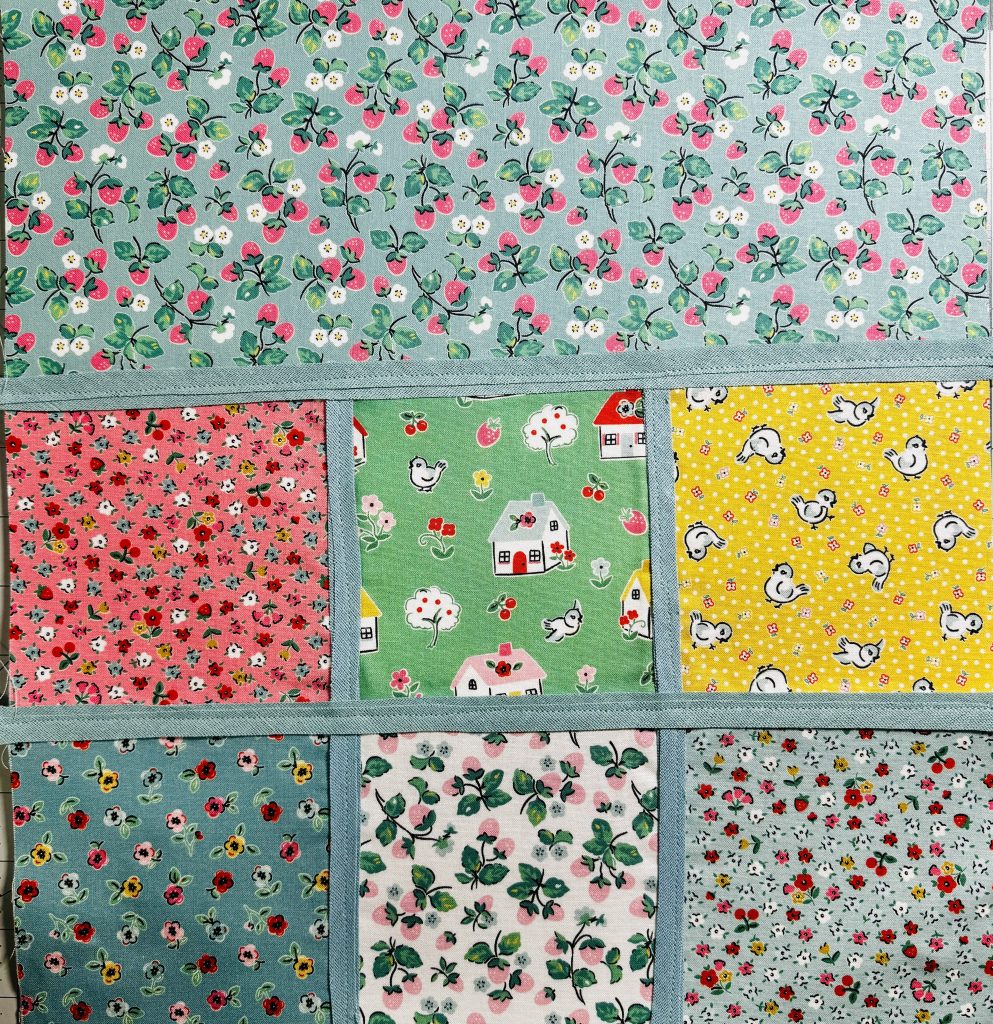
Here's a completed exterior panel with Chenille It applied:
Fluff It: You can achieve the fluffy, signature texture in one of two ways. Chenille It is designed to fluff when you wash and dry your project. You could wash and dry the tote panels to get the fluff. However, I'm not patient enough, and have found that using an old wire eyebrow brush achieves the same look in a fraction of the time.
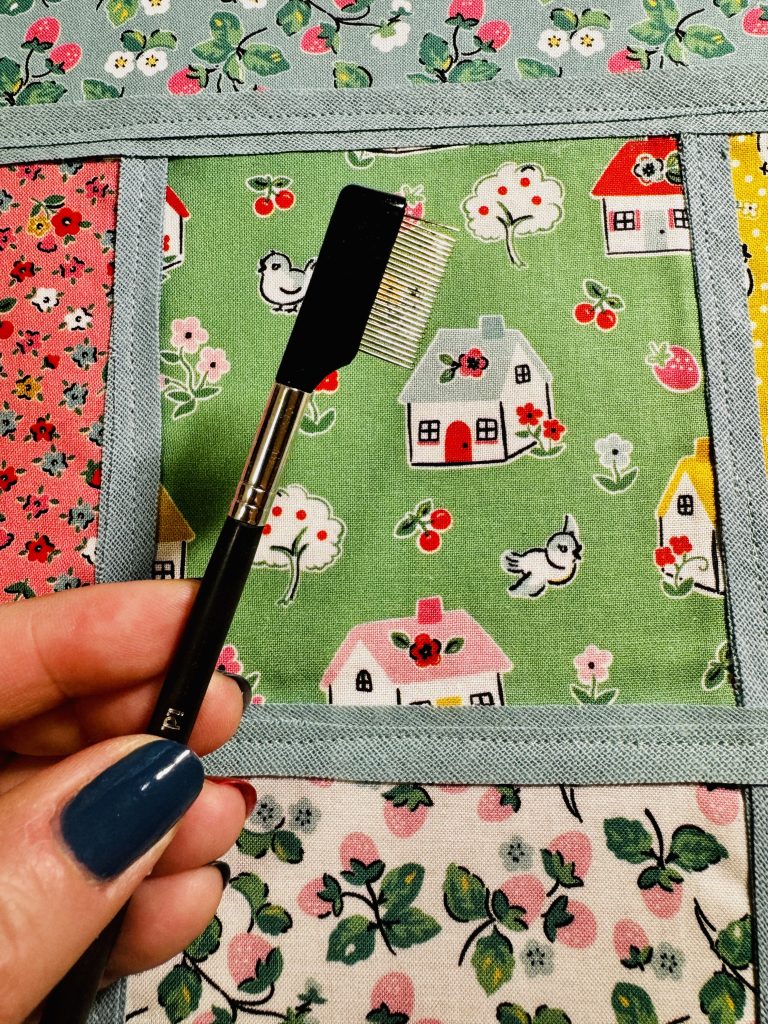
I simply place the wire teeth of the brush and gently scrape in a back and forth motion until the tape "blooms". Do this gently, if you are too rough, you will end up scraping it all off. But, if you do, it's very easy to sew more on and have it look seamless. Here's a quick video showing you how to do it:
Finish Your Bag: Complete the assembly of your Easy Charm Tote as per the pattern instructions.
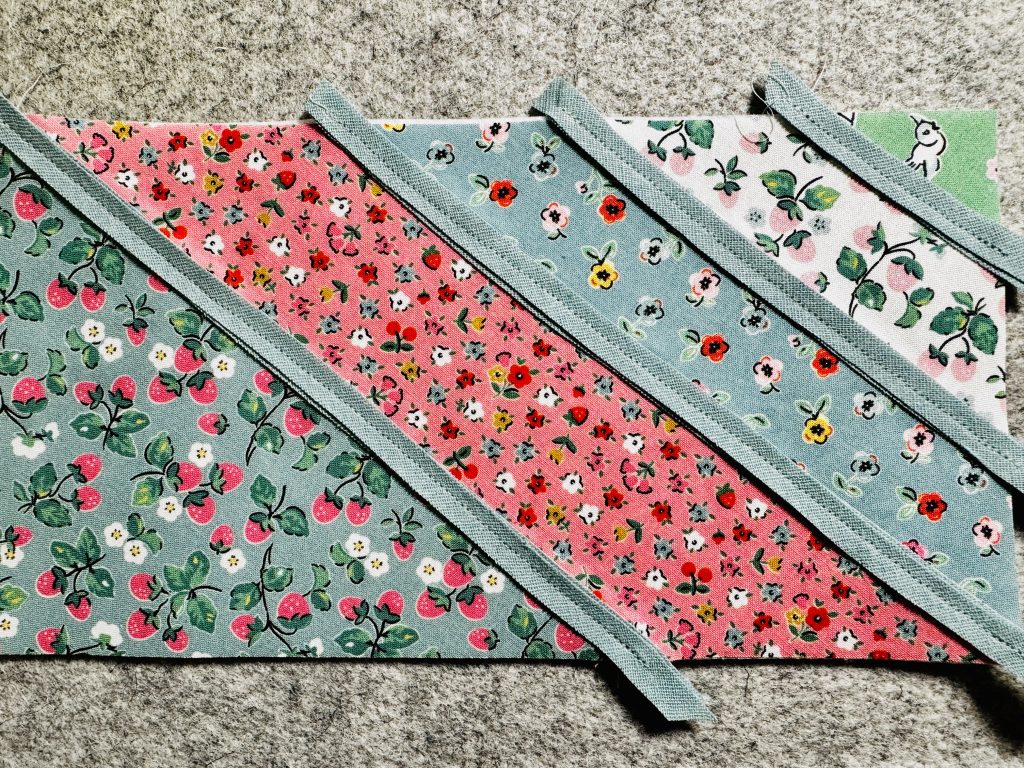
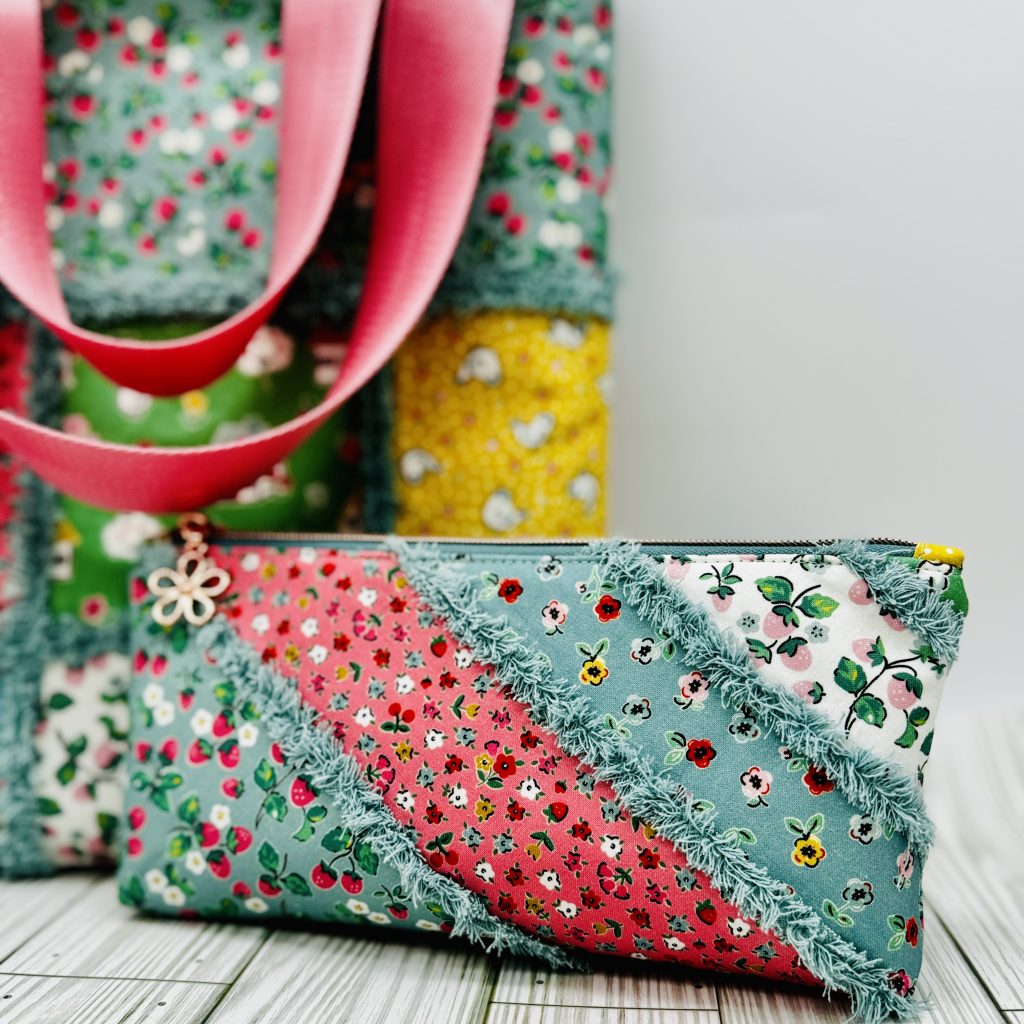
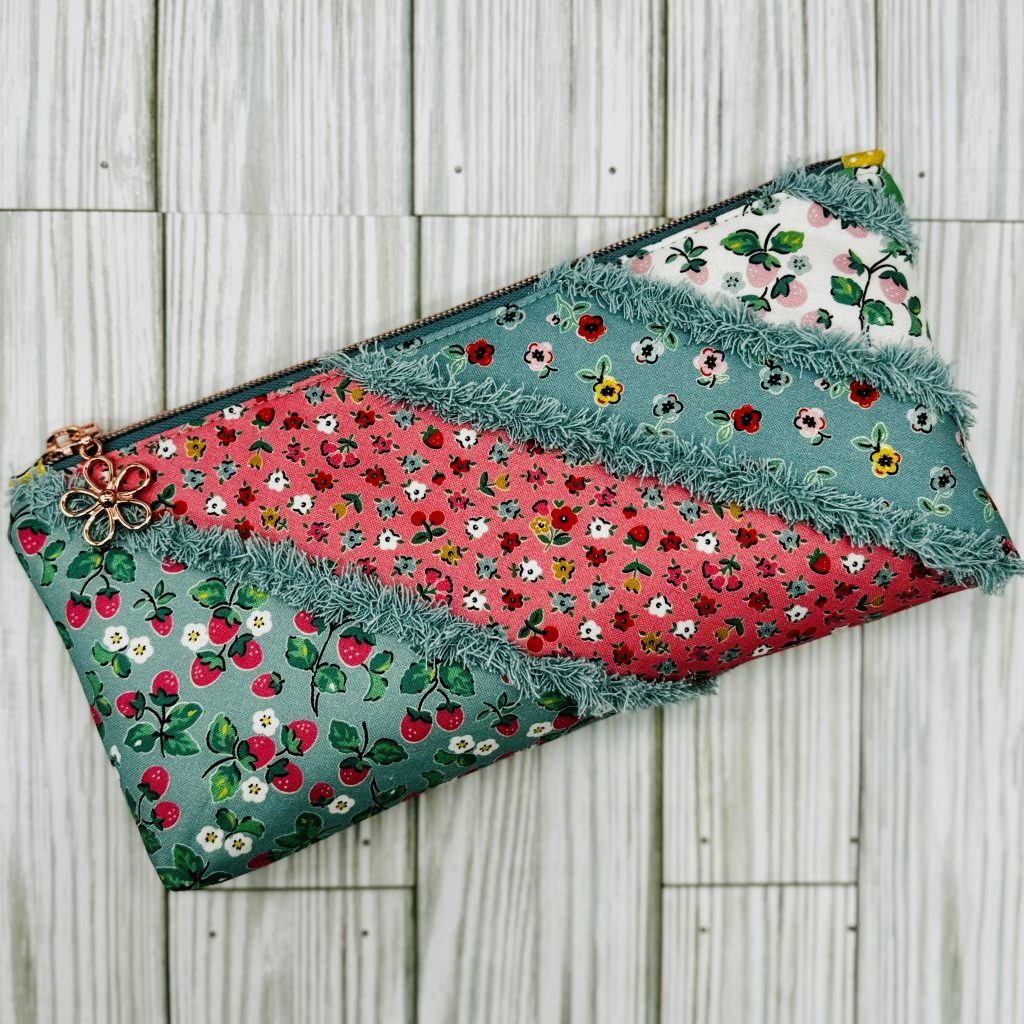
For the Sunset Zipper Pouch, Chenille It works wonderfully along the striped pattern for added flair. Follow the same steps as above, adapting the placement to your pouch design.
I’d love to see how you use Chenille It to enhance your Easy Charm Tote or Sunset Zipper Pouch! Share your photos on Instagram and tag me @bemandythings. Who knows? Your creation might inspire the next beginner bag maker!
With Chenille It, leveling up your bags is easier and more fun than ever. Whether you’re making a tote for a weekend market or a pouch for your everyday essentials, this simple addition can take
Chenille It is a soft, precut fabric strip that fluffs up when washed, creating a textured, chenille-like effect. It’s perfect for adding a cozy, quilted vibe to your bags while keeping things simple and beginner-friendly. Plus, it comes in a variety of colors, and a 3/8" or 5/8" width option, so you can customize it to suit any fabric or design.
Choose Placement: You will want at least 2 strips of Chenille It for each area you choose to add texture. The more strips you use, the fluffier the project. For the Easy Charm Tote, I recommend applying it to the charm square and top border seams.
Stitch it Down: I used a glue stick to apply glue to the center of the seams, then placed 2 strips of Chenille It on top. Sew the Chenille It strips in place using a straight stitch down the center of the strip. Make sure it’s securely attached but not over-stitched.
Here's a completed exterior panel with Chenille It applied:
Fluff It: You can achieve the fluffy, signature texture in one of two ways. Chenille It is designed to fluff when you wash and dry your project. You could wash and dry the tote panels to get the fluff. However, I'm not patient enough, and have found that using an old wire eyebrow brush achieves the same look in a fraction of the time.
I simply place the wire teeth of the brush and gently scrape in a back and forth motion until the tape "blooms". Do this gently, if you are too rough, you will end up scraping it all off. But, if you do, it's very easy to sew more on and have it look seamless. Here's a quick video showing you how to do it:
Finish Your Bag: Complete the assembly of your Easy Charm Tote as per the pattern instructions.
For the Sunset Zipper Pouch, Chenille It works wonderfully along the striped pattern for added flair. Follow the same steps as above, adapting the placement to your pouch design.
I’d love to see how you use Chenille It to enhance your Easy Charm Tote or Sunset Zipper Pouch! Share your photos on Instagram and tag me @bemandythings. Who knows? Your creation might inspire the next beginner bag maker!
With Chenille It, leveling up your bags is easier and more fun than ever. Whether you’re making a tote for a weekend market or a pouch for your everyday essentials, this simple addition can take your project to the next level. Ready to give it a try? Grab your pattern, pick up some Chenille It, and let your creativity shine!

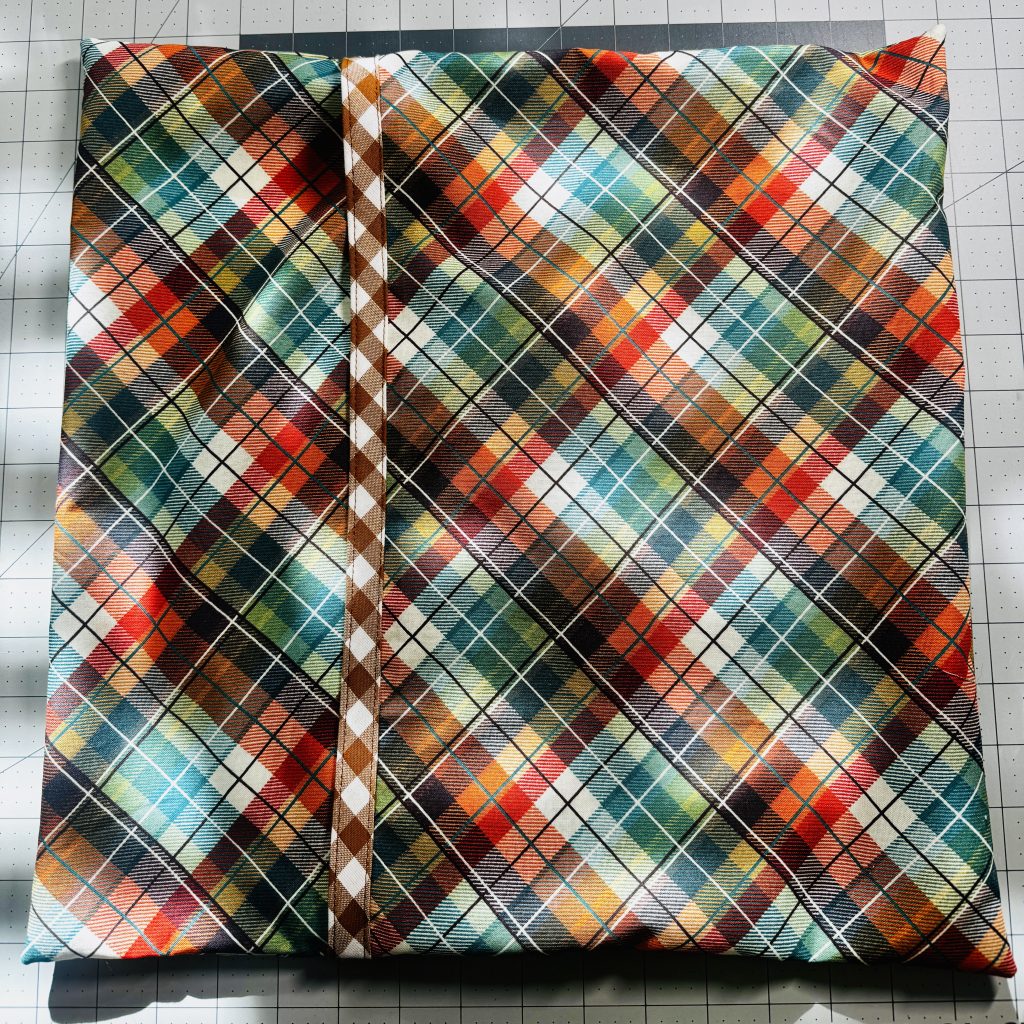
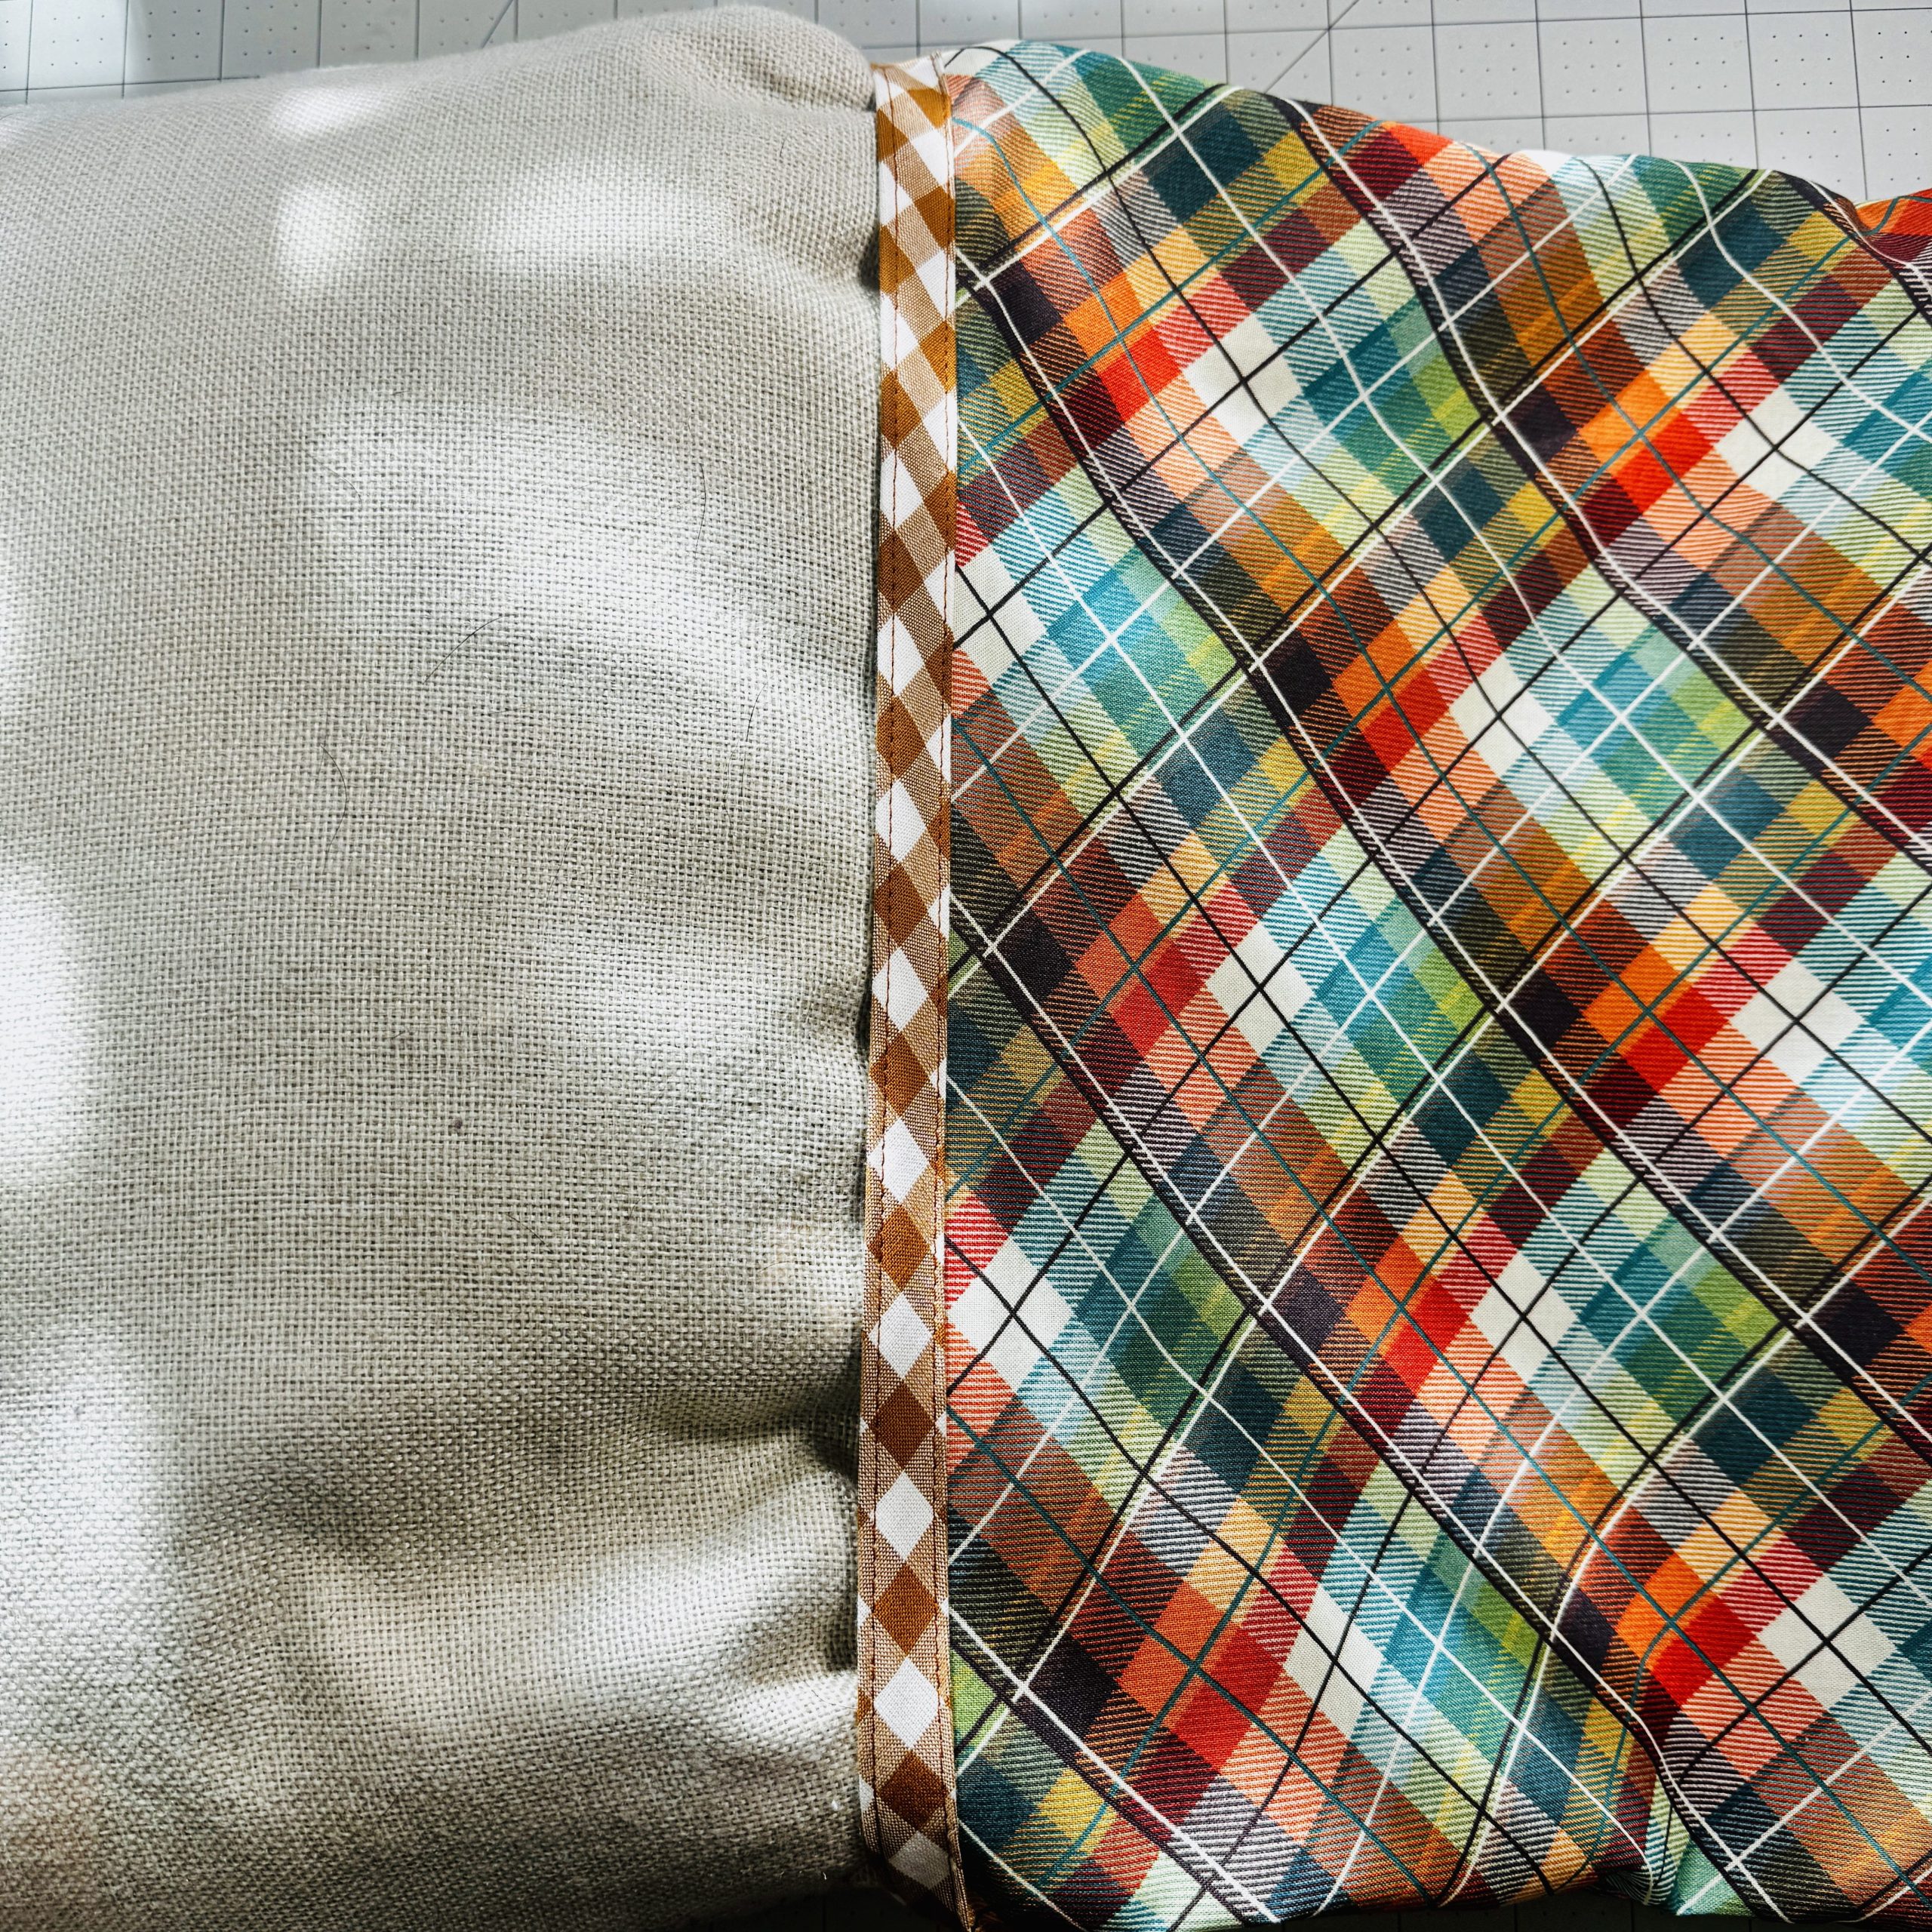
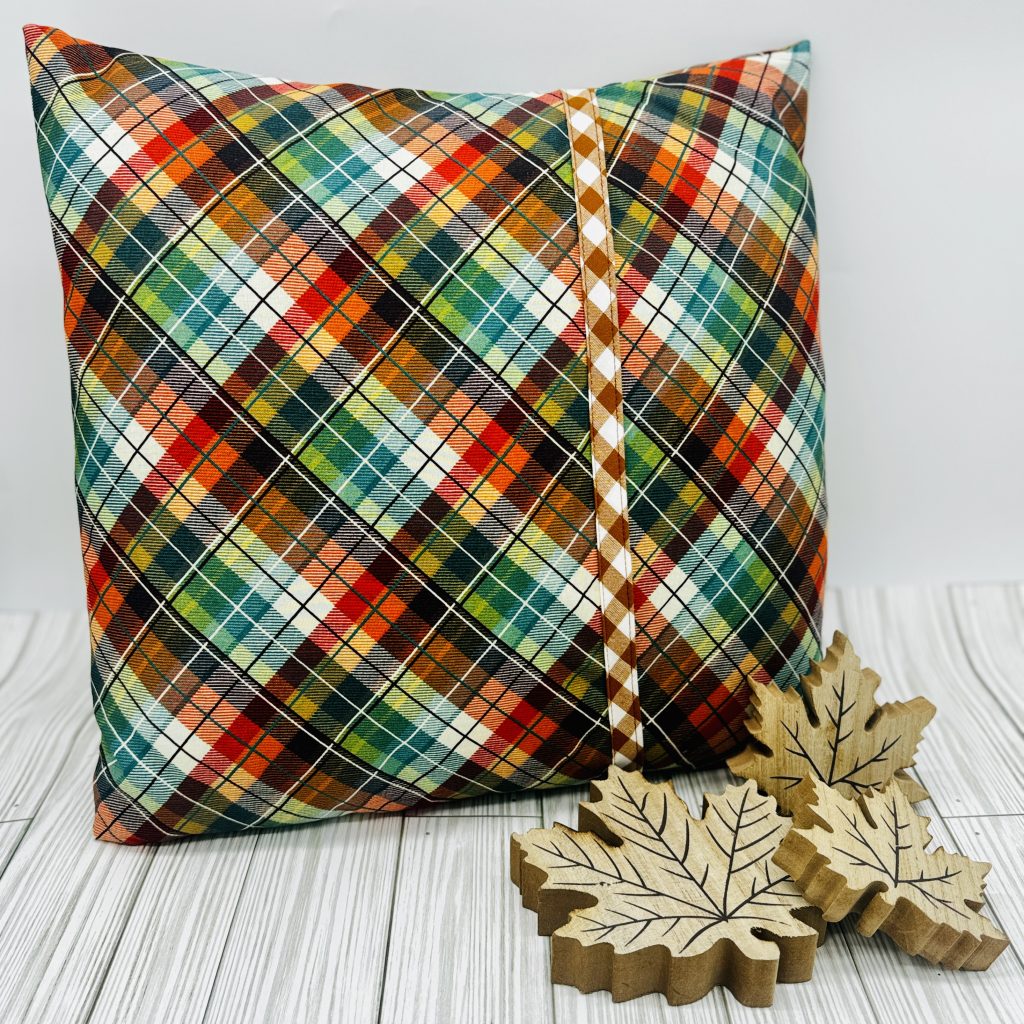
Transforming your living space can be as simple as adding a pop of color or a cozy touch with new pillow covers. An envelope closure pillow cover is a perfect project for beginners or anyone looking to refresh their decor without zippers or buttons. This blog post will guide you through the steps of sewing your own beautiful pillow cover with an envelope closure, and how to add binding to the closure panel for a fancy finish.
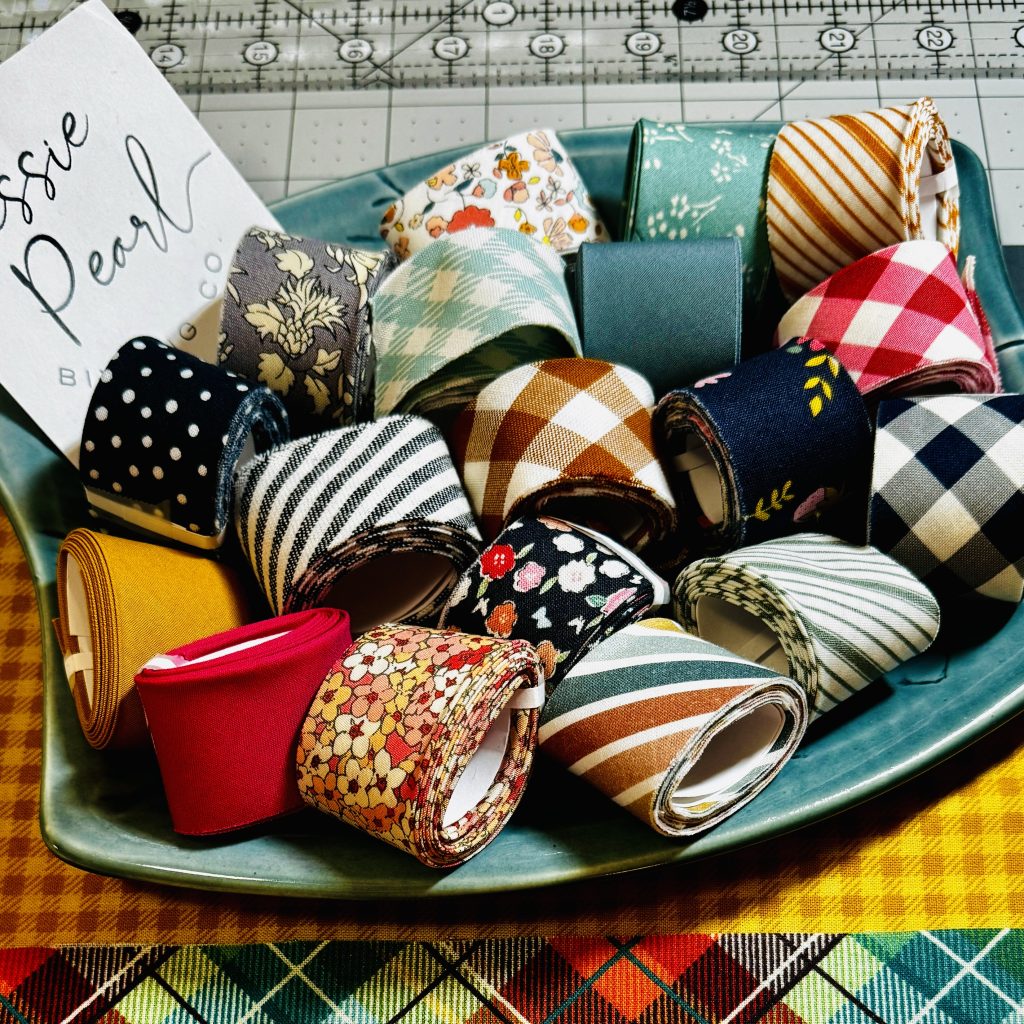
For this project, I'll be using pre-made binding from Bessie Pearl Binding Co. A small online business, Bessie Pearl offer pre-made bias quilt binding and bias tape made from high-quality fabrics to provide the perfect finishing touch for your handmade quilts, garments, or other handcrafts.
A PDF version of this pattern is available for purchase on my website or Etsy shop - click the button below to check it out!
Before you start: Some may wonder whether pre-washing your fabric is necessary. I never do, but have occasionally had a pillow cover that shrunk a little too much in the dryer. It's up to you. However, I do recommend ironing your fabric before cutting so your cuts are accurate.
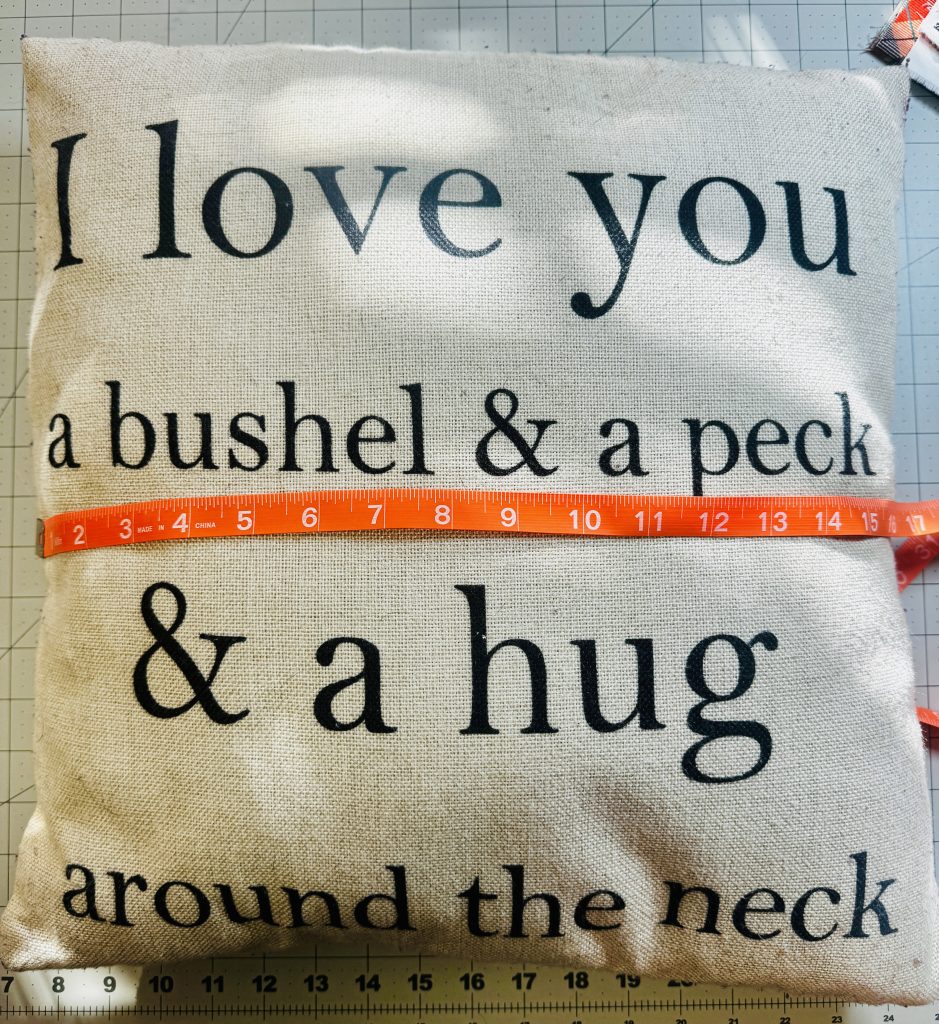
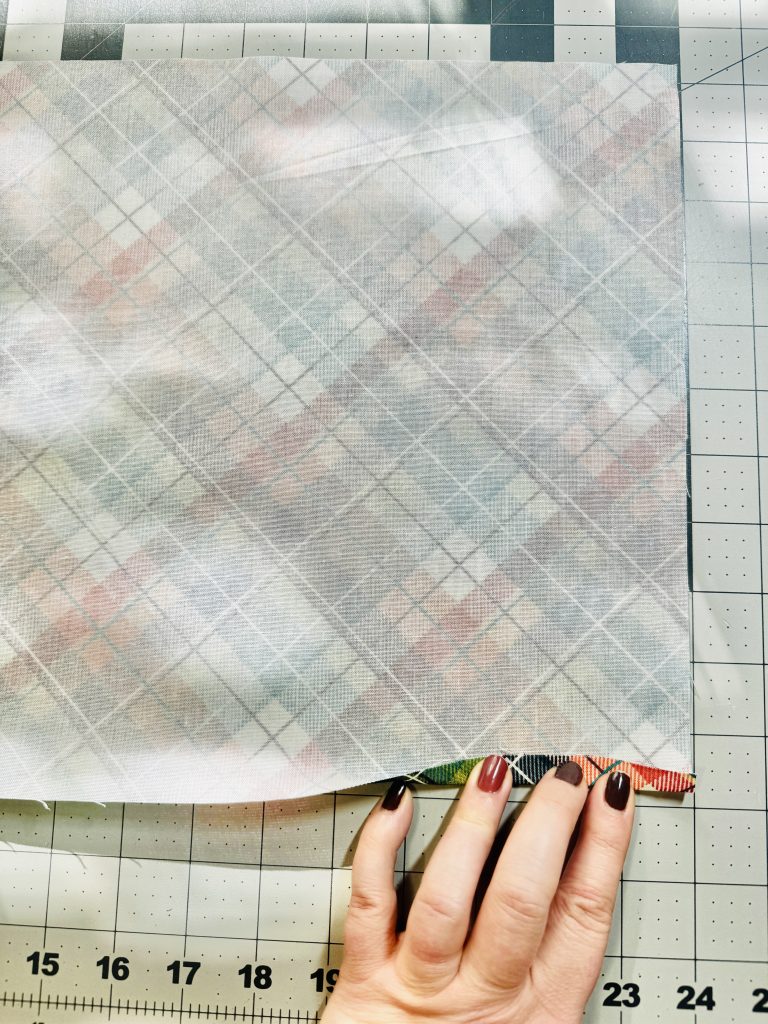
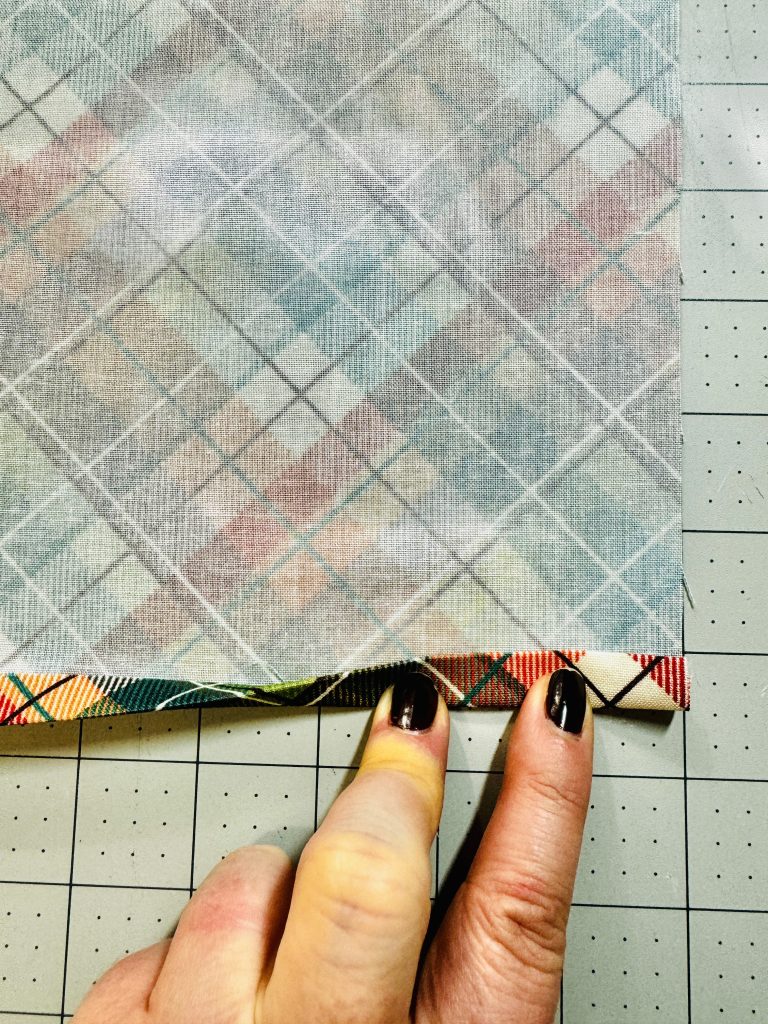
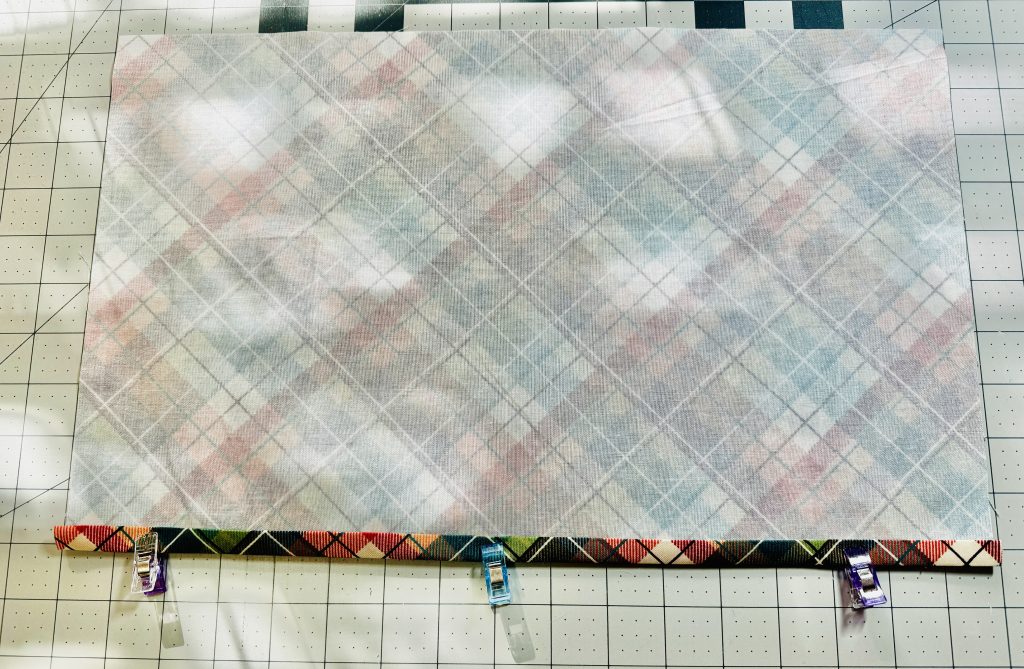
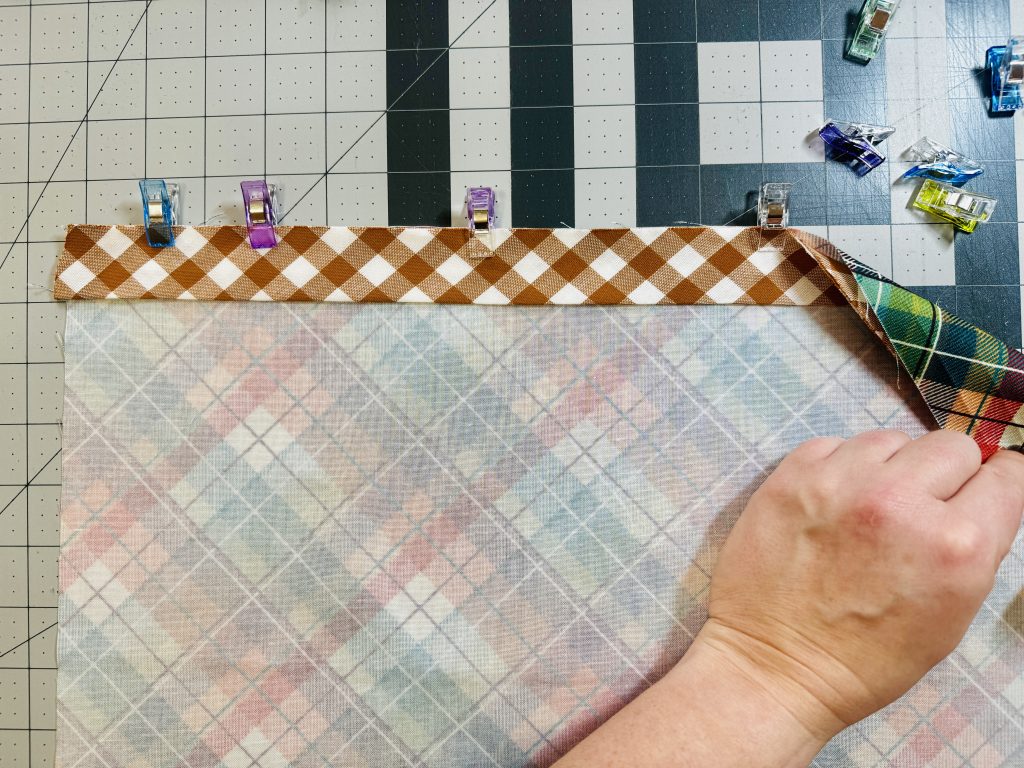
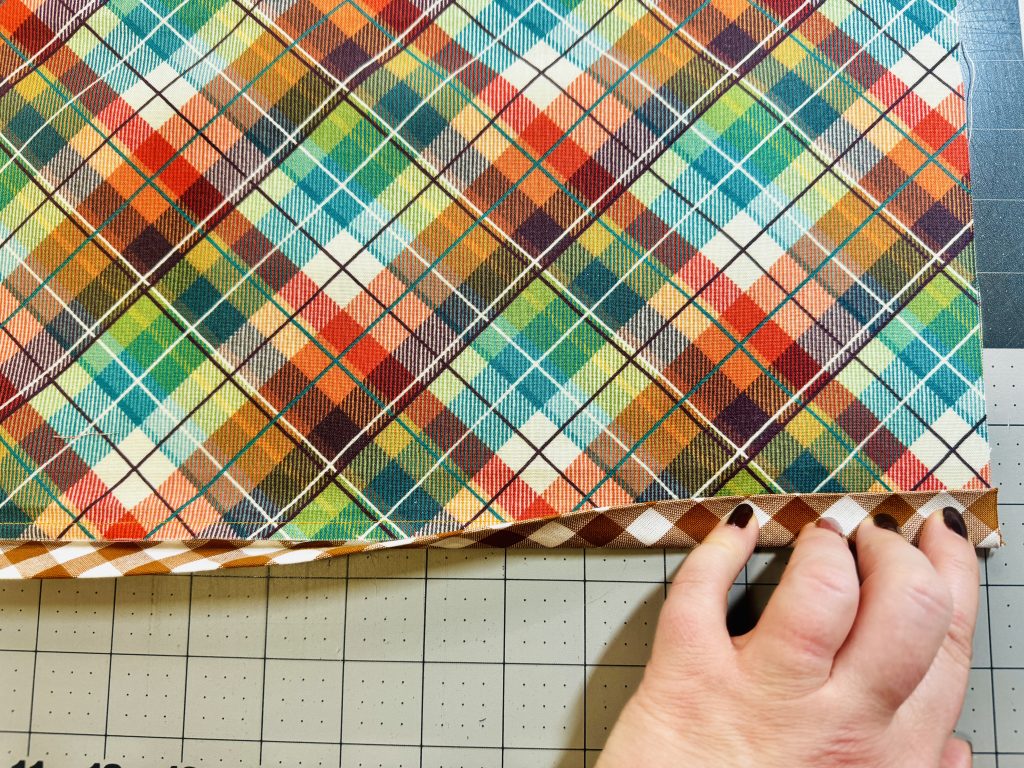
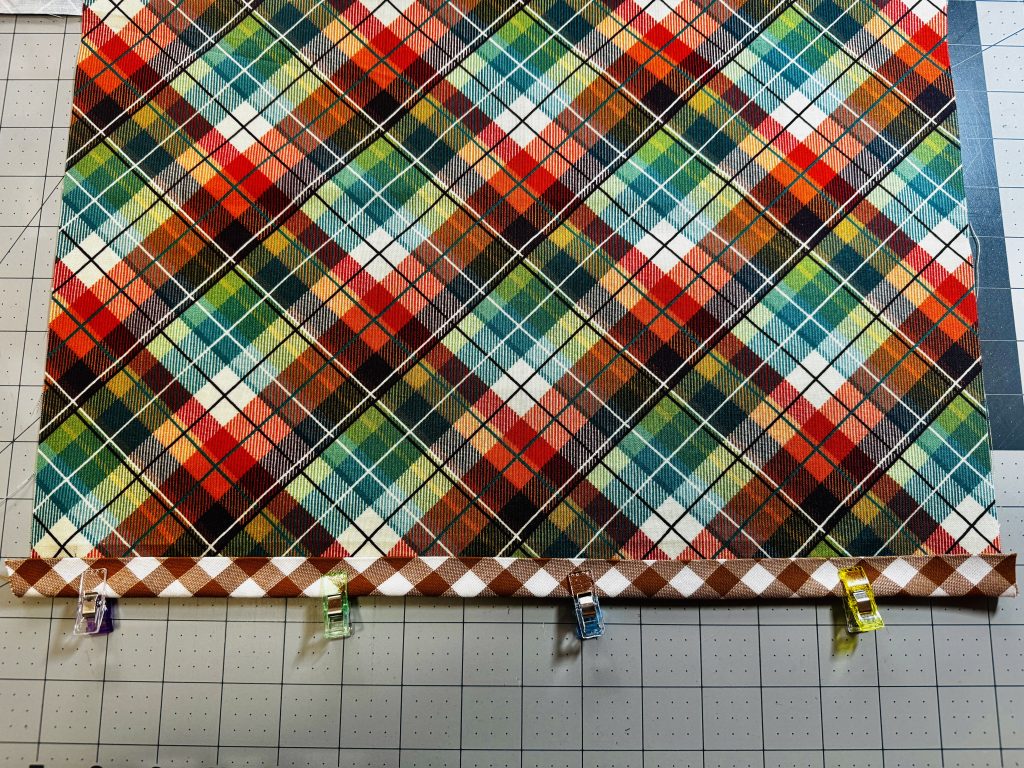
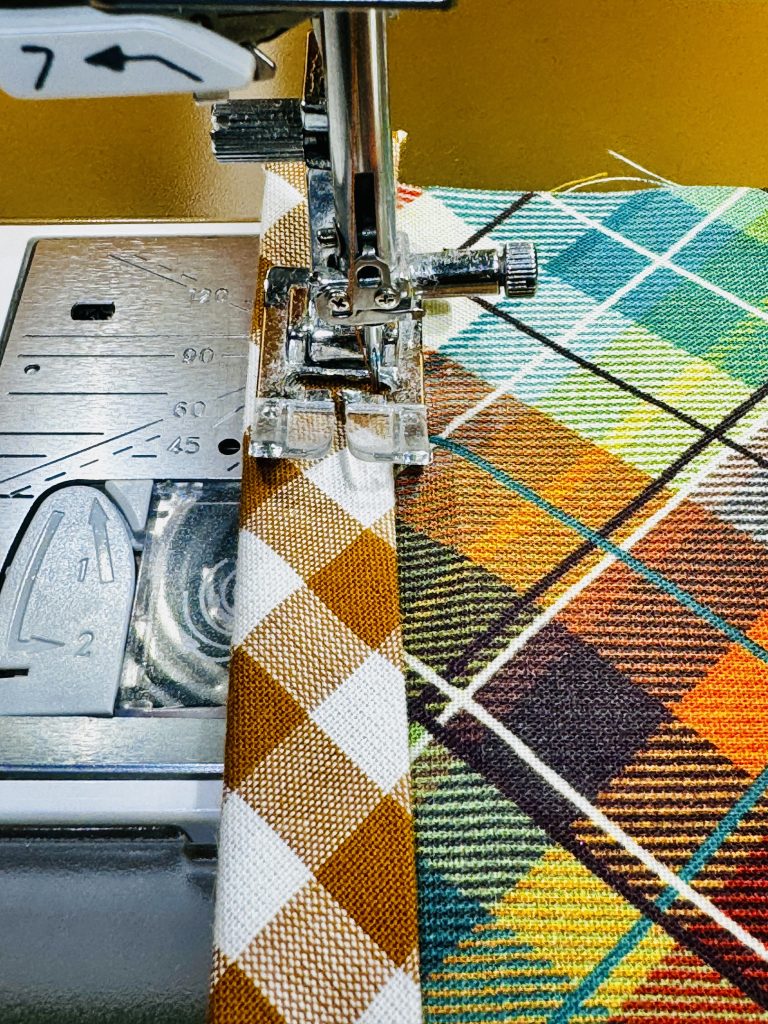
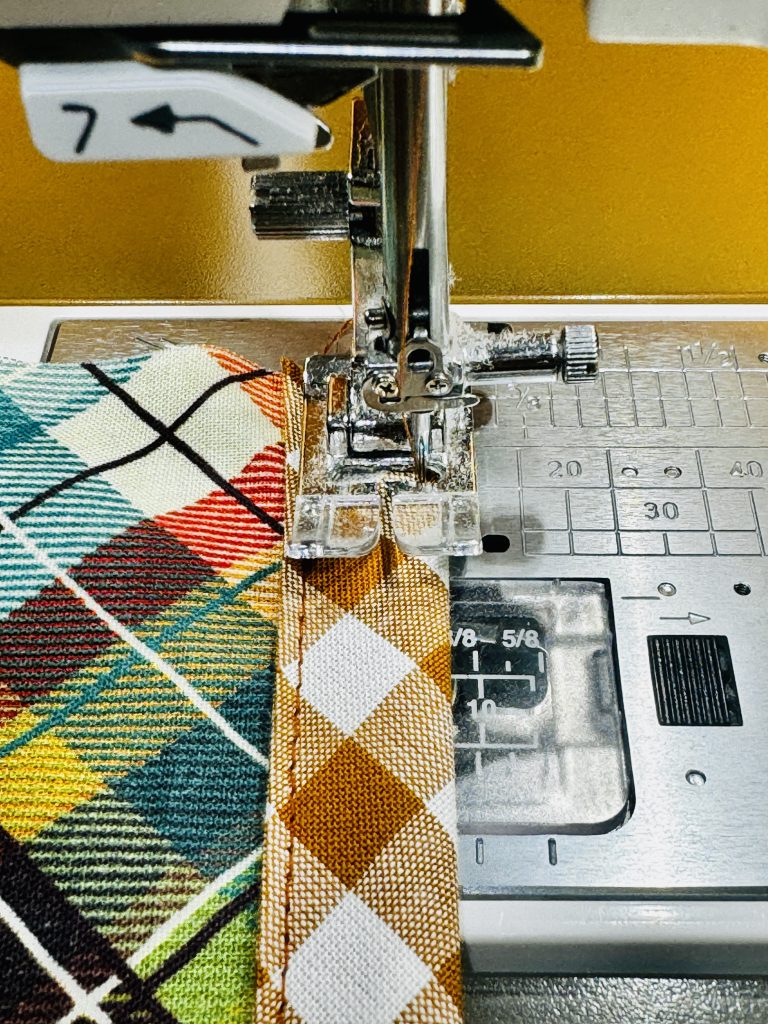
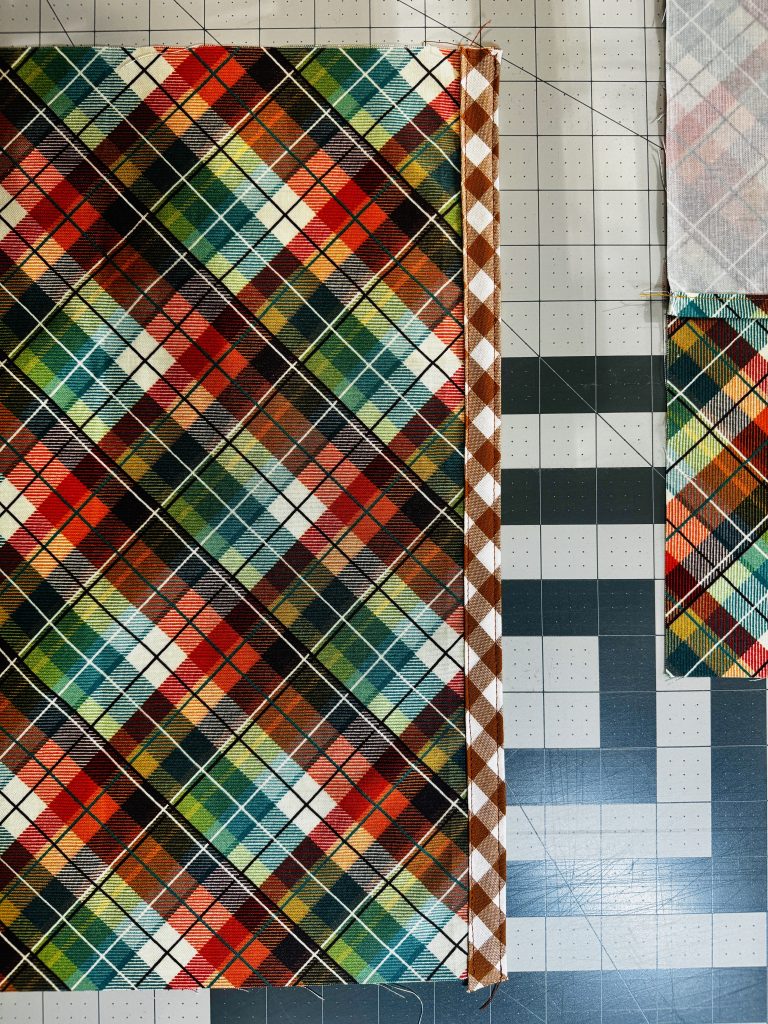
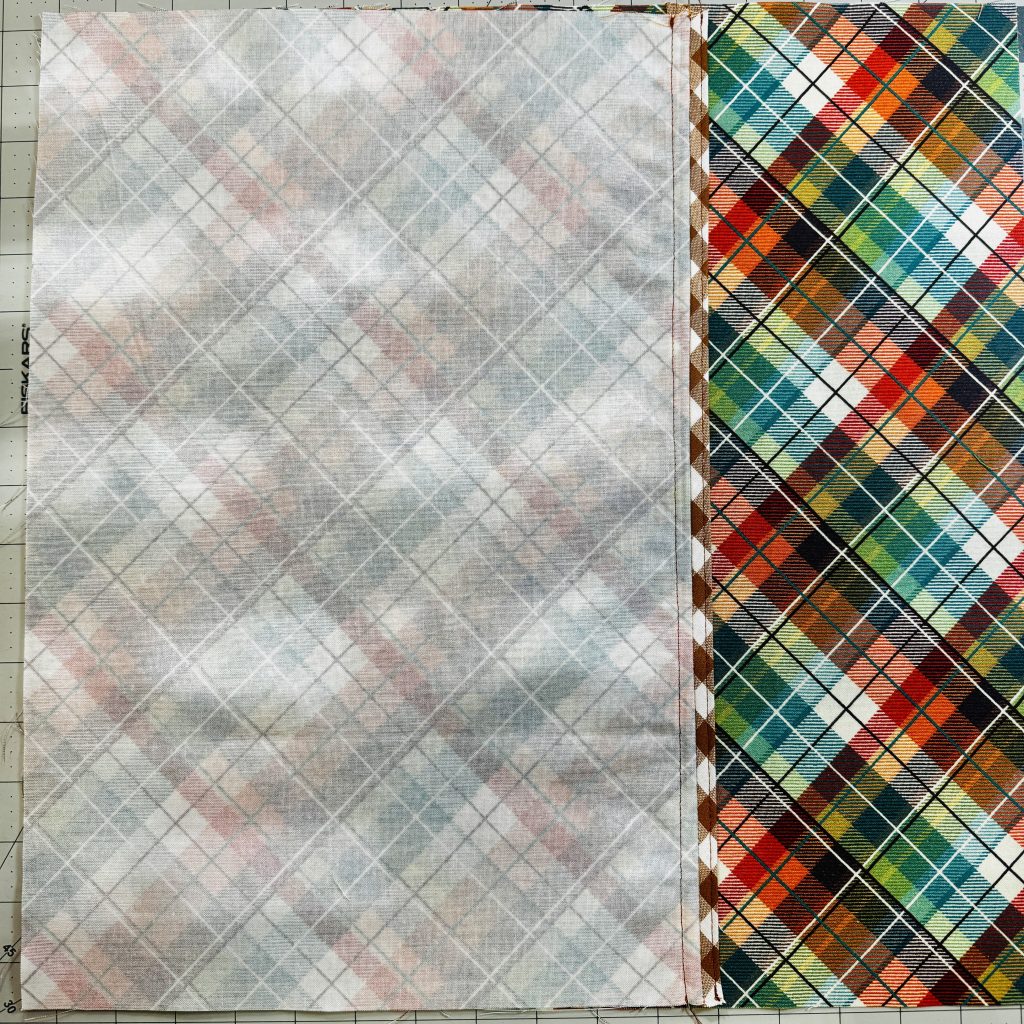
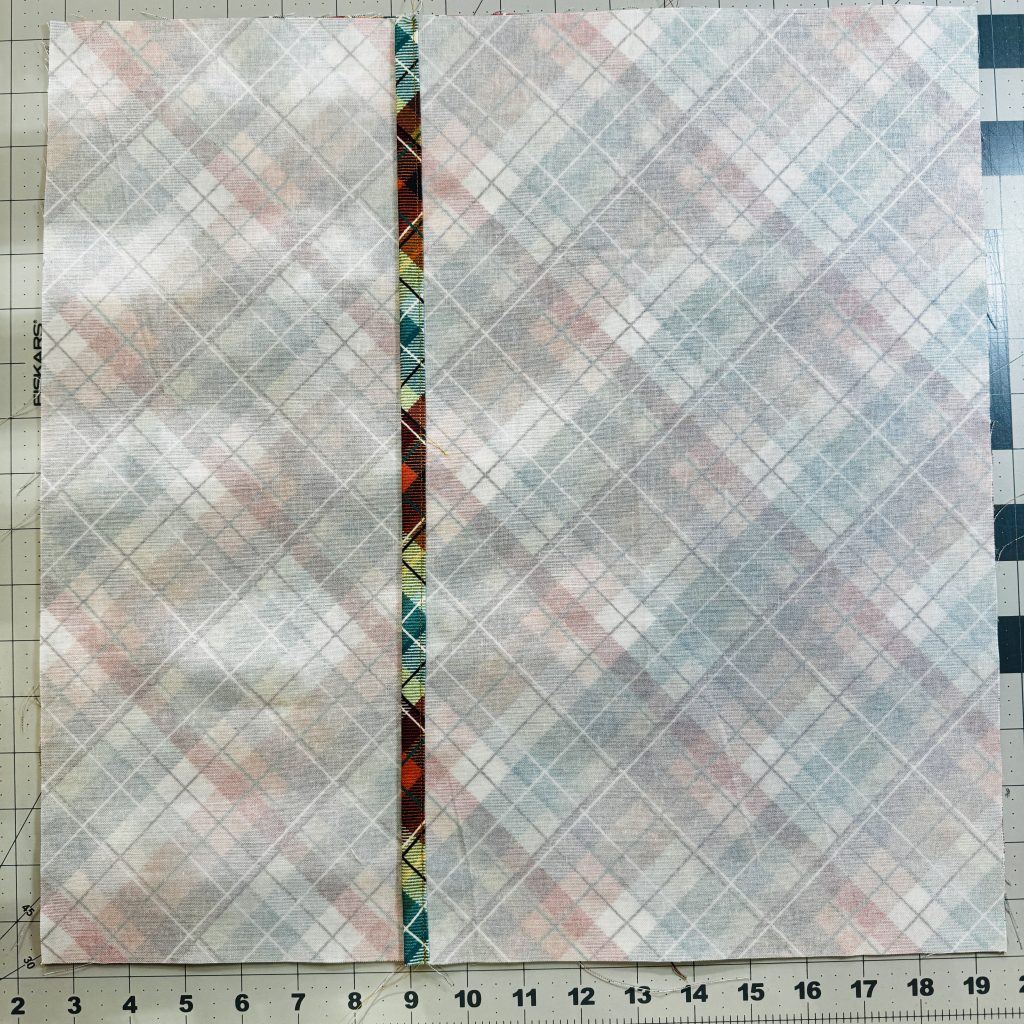
The following directions show you how to use pre-made binding for the pillow back. If you want to use your own, cut a strip 2.5" x 17". Fold the wrong sides together along the 17" side and continue with directions.
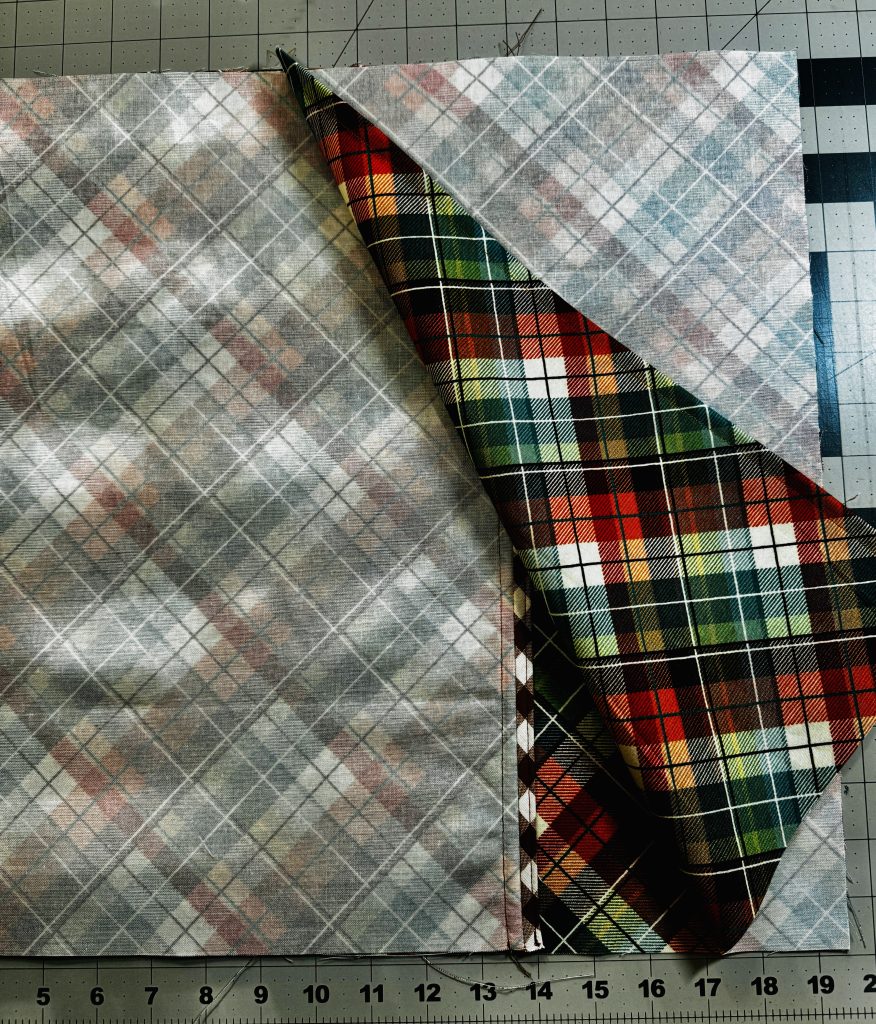
Your pillow cover is complete! Enjoy!

If you like this blog tutorial, make sure to join my email list! Stay updated on new pattern releases, ready to ship items, and a complimentary zipper pouch pattern!

Hello, fellow sewing enthusiasts! Today, I am thrilled to share with you my latest creative journey as a Benartex Fabrics ambassador, featuring their stunning Botanical Radiants collection. This collection truly captivated me with its vibrant floral motifs and rich color palette, making it the perfect canvas for my latest creations.
Introducing the Joanna Tote Bag

The centerpiece of my ambassador project is the Joanna Tote Bag, a design that blends functionality with timeless elegance. Crafted using my brand new Joanna Tote Bag pattern, this tote showcases the exquisite prints and hues from the Botanical Radiants collection. I designed the Joanna tote to work specifically with fat quarter bundles. It offers 3 strap size options, and instructions on making your own or using premade straps. The interior features 3 slip pockets using my perfected pocket installation with pocket binding. The spacious interior and practical design make it ideal for everyday use, whether you're heading to a quilt guild meeting or strolling through a botanical garden.
Elevating the Sunset Zipper Pouch

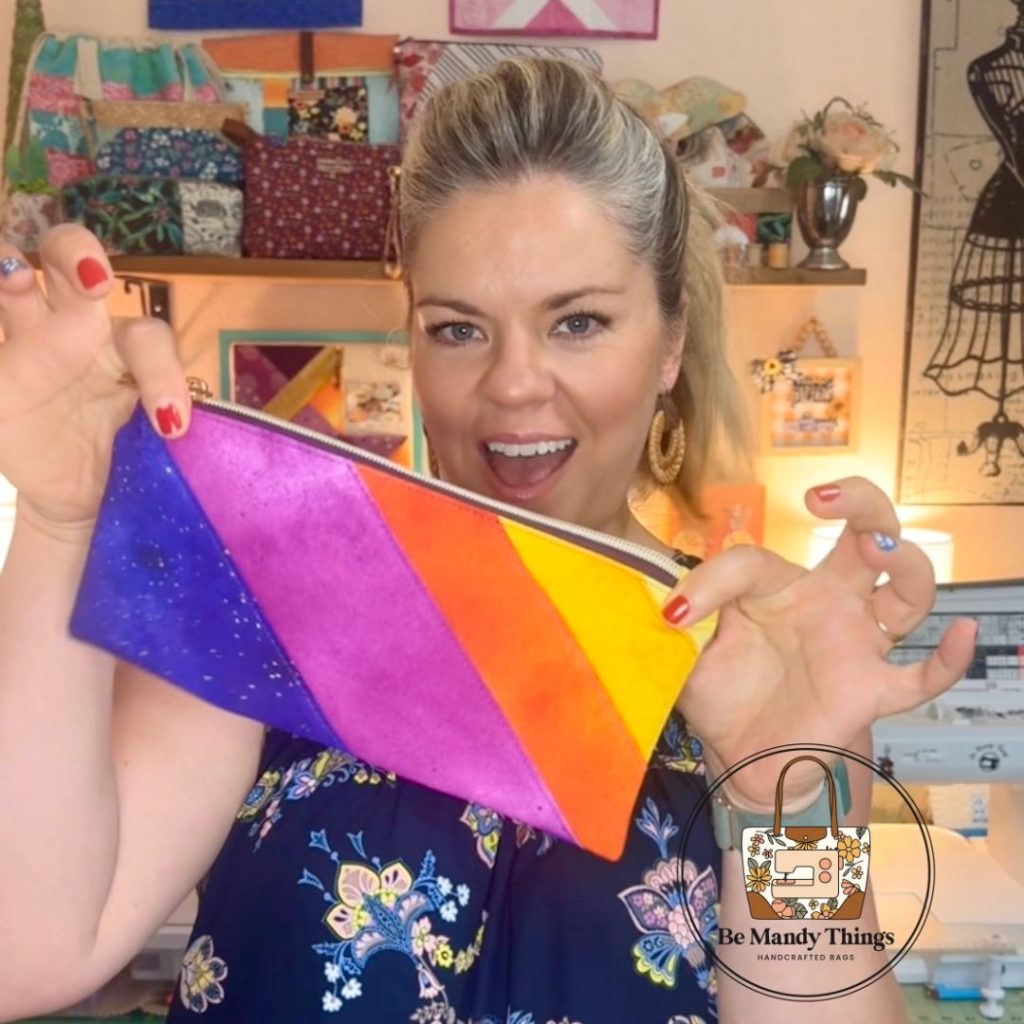
In addition to the Joanna Tote Bag, I also delved into creating a stylish companion piece: a zipper pouch using my Sunset Zipper Pouch pattern. For this project, I enhanced the pattern by incorporating interfacing for added structure, increasing its overall size, and boxing the corners to create a more polished finish. This pouch not only complements the Joanna Tote Bag but also serves as a versatile accessory for organizing essentials with flair.
Explore and Create with Ease

Both patterns, the Joanna Tote Bag and the Sunset Zipper Pouch, are now available for purchase on my website and Etsy shop. They are designed to empower sewists of all levels to create professional-quality bags that celebrate the beauty of Benartex fabrics. Whether you're a seasoned maker or just starting your sewing journey, these patterns offer clear instructions and expert tips to ensure your success. If you join my email list, you can receive the Sunset Zipper Pouch pattern for free.
Discover Botanical Radiance

Benartex Fabrics has once again exceeded expectations with the Botanical Radiants collection. Each fabric piece radiates sophistication and charm, inspiring endless possibilities for quilts, bags, and home décor. The quality and versatility of these fabrics shine through in every stitch, making them a must-have for any sewing enthusiast's collection.
Get Started Today

Join me in exploring the Botanical Radiants collection and bringing your creative visions to life. Visit my website or Etsy shop to purchase the Joanna Tote Bag and Sunset Zipper Pouch patterns, and let's embark on a journey of creativity and craftsmanship together. Elevate your sewing projects with fabrics that inspire and patterns that empower—you deserve to create with the best!
Thank you for joining me on this exciting adventure with Benartex Fabrics. Happy sewing!
Stay tuned for more updates, projects, and inspiration.


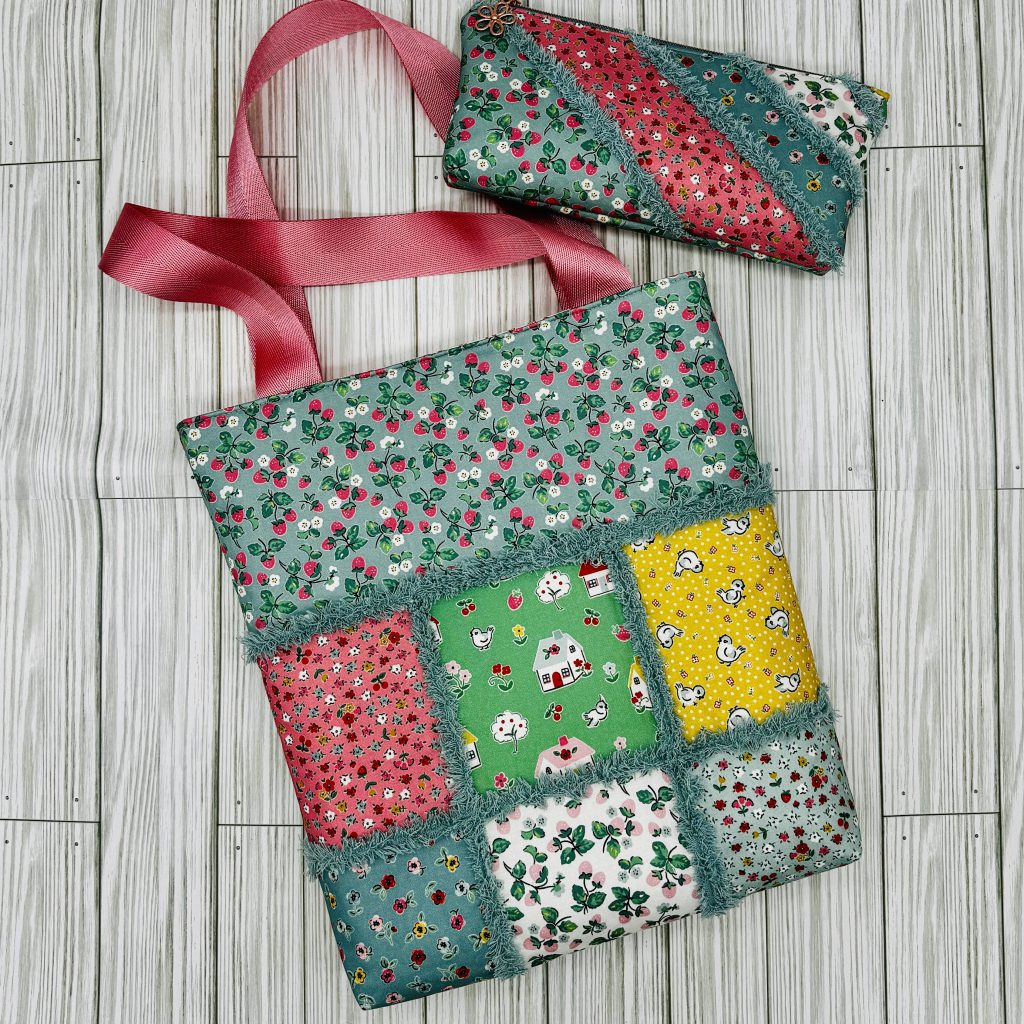
Hey there, fellow makers! I’m so thrilled to have you here as I share a little behind-the-scenes peek into my latest project. If you’re anything like me, you probably get that little rush of excitement when a new fabric collection lands in your hands. And let me tell you, Poppie Cotton’s Mushroom Blooms collection did not disappoint! From the moment I saw those vibrant colors and whimsical patterns, I knew I had to turn them into something special. So, grab a cup of your favorite drink, get cozy, and let’s dive into how I created a fabulous tote and matching zipper pouch using just a fat quarter bundle—no big cuts needed!
The Spark That Started It All
You know that feeling when you first lay eyes on a new fabric and your mind starts racing with possibilities? That’s exactly what happened when I unwrapped the Mushroom Blooms fat quarter bundle. I usually work with 1/2 yard cuts or larger, but I thought, “Why not challenge myself this time?” I love the idea of making the most out of what you have, and this was the perfect opportunity to do just that. Plus, I think there’s something so satisfying about proving that you can create something beautiful without needing a ton of fabric.
The Patterns: Starry Tote and Sunset Zipper Pouch
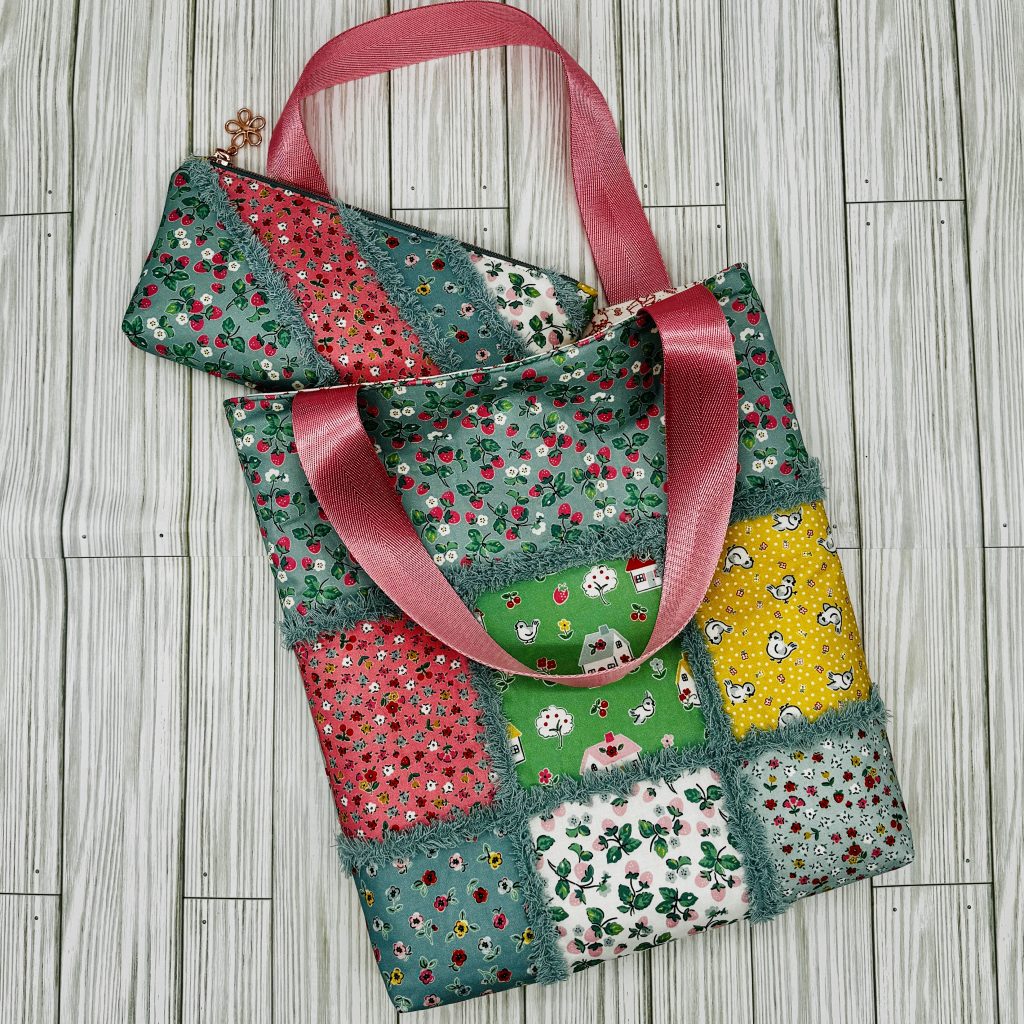
Whenever I’m looking to create something practical yet stylish, I reach for my trusty Starry Tote Pattern and Sunset Zipper Pouch pattern. They’ve become my go-to’s, and for good reason—they’re beginner-friendly, but the end result always looks polished and professional. When paired with Mushroom Blooms, these patterns truly came to life. The cheerful florals and sweet details in the fabric made the tote and pouch feel like they were just meant to be together.


Making the Most of Every Inch
So, let’s talk about working with a fat quarter bundle. It’s a bit like a game of Tetris—figuring out how to cut and piece everything together without wasting an inch. Here’s how I tackled it:
1. **Smart Cutting:** I started by planning out my cuts to make sure I was using the fabric as efficiently as possible. For anyone new to this, I recommend laying out your pieces first and then cutting to avoid any mishaps. With a little planning, you’d be surprised how much you can squeeze out of a fat quarter!
2. **Mix and Match:** Don’t be afraid to mix and match fabrics within the collection. The beauty of Mushroom Blooms is that all the prints work together, so you can get creative with your combinations. I had a lot of fun pairing different prints for the tote’s exterior, lining, and the zipper pouch. I cut 5" squares to create the backing fabric which coordinated with the scrappy star block on the front.

3. **Layering on the Details:** To really make the tote stand out, I incorporated 3 fabrics into the handles, and used a lighter colorway to pop for the interior pocket
.
Personalizing the Patterns
One of the joys of sewing is that you can always put your own spin on things. Even though I was working with a familiar pattern, I couldn’t resist tweaking it here and there to highlight the Mushroom Blooms fabric. For example, I played around with the placement of the mushrooms to ensure they were front and center on the tote. Little adjustments like these can make a huge difference in how the finished piece looks and feels. And don’t worry—if you’re new to sewing, these tweaks are easy to do!


Why These Patterns Are Perfect for You
Whether you’re an experienced quilter looking to dip your toes into bag making or a seasoned bag maker eager to try something new, these patterns are perfect for you. They’re designed to be straightforward and fun, with clear instructions that guide you every step of the way. Plus, there’s nothing more rewarding than finishing a project and having a gorgeous tote and pouch to show off—or gift to someone special!
Ready to Make Your Own?
I’m so excited for you to try out the Starry Tote and Sunset Zipper Pouch patterns for yourself. You can find them in my shop, and I’d love to see how you bring them to life with your own favorite fabrics. If you’re feeling inspired by Mushroom Blooms, why not grab a fat quarter bundle and give it a go? Trust me, once you start, you won’t want to stop!
Thank you so much for joining me on this creative journey. I hope this little glimpse into my process has inspired you to get behind your sewing machine and start stitching up something beautiful. Remember, every stitch is a step toward creating something uniquely yours—happy sewing!

Celebrating Home with Poppie Cotton's Cottage Charm Fabric Tour: A Quilted Hot Pad and Oven Mitts
The charm of a cozy kitchen is often tied to the love and creativity infused into it. When I joined Poppie Cotton's Cottage Charm Fabric Tour, the homey and whimsical designs of the fabric collection inspired me to craft something special for the kitchen. I decided to create a quilted hot pad using a free pattern from Bre T Designs and paired it with two oven mitts following a pattern by Craft Owl Handmade. This set encapsulates the spirit of home, warmth, and a touch of whimsy.
Embracing the Cottage Charm
The Cottage Charm Fabric Collection by Poppie Cotton is a delightful assortment of prints that evoke the nostalgia of home. The soft, pastel colors and charming patterns are perfect for creating items that bring comfort and a sense of joy to any space. As soon as I saw this collection, I knew I wanted to make something for the kitchen—a place where family and friends often gather and where the heart of the home truly lies.
Project Overview

For this project, I combined two distinct yet complementary patterns:
1. **Quilted Hot Pad**: Using a free pattern from Bre T Designs, I crafted a hot pad that is not only functional but also a beautiful addition to any kitchen decor.
2. **Oven Mitts**: Following a pattern from Craft Owl Handmade, I created two oven mitts that match the hot pad, completing the set.
Materials and Preparation
Before diving into the creation process, it was essential to gather all the necessary materials. Here’s a list of what I used:
- **Poppie Cotton's Cottage Charm Fabric**: A selection of prints from the collection.
- **Insul-Bright**: A heat-resistant batting necessary for the hot pad and oven mitts.
- **Cotton Batting**: Additional batting to provide extra insulation.
- **Basic Sewing Supplies**: Scissors, rotary cutter, cutting mat, pins, sewing machine, thread, and iron.
Creating the Quilted Hot Pad

The hot pad was the first item I tackled, using the free pattern from Bre T Designs. Here’s a step-by-step overview of the process:
Step 1: Cutting the Fabric
I started by selecting the Cottage Garden in Yellow and fussy cut around one of the houses. Then I chose an assortment of strips from Cottage Charm following the pattern's instructions and assembled the top layer.

Step 3: Quilting the Layers
To assemble the hot pad, I created a quilt sandwich based on the pattern instructions. Then I stitched in the ditch along all the seams, which created a fun, puffed look. This quilting not only holds the layers together but also adds a lovely texture to the hot pad.

Step 4: Finishing the Edges
After quilting, I chose Bursting Blossom in Teal as my binding, to help all of the colors pop.
Crafting the Oven Mitts

The oven mitts were next on my list. Using the pattern from Craft Owl Handmade, I created two matching mitts that complement the hot pad. Here’s how I did it:
Step 1: Choosing the Fabric
For each mitt, I chose Cottage Garden in Blue for the top, and Garden Stripe Teal for the bottom. The lining pieces are Delicate Foliage in Blue. The binding on the edge is the same as the quilted hot pad, Bursting Blossom in Teal, to add cohesiveness to the project, but also help the colors of the houses pop.

Step 2: Quilting the Mitts
To ensure the layers stayed together, I quilted each piece using a diagonal crosshatch pattern. This not only added stability but also a decorative element to the mitts. Don't they look like something you would purchase in a store?!

Step 4: Sewing the Mitts Together
Following the pattern instructions, I sewed the mitts together and created a beautiful set to keep hot items cool to the touch!
Final Thoughts and Reflections
Creating this kitchen set was so much fun! The Cottage Charm fabric collection provided the perfect inspiration, and the patterns from Bre T Designs and Craft Owl Handmade were easy to follow and yielded beautiful results. This project not only adds a touch of whimsy to any kitchen but also reinforces the importance of handmade items in creating a warm, welcoming home.
Tips for Fellow Crafters
For anyone interested in embarking on a similar project, here are a few tips:
- **Choose Complementary Fabrics**: Select fabrics that complement each other to create a cohesive look.
- **Take Your Time Quilting**: Quilting can be a time-consuming process, but it’s worth the effort for the added texture and stability.
- **Use Quality Materials**: Investing in good quality batting and fabric will ensure your finished items are durable and functional.
- **Have Fun with It**: Enjoy the process and don’t stress too much about perfection. Handmade items have character and charm that store-bought items can’t replicate.-**Beware!** Remember, when using the insulbright interfacing, the oven mitts and hot pad will NOT be MICROWAVE SAFE!
A Celebration of Home
This project was a wonderful way to celebrate the charm and warmth of home. The Cottage Charm fabric collection by Poppie Cotton brings a sense of nostalgia and whimsy, making the kitchen set not just practical but also a beautiful addition to any home decor. Crafting these items reminded me of the joy of creating something with my hands and the satisfaction that comes from making something both useful and lovely.
Whether you’re an experienced quilter or a beginner, I encourage you to explore the world of fabric crafting. There’s something incredibly rewarding about transforming a piece of fabric into a cherished item that brings beauty and function into your daily life. Happy crafting!

Quilting enthusiasts and crafters alike, gather round! July brings with it another exciting installment of Patterns by Jen’s Monthly Color Challenge for 2024. This month, we dive into the vibrant world of Benartex’s Blender Collection, New Hue, where hues collide and creativity knows no bounds. And this year’s overarching theme—tropical fish—adds an extra splash of inspiration and vibrancy to each month’s design.
Embracing the July Block: Fun and Easy with Benartex's New Hue

The beauty of Jen’s Monthly Color Challenge lies in its ability to merge learning with creativity seamlessly. This month, I had the pleasure of working with Benartex's New Hue collection, a palette that bursts with fresh and dynamic colors. The July block itself was a joy to create, thanks to its straightforward design and clear instructions provided by Jen. For quilters at any level, from beginners to seasoned pros, this challenge serves as an excellent opportunity to hone skills and explore new techniques.
The Theme: Tropical Fish

This year’s theme, tropical fish, infuses each month with vibrant color schemes and playful patterns inspired by the diverse underwater world. From the iridescent scales of a parrotfish to the striking stripes of a clownfish, each block captures the essence of these aquatic beauties, encouraging participants to explore bold color combinations and intricate designs.
Here is a list of the other months' colors, and a link to all the bloggers participating:
July's Theme: The Duboisi Cichlid Fish

July’s block pays homage to the Duboisi Cichlid, a fish known for its stunning coloration and distinct markings. Native to the rocky shorelines of Lake Tanganyika in Africa, the Duboisi Cichlid features a striking contrast of deep charcoal and bright gray. These vibrant colors are perfectly captured in the New Hue collection, making it the ideal fabric choice for this month’s challenge.
Creating the Duboisi Cichlid block was particularly enjoyable due to its bold and contrasting color scheme. The dark hues represent the rich underwater environment, while the gray accents mimic the cichlid’s unique markings. This combination not only brings the fish to life on fabric but also allows quilters to experiment with color placement and pattern creation.

The Appeal of Benartex's New Hue Collection
What sets Benartex’s New Hue apart is its versatility. The collection boasts a spectrum of colors that blend effortlessly, making it ideal for both the bold blocks that demand attention and the subtle gradients that add depth to any quilt. Whether you're piecing together a modern quilt or paying homage to traditional designs, New Hue’s array of shades ensures every creation is uniquely yours.

Learning Through Challenges: Building Quilting Skills
Beyond the sheer enjoyment of working with beautiful fabrics, Jen’s challenge acts as a catalyst for skill-building. Each block introduces new concepts and techniques, allowing participants to expand their quilting repertoire with every stitch. From mastering precise cutting to perfecting seam allowances, the challenge encourages growth in both proficiency and confidence.
Community and Support: The Heartbeat of the Challenge
One of the most rewarding aspects of participating in Jen’s Monthly Color Challenge is the sense of community it fosters. Across social media platforms and quilting forums, participants share their progress, exchange tips, and celebrate each other’s creations. This camaraderie not only enhances the quilting experience but also inspires new ideas and friendships that extend beyond the challenge itself.
Why You Should Join the Fun
If you’re looking to inject a burst of creativity into your quilting journey, look no further than Patterns by Jen’s Monthly Color Challenge. Whether you’re a newcomer eager to learn or a seasoned quilter seeking fresh inspiration, this challenge promises something for everyone. With each block, you’ll discover new techniques, explore exciting color combinations, and connect with a vibrant community of fellow quilters.

Final Thoughts
As July unfolds and we delve deeper into Patterns by Jen’s Monthly Color Challenge, I find myself eagerly anticipating the next block and the opportunity it presents to further explore Benartex's New Hue collection. The joy of quilting lies not just in the finished product but in the process itself—the chance to create, to learn, and to share with others who share the same passion.
So, whether you’re already knee-deep in quilting projects or contemplating your first quilt block, consider joining the challenge. Let Jen’s guidance and Benartex's New Hue collection ignite your creativity and take your quilting skills to new heights. After all, in the world of quilting, every stitch tells a story, and every challenge brings us closer to mastering our craft.
Happy quilting, everyone!
*Note: For more information on Patterns by Jen’s Monthly Color Challenge and to explore Benartex’s New Hue collection, visit Patterns by Jen and Benartex.
Join the conversation on social media using #PatternsByJenChallenge and #BenartexNewHue.
Free zipper pouch pattern when you sign up for our Newsletter!
Handcrafted Bags and Sewing Patterns available on Be Mandy Things Website!
Join the Be Mandy Things Sewing Patterns Facebook page.
Follow me on Instagram and Facebook for daily sneak peeks and updates.

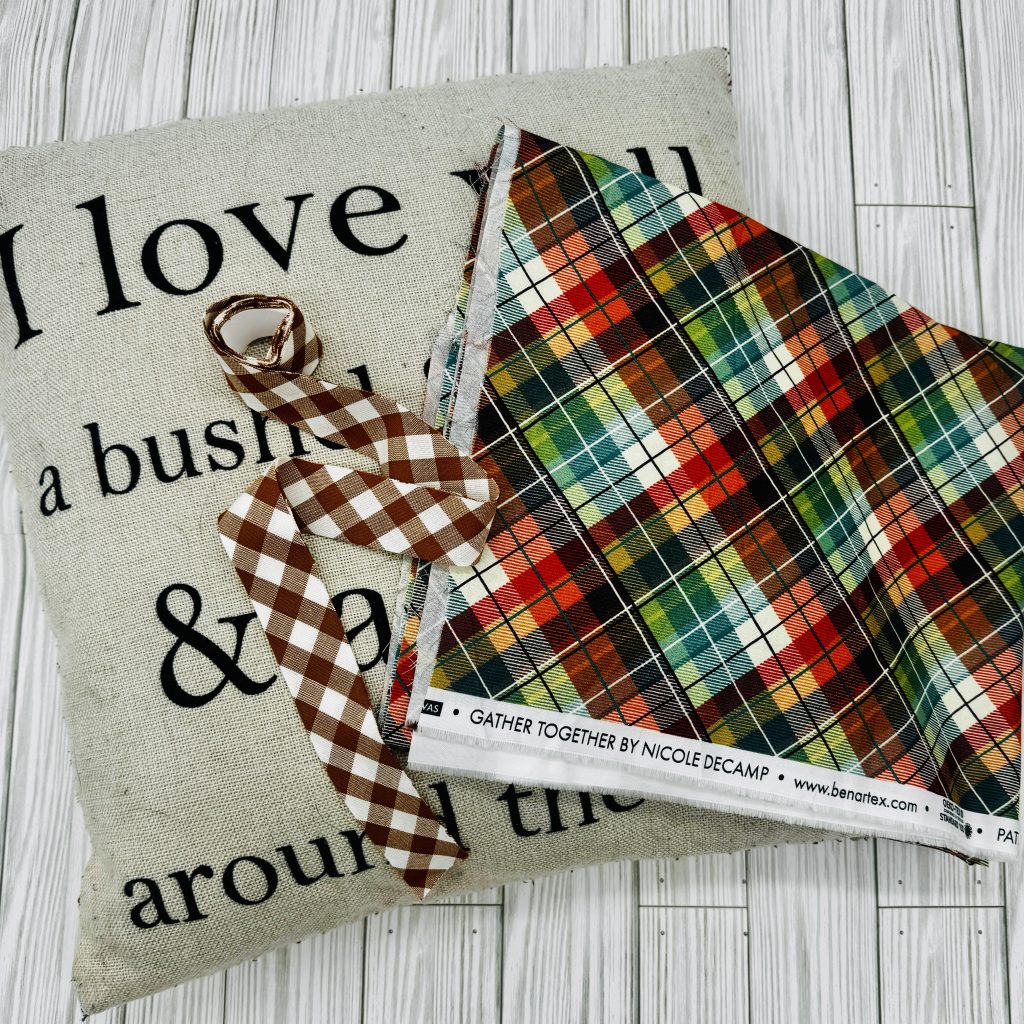
**Celebrate the Season with Poppie Cotton’s Prairie Christmas Fabric Collection**
As the holiday season approaches, it's the perfect time to start thinking about festive projects that bring the warmth and joy of Christmas into our homes. This year, Poppie Cotton has released their enchanting Prairie Christmas fabric collection, and it’s everything you need to create a cozy, nostalgic atmosphere. With its blend of vintage charm and modern sophistication, this collection is a must-have for any crafter looking to make this holiday season truly special.

**A Glimpse Into Prairie Christmas**
Poppie Cotton’s Prairie Christmas fabric collection is a delightful blend of rustic charm and timeless elegance. Inspired by the serene beauty of the countryside during the holiday season, each piece in this collection tells a story of snow-covered fields, cozy hearths, and the simple joys of Christmas past. The collection features a rich palette of reds, greens, creams, and soft blues, adorned with classic holiday motifs such as holly, mistletoe, plaid patterns, and whimsical winter florals. Every fabric in the collection is designed to evoke the spirit of a traditional Christmas, making it ideal for a wide range of festive projects.
**Creating Magic with Craft Owl Handmade's Wish Stocking Pattern**


This Christmas, I decided to use Poppie Cotton’s Prairie Christmas collection to create a set of stockings for my family. I chose the Wish Stocking pattern by Craft Owl Handmade, a pattern that perfectly complements the vintage feel of the Prairie Christmas fabrics.
As I worked on these stockings, I couldn’t help but feel the magic of the season come to life. The pattern was easy to follow, making the process enjoyable and stress-free. The stockings, with their charming designs and beautifully coordinated fabrics, turned out to be even more delightful than I had imagined.
Each stocking was unique, yet they all shared the cohesive beauty of the Prairie Christmas collection. The rich red plaid, combined with the delicate floral prints, created a stunning contrast that added depth and character to each piece. The soft cream fabric with intricate holly designs provided a perfect backdrop for personalization, allowing me to add each family member’s name with ease. As I hung the stockings by the fireplace, I was filled with a sense of accomplishment and joy, knowing that these handmade treasures would become a cherished part of our Christmas traditions.
**Get Started on Your Holiday Projects**
Now is the perfect time to start your holiday crafting. Poppie Cotton’s Prairie Christmas fabric collection is available in stores now, so don’t miss the opportunity to bring a touch of vintage charm to your Christmas celebrations. Whether you’re an experienced crafter or just starting out, these beautiful fabrics and the easy-to-follow Wish Stocking pattern by Craft Owl Handmade will make your holiday projects a joy to create.
Bring the spirit of a Prairie Christmas into your home this season. Happy crafting, and may your holidays be filled with warmth, joy, and handmade treasures!
![]()
Want more from Be Mandy Things?

Prepare for BBQ Season with Benartex Fabrics' Chillin' & Grillin' Collection! As a Brand Ambassador for Benartex Fabrics, I was lucky to get to play with this collection that is perfect for summer and all of the cook-outs coming up. The best part is you don’t have to leave your sewing room to enjoy some delicious barbecue! Burgers, hot dogs, shrimp and veggies - there is everything you need to create fun aprons, grill mitts, potholders, placemats and more for your backyard feasts. Click the logo to visit the collection!
![]()
This quick tutorial will show you how to make 4 placemats - they only take a few hours from start to finish - so you could whip these up in the morning and have a decked out table by afternoon!
 Mix & Match
  Reversible Placemats
  Same Top/Bottom
If you're more of a visual learner, I've got a quick video tutorial on my You Tube Channel - Check it out!
MATERIALS NEEDED:
Make sure to pre-wash your fabric to prevent any post-sewing shrinkage!
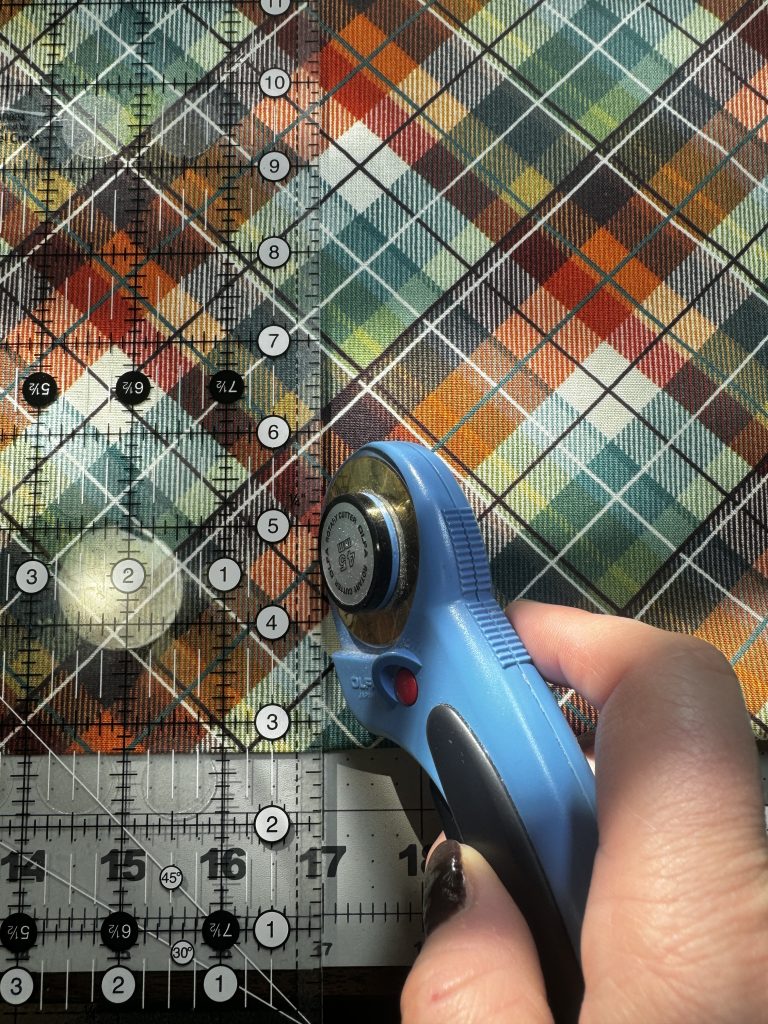
1️⃣ Begin with 2 yards of fabric (or 1 yard each for reversible). Make sure it is washed and pressed before cutting, then lay out flat on cutting mat.
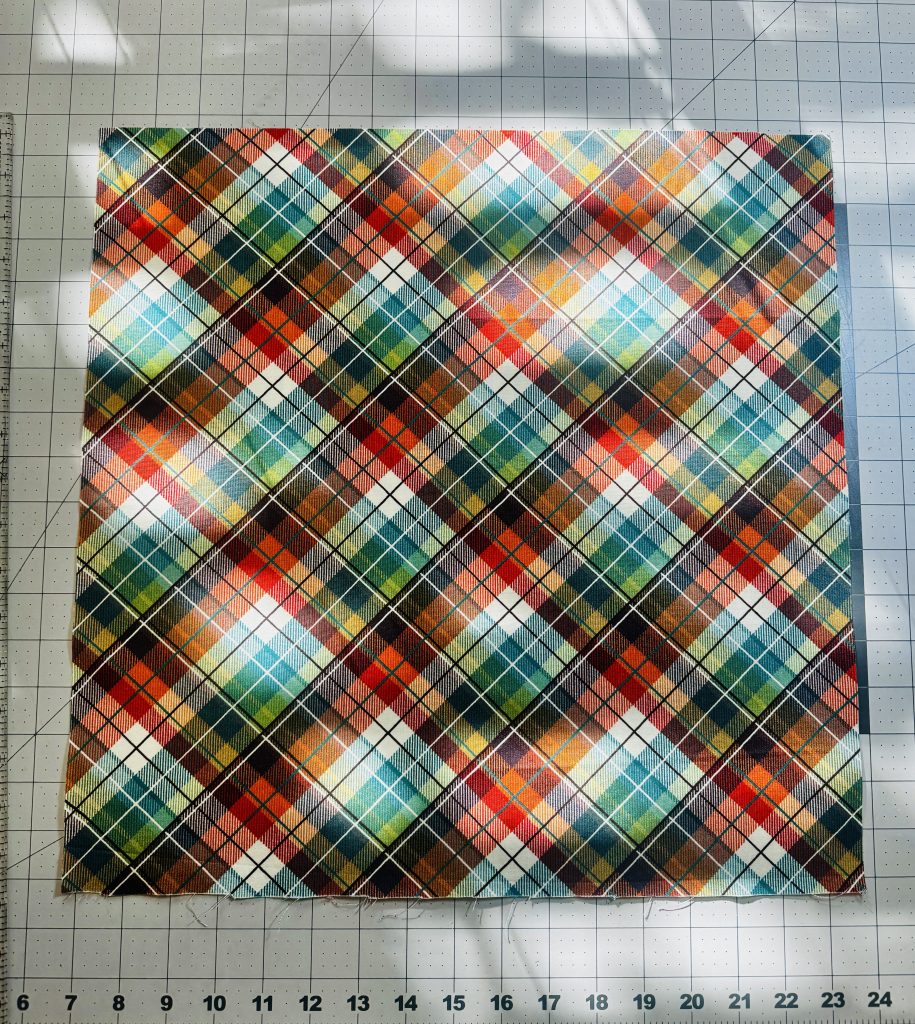
2️⃣ Cut placemats at 19”W x 14”H, following fabric direction.
 14" Tall
  19" Wide
 This collection includes a border stripe, which I used to cut 4 placemats. PRO TIP!!! Pay VERY careful attention to fabric direction when cutting measurements, remember 19" WIDE by 14" TALL.
3️⃣ INTERFACING:
 Let's take a minute to talk about different types you can use. Depending on what look you are going for when completed will be determined by the type of interfacing you use. I have made many placemats, and I really like the finished look and feel of Pellon 911F. It's not too fluffy, not too rigid, and gives the placemat some structure without being stiff. Choose what works best for you.
Once you have chosen your interfacing, cut out 4 pieces measuring the same dimensions as the placemat, 19"W x 14"H.
Now you may adhere the interfacing to the wrong side of the top fabric, according to manufacturer's instructions. If using batting, you can spray baste or pin, or move on to step 4.
 PRO TIP! Make sure if interfacing is fusible, bumpy side is up (ask me how I know), this is the glue side that will adhere to the fabric.
4️⃣ It's time to start assembling the placemats!
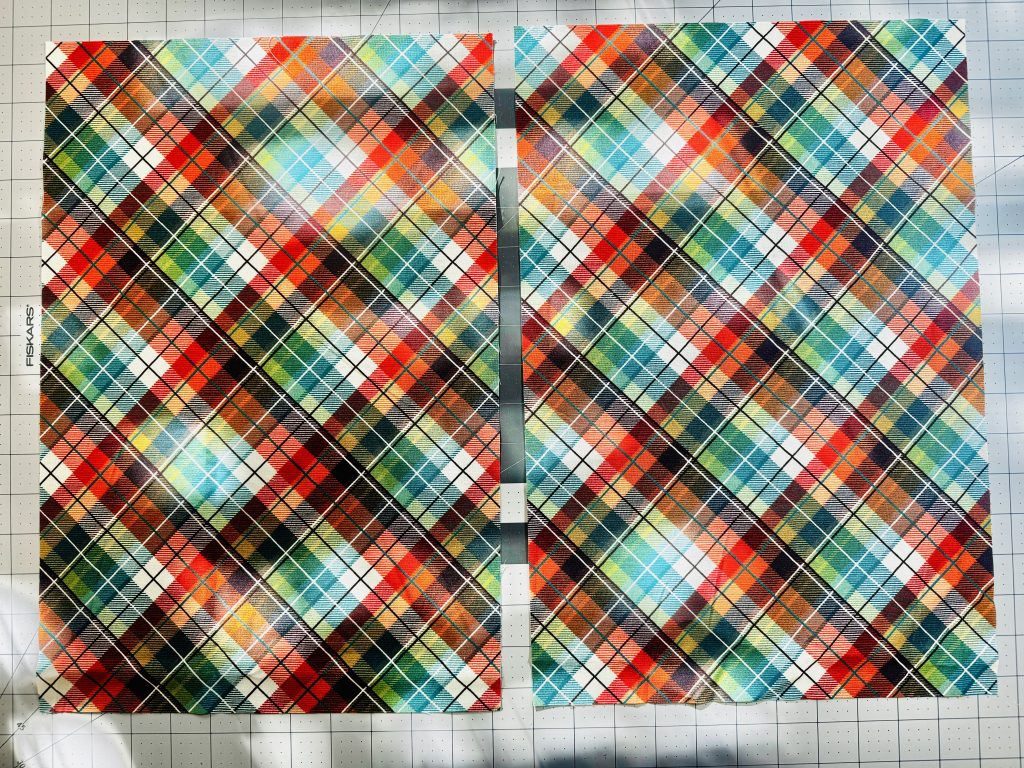
 Place a top and bottom piece right sides together (RST).
Choose a side to create the opening where you will be turning the placemat out after it is sewn together. I usually like to make the opening a little bigger than my hand.
 I place 4 fingers on a side, and mark above and below for the opening. You will not be sewing over this section, so make sure you pay attention to your marks, or you will sew the placemat completely shut and not be able to turn it out.
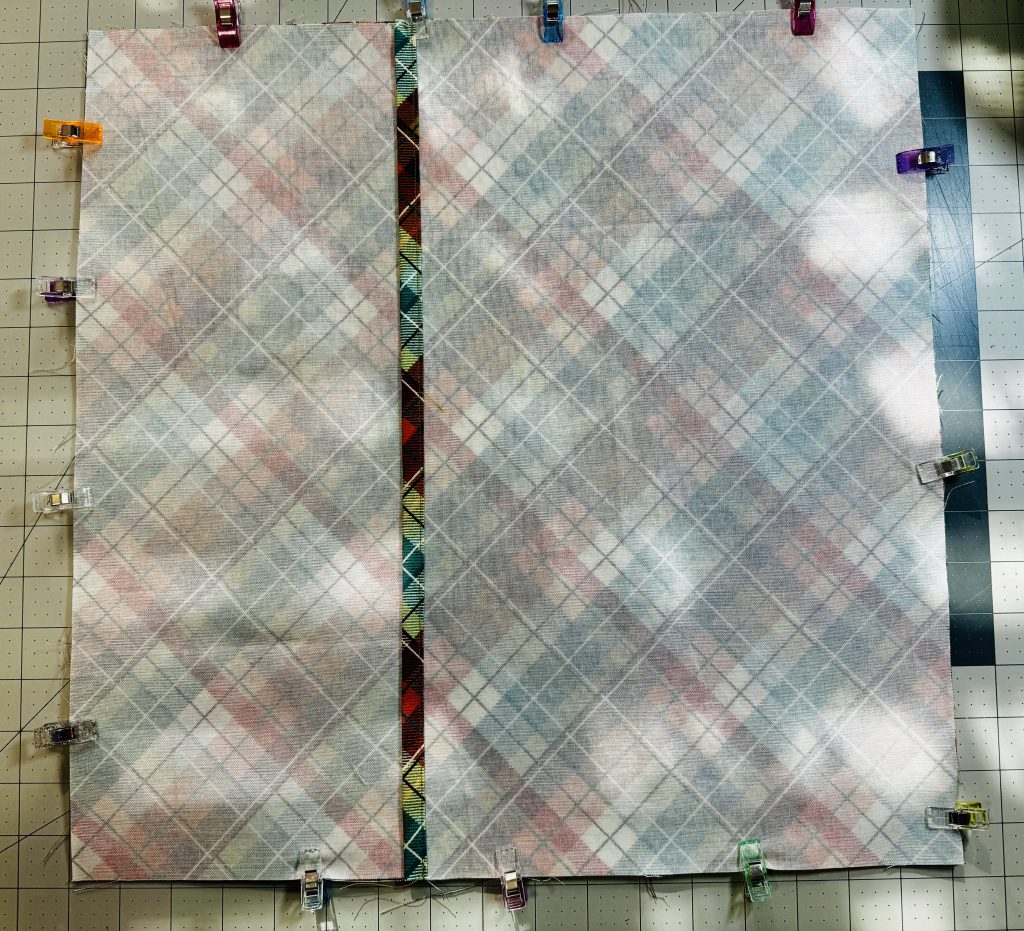
 Pin or clip around the outer edges of the placemat, just to keep the edges lined up until you get it to your sewing machine.
  Once you have the placemat at your sewing machine, start sewing at the bottom of the opening mark, using a 1/2" seam allowance (SA), making sure to backstitch a few times. Make sure you did not sew closed your opening!
Sew around all the sides of the placemat, stopping at the top of the opening, and backstitch again.


Do this for all placemats.
5️⃣ Here's where the magic happens! Part of the reason the seam allowance is so big, is for this trick right here.
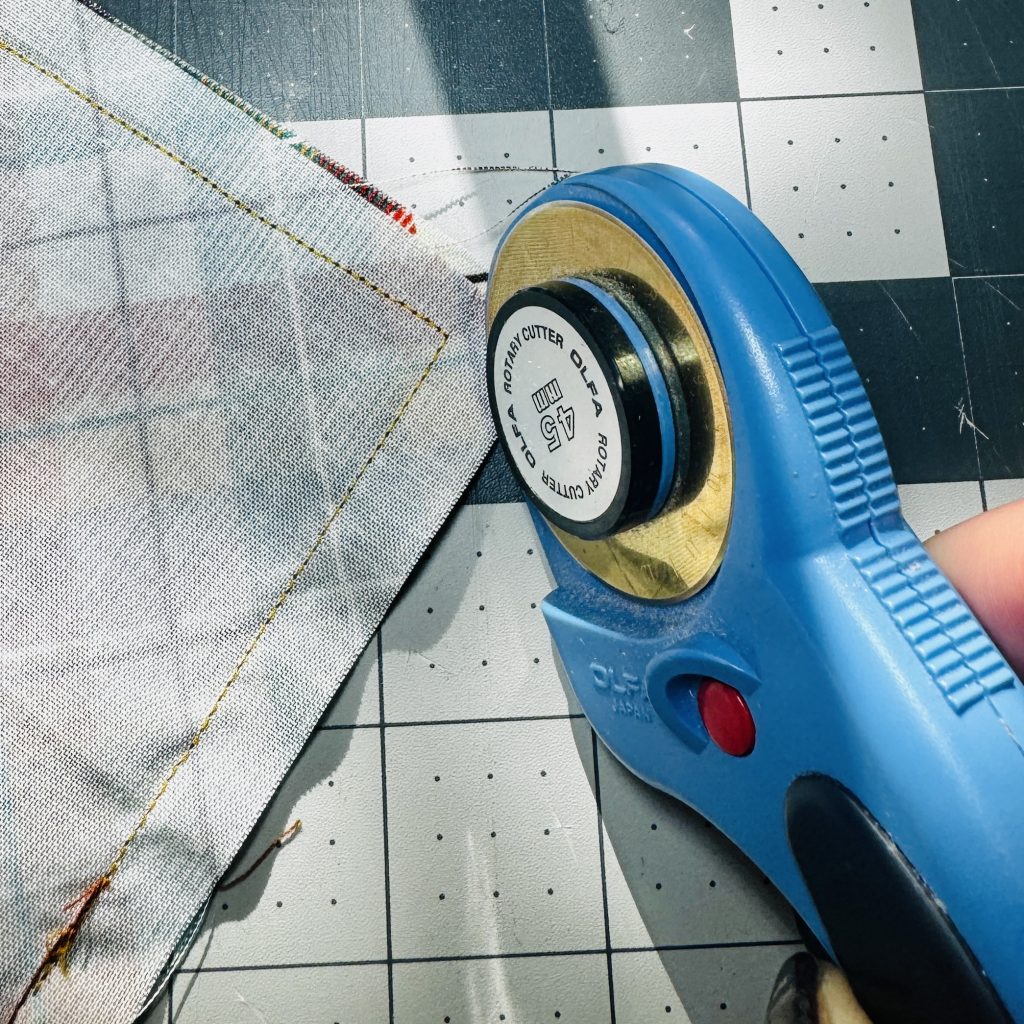
 PRO TIP!! At the opening, you will cut away some of the seam allowance. This will create a tab, that will be folded in once you turn out the placemat, and helps for a smooth, straight edge of the finished placemat.
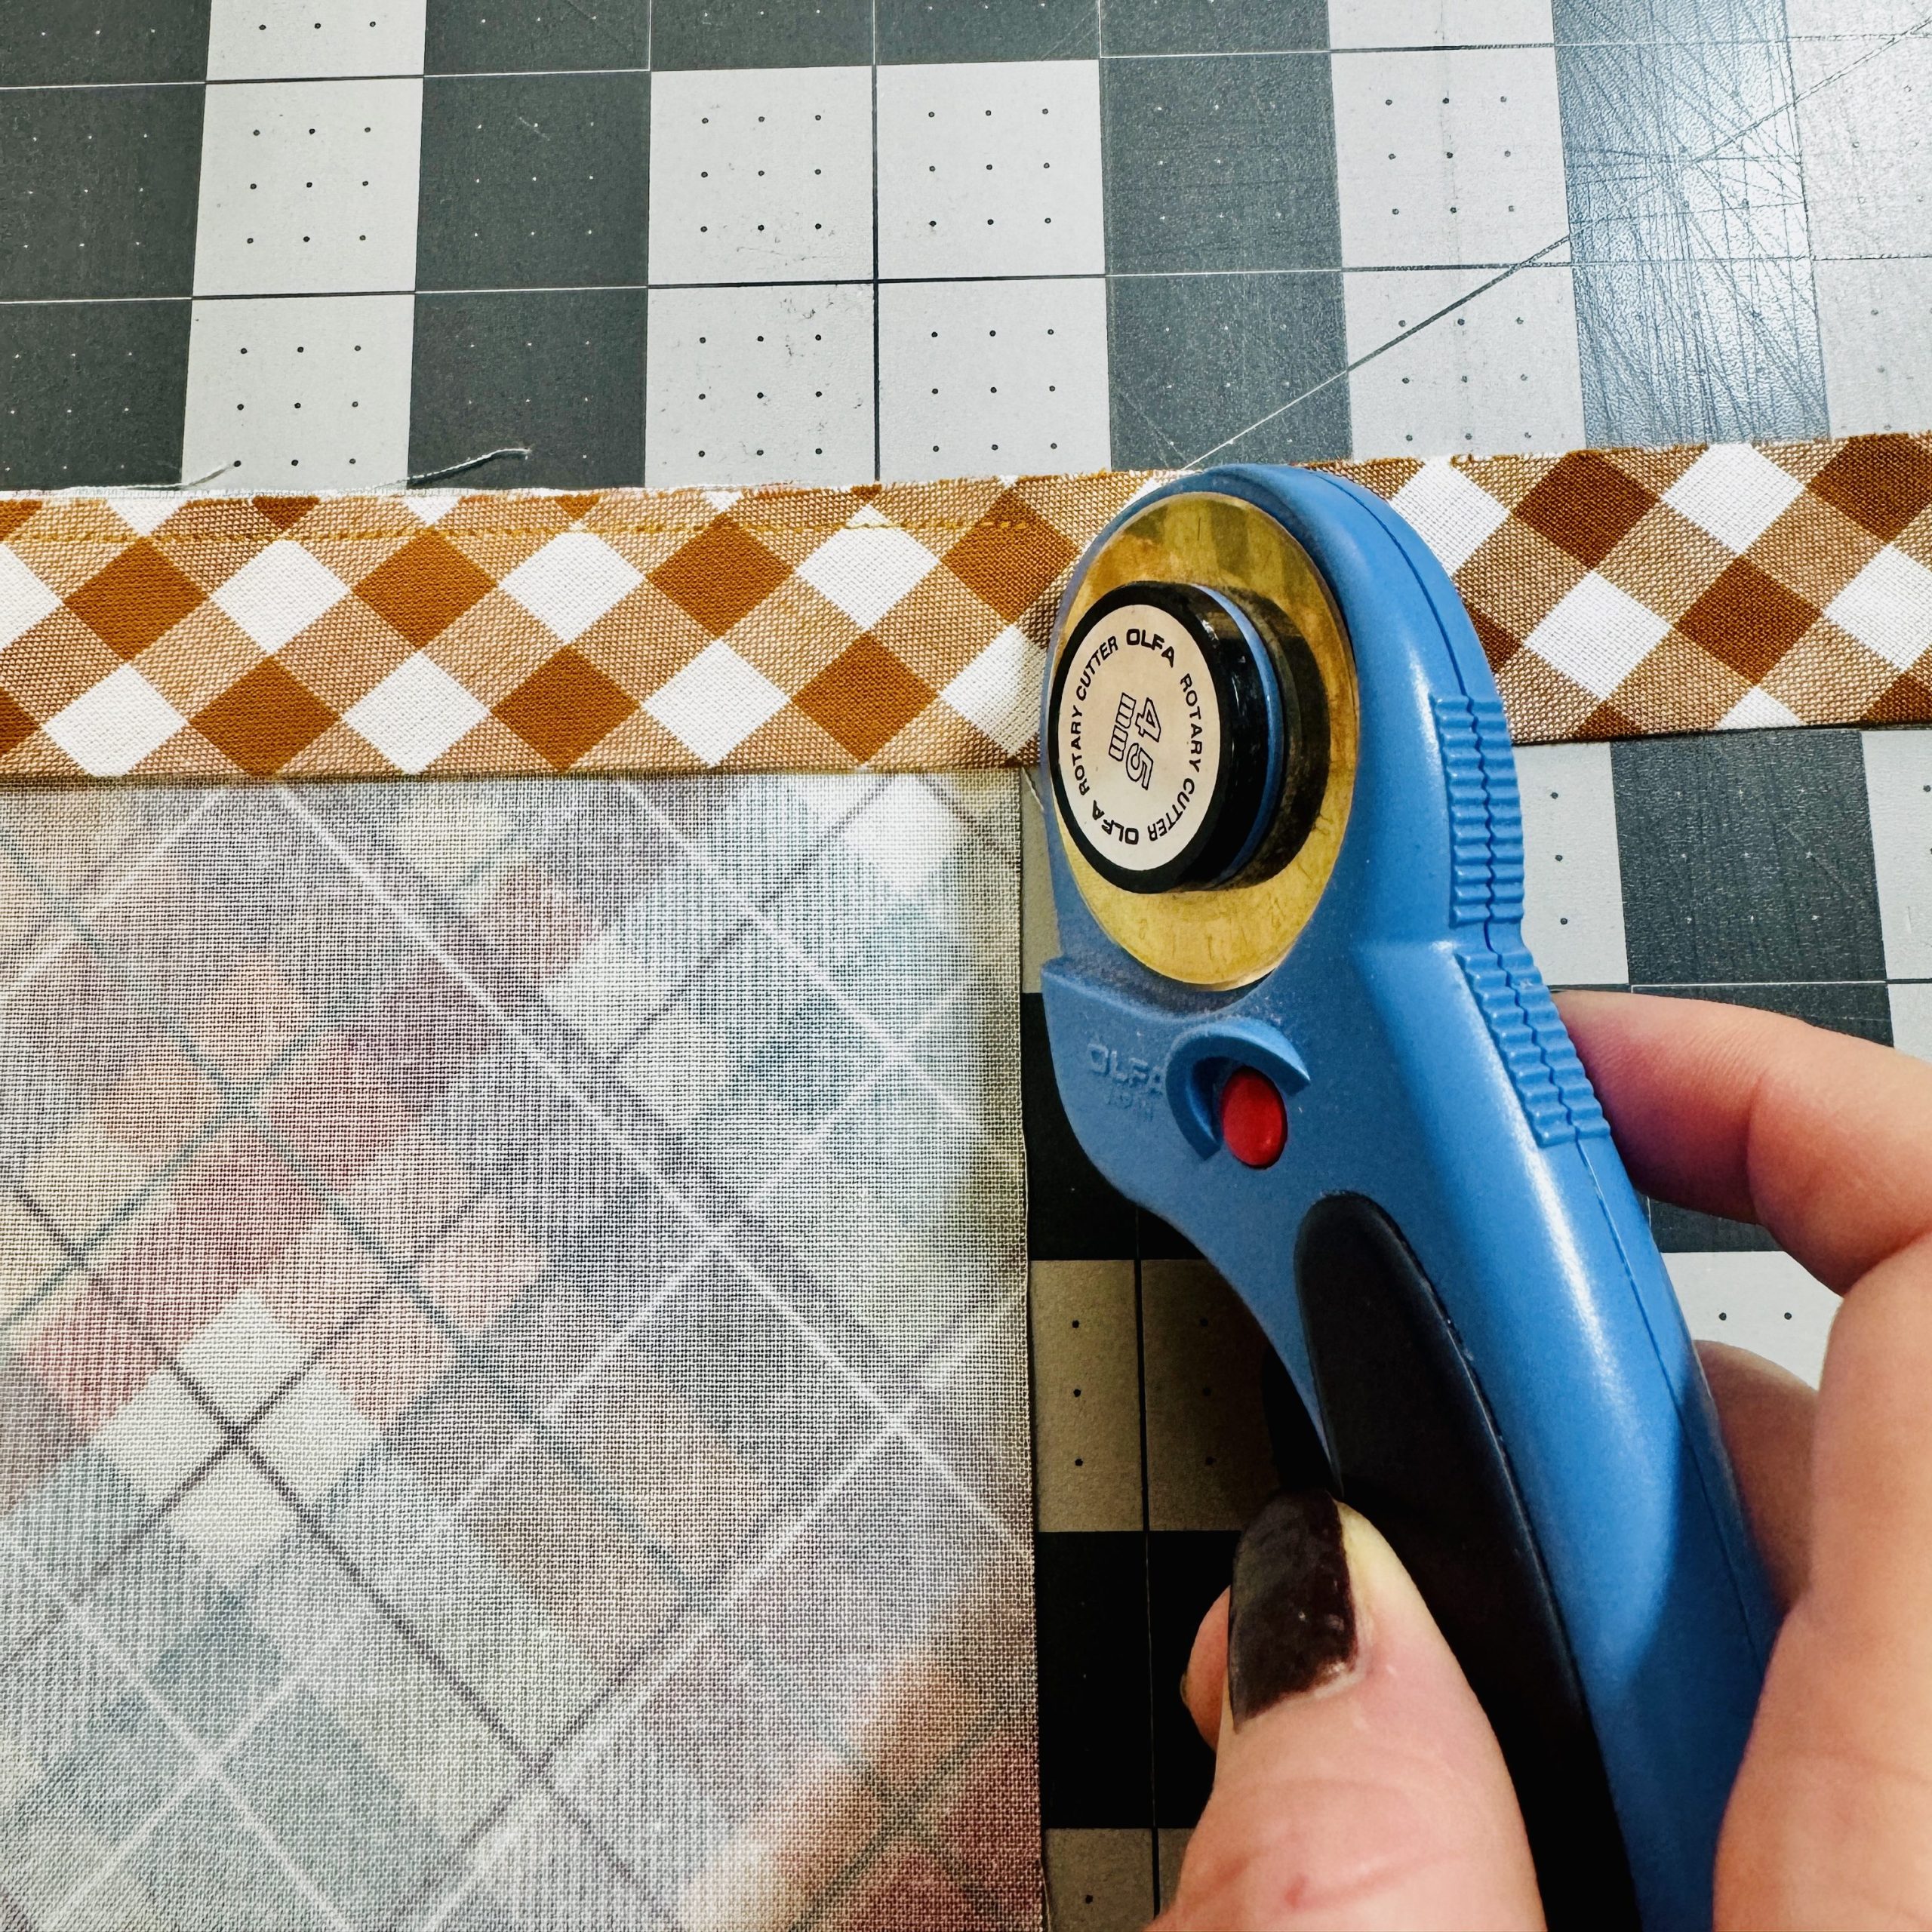
 If it helps, draw a line like I did here as a guide for how to cut into the seam allowance. I like to live on the edge, and I use my rotary cutter, but I've also done this many times with placemats and bagmaking. If you're nervous, draw the line, and use scissors to cut away seam allowance.

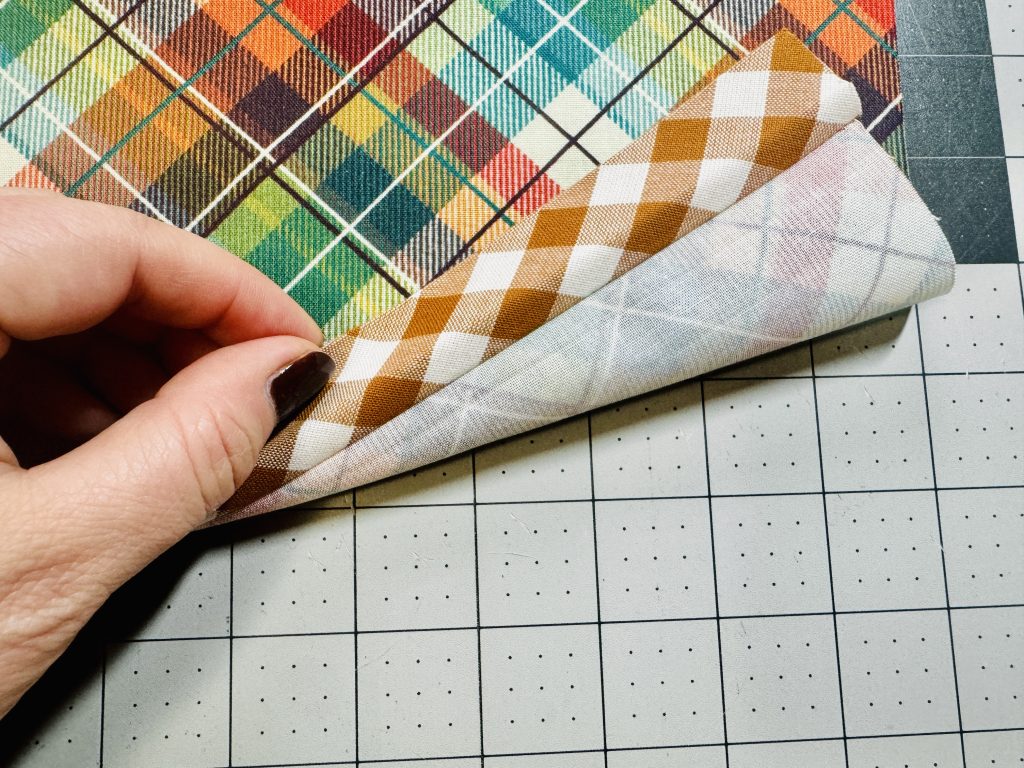
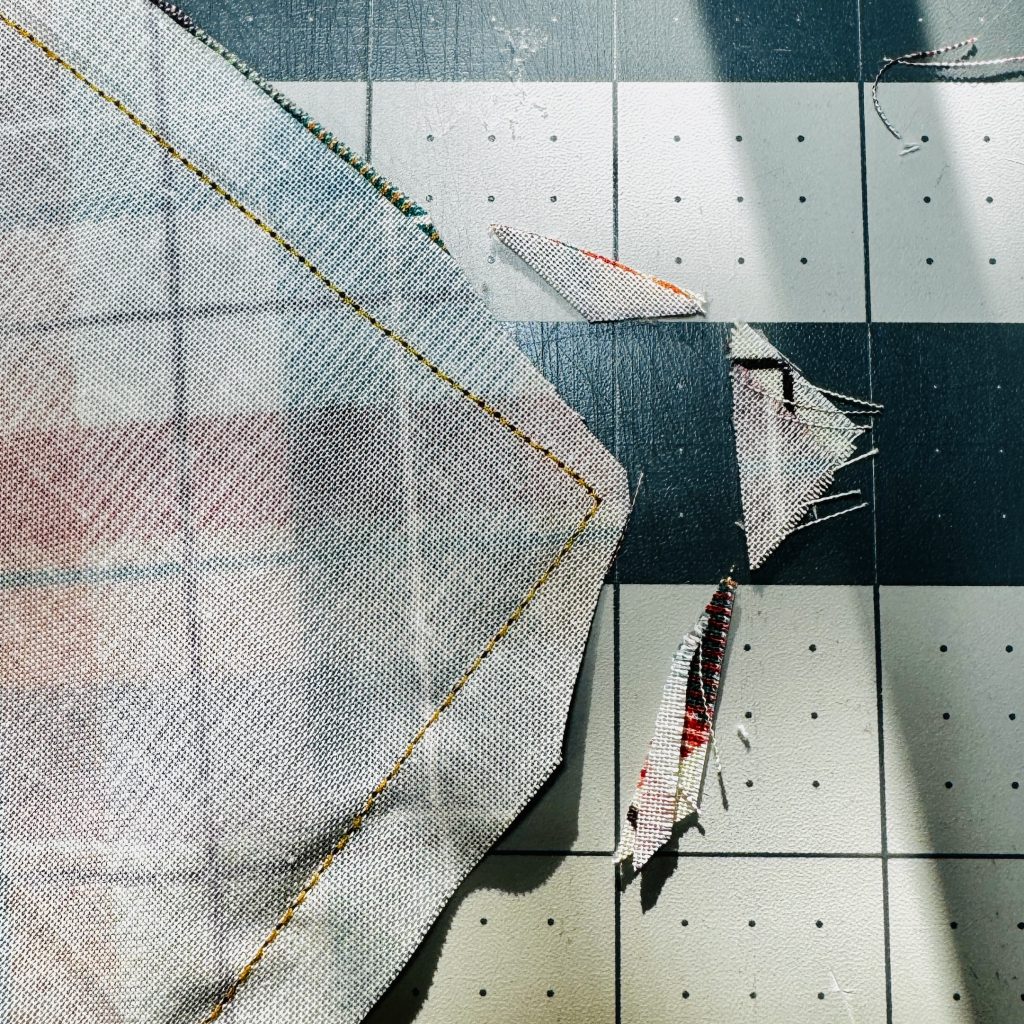
 You will end up with a "tab" which will make it easy to insert the seam allowance into the hole after it is turned out, making for a smooth, straight closing.
 Cut away the seam allowance from the four corners, taking care not to cut into the seam.

 Reach your hand in to an opposite corner, grab hold and pull placemat inside out.

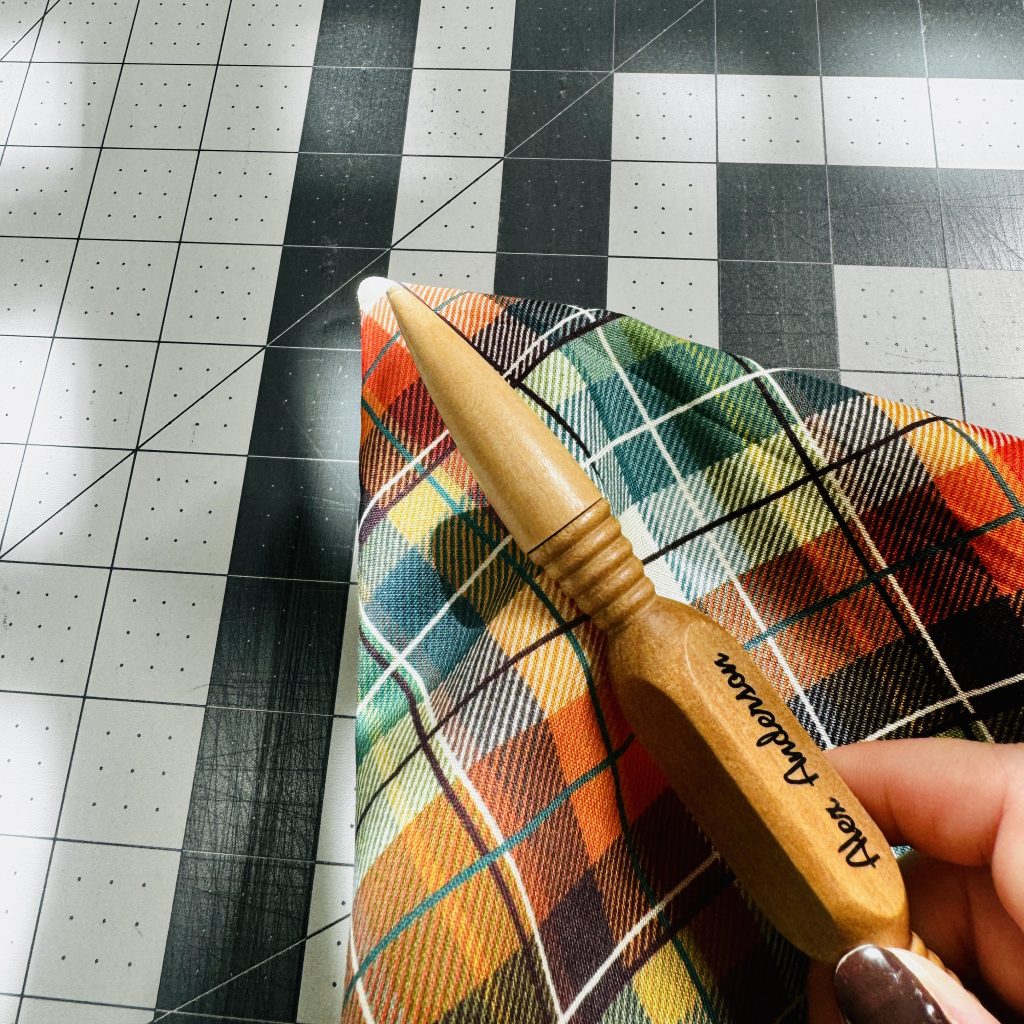
 Pop out the corners with a sharp tool, but do not poke a hole in the corners.

 Once completely turned, with corners poked out, roll the edges of the seams with your fingers to help flatten before taking to the iron to press. PRO TIP! Another reason the seam allowance is 1/2" is to help with rolling the seams to make them flat. I've sewed these using 1/4" SA, as well as 3/8" SA, and it is a struggle to get perfectly flat seams. This is why I like the 1/2" SA.
 Also, finger press the extra seam allowance at the opening to help keep it inside before pressing.
 Press placemat to flatten seams, as well as opening.
6️⃣ Topstitch to close the opening, using a 3.5 mm stitch length. I like to topstitch 3 times. I sew once around using a 1/8" SA. From that stitch line, I will sew another row 1/4" away from that stitch. Then, I will sew a 1/2" away from the previous 1/4" stitch line. See examples below.

 Topstitch 1/8" from edge
Topstitch 1/4" away from previous 1/8" stitch line
 Topstitch 1/2" away from previous 1/4" stitch line
 Final showing all 3 topstitch lines
7️⃣ Your placemat is done! Final measurements should be 13"H x 18"W. Enjoy your new summer table! Feel free to leave a comment, share with a sewing bestie or ask a question.
Happy Sewing!


Free Zipper Pouch Pattern when you sign up for our Newsletter!
Handcrafted Bags and Sewing Patterns available on Be Mandy Things Website!
Join the Be Mandy Things Sewing Patterns Facebook page.
Follow me on Instagram and Facebook for daily sneak peeks and updates.


